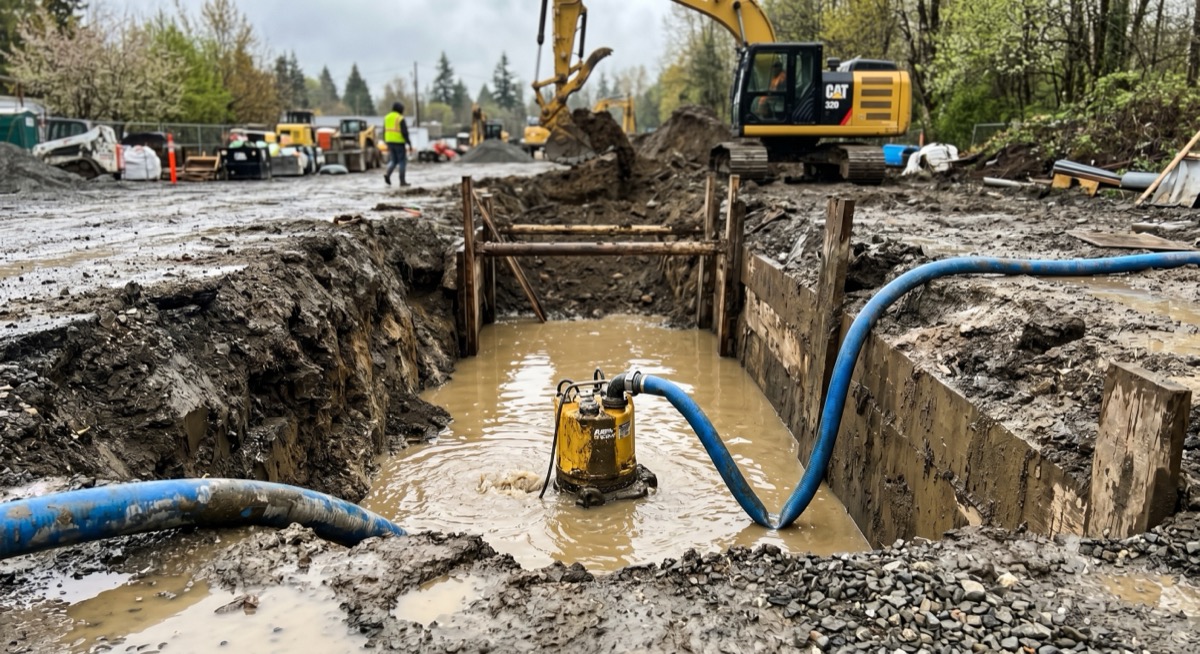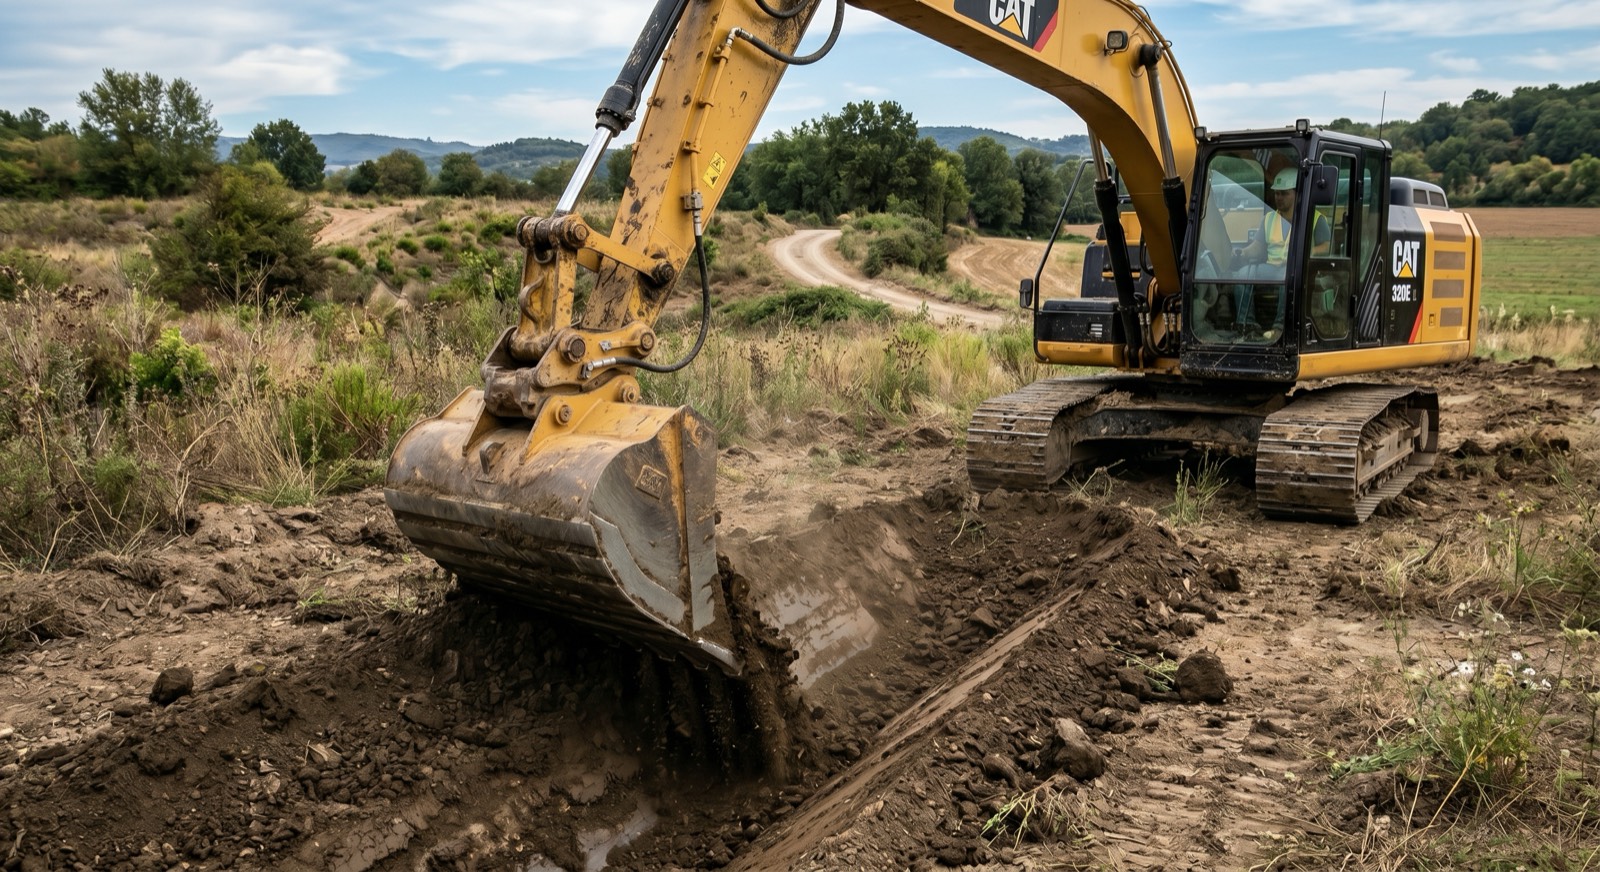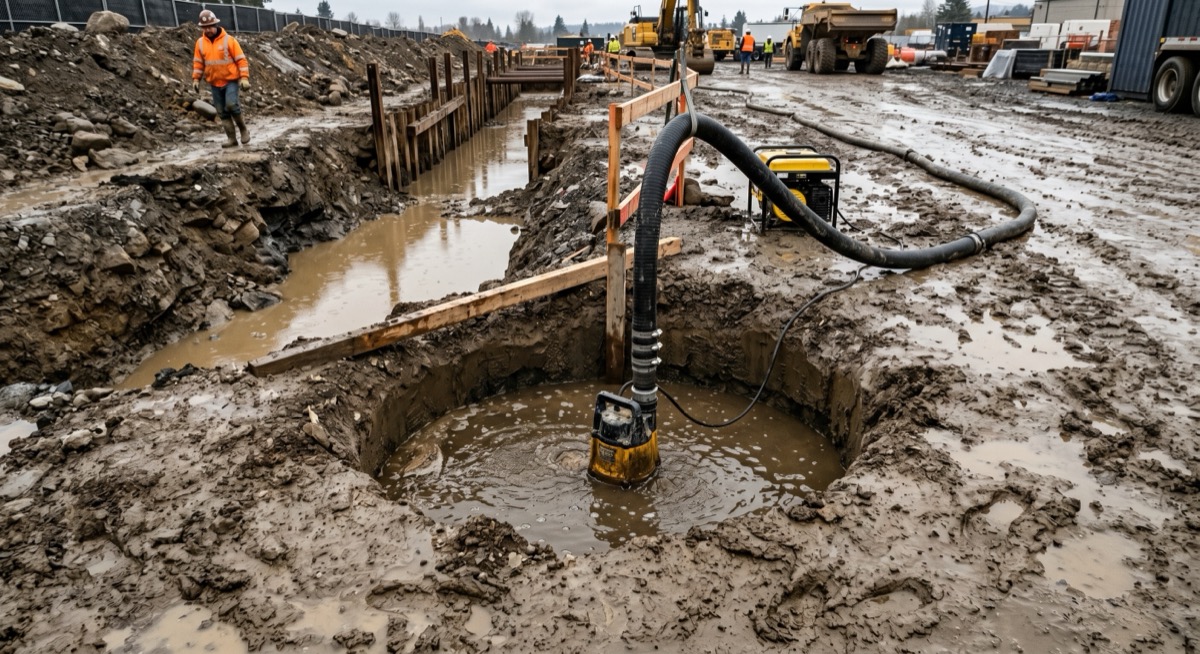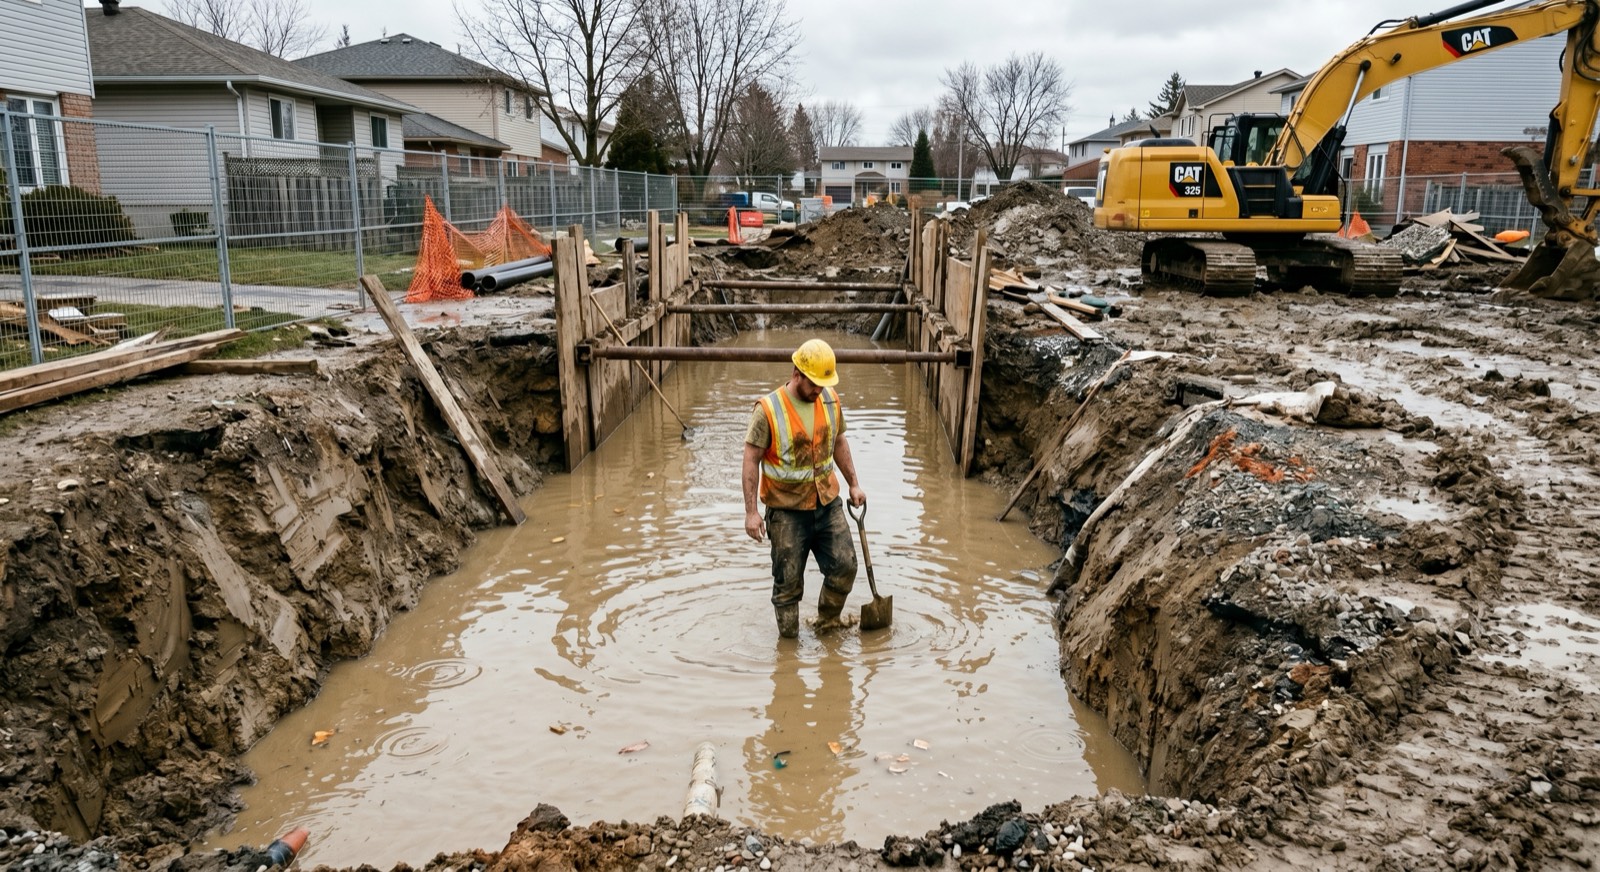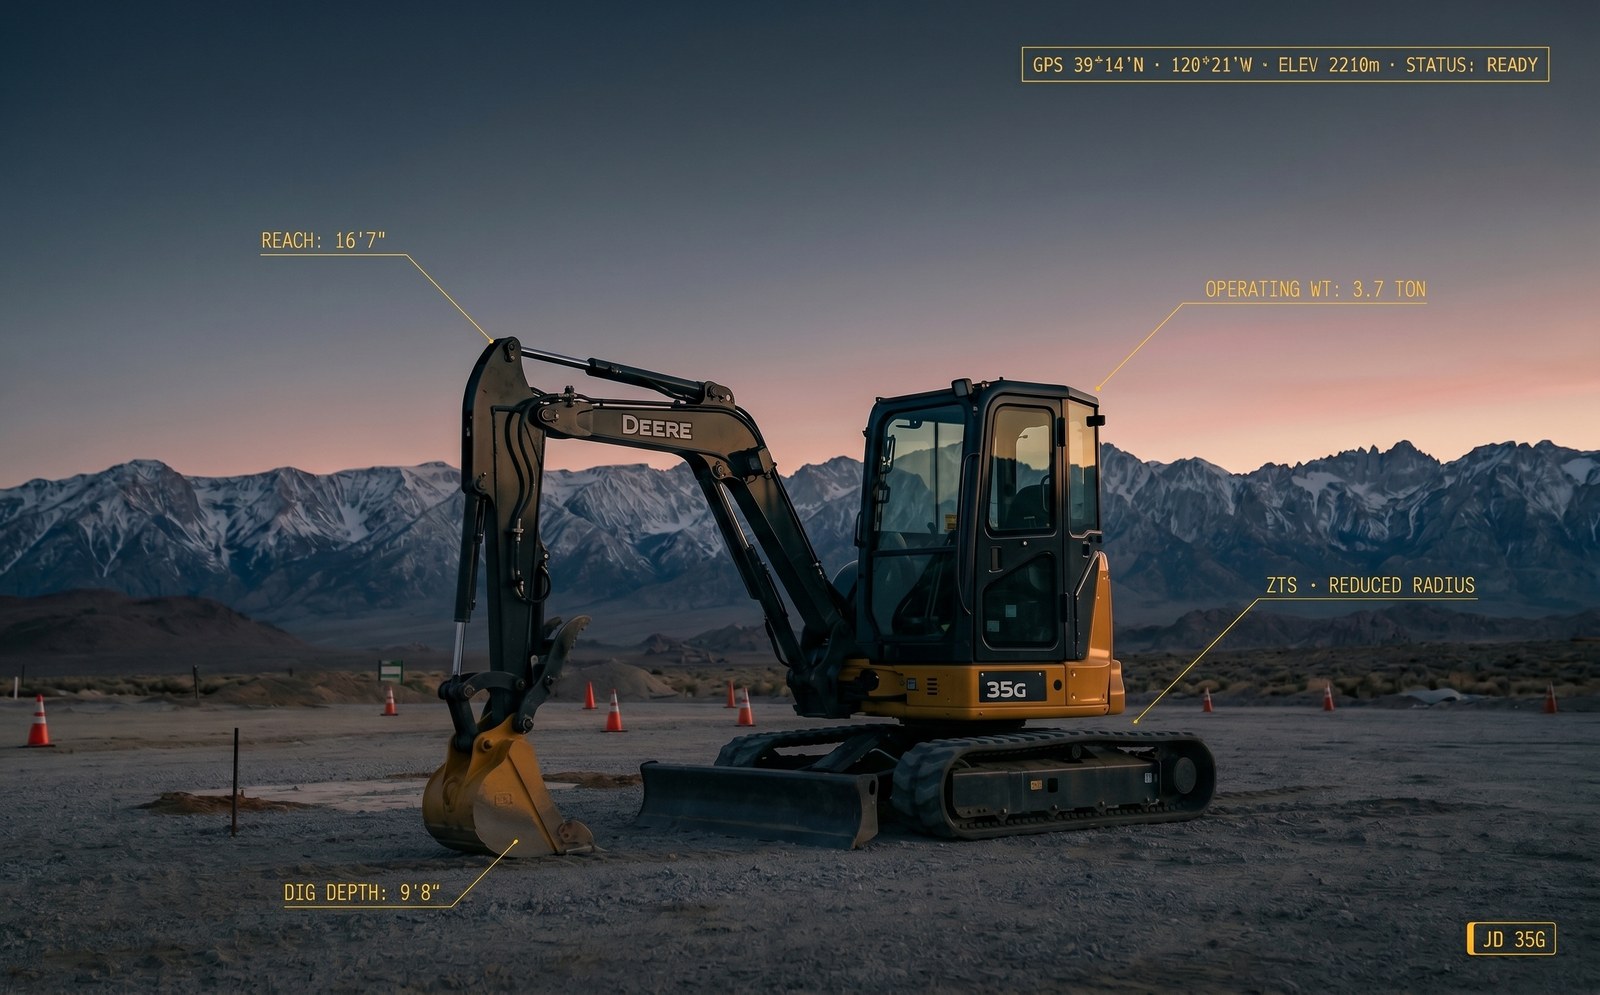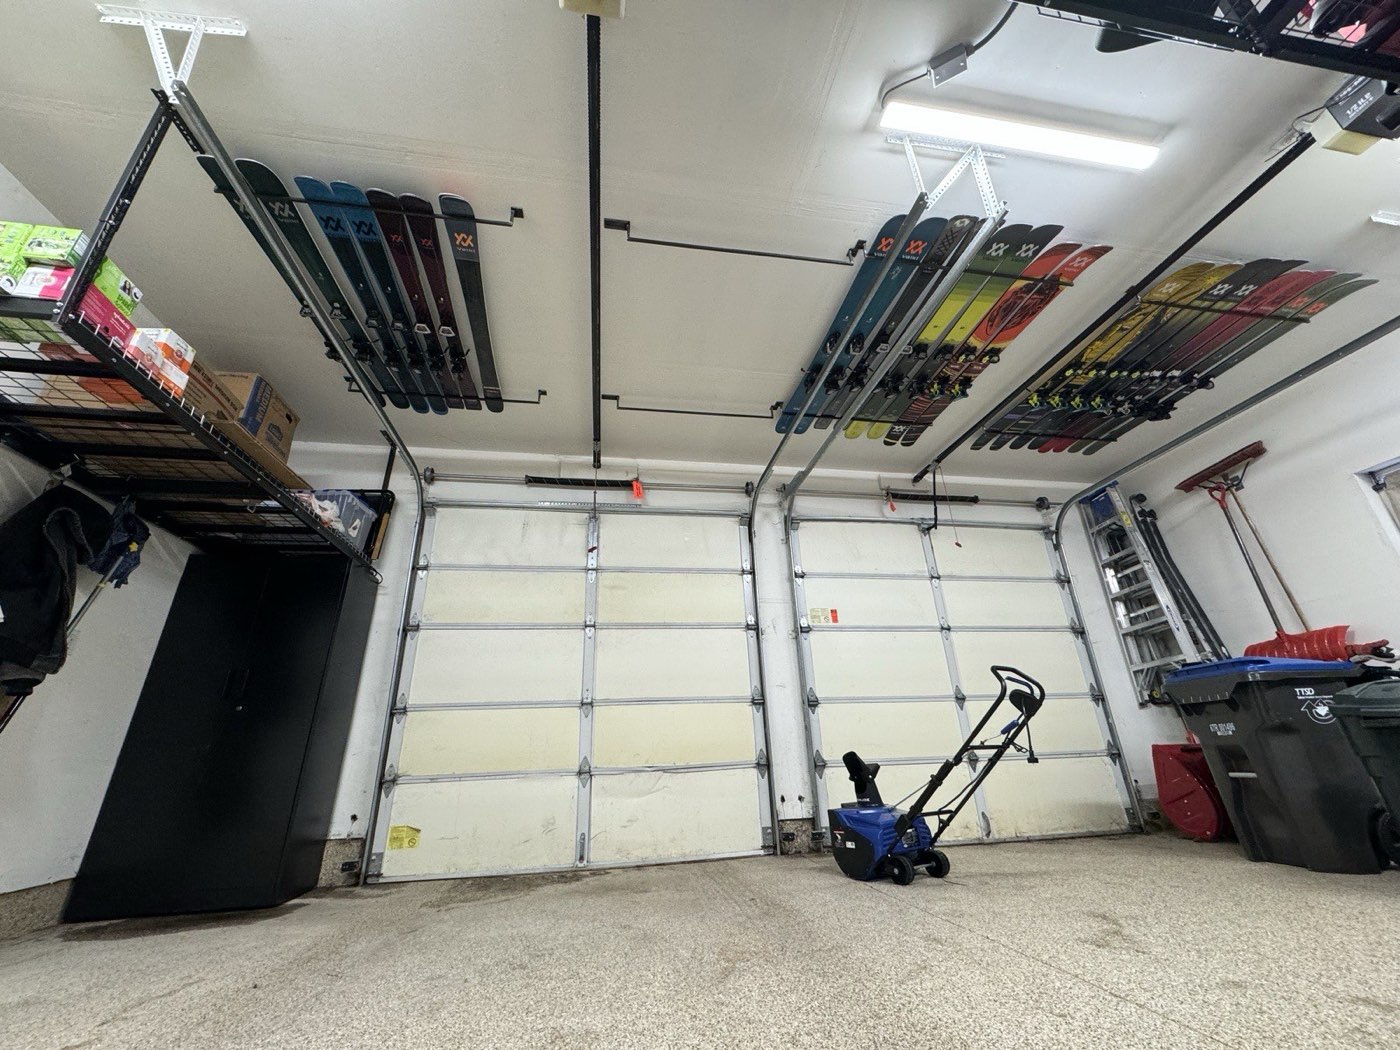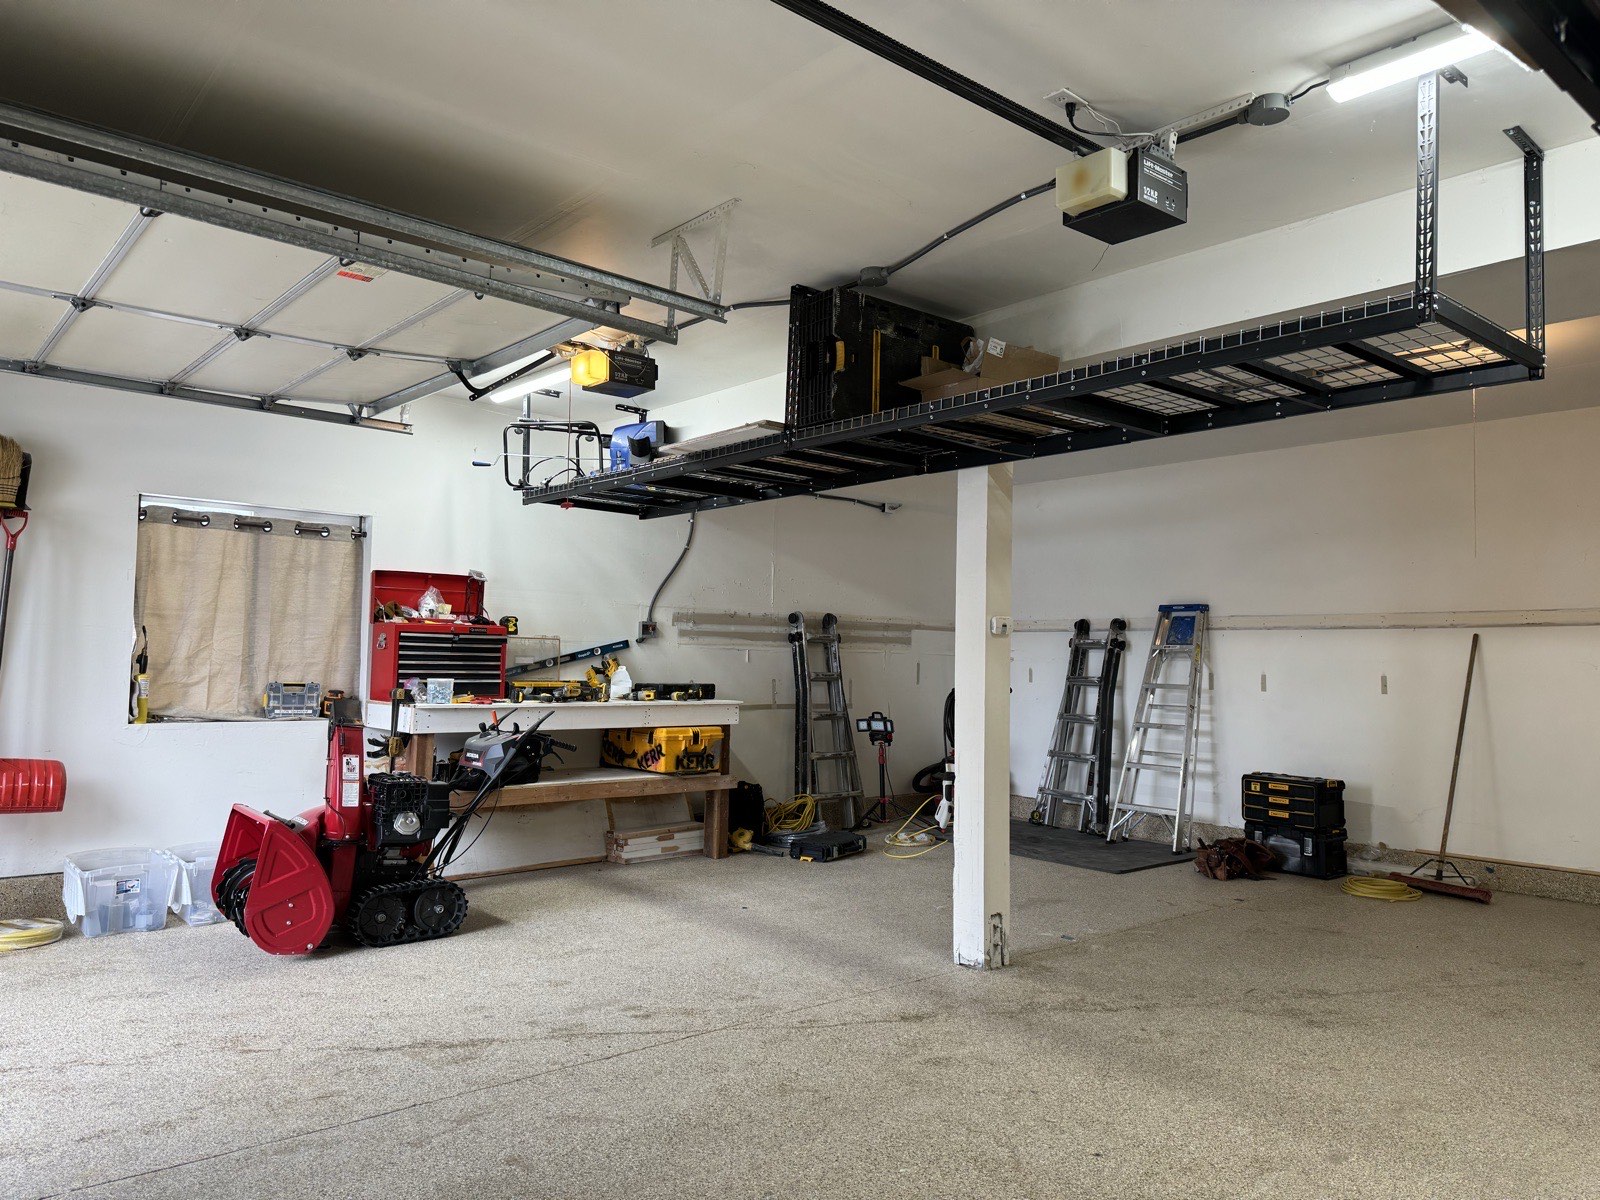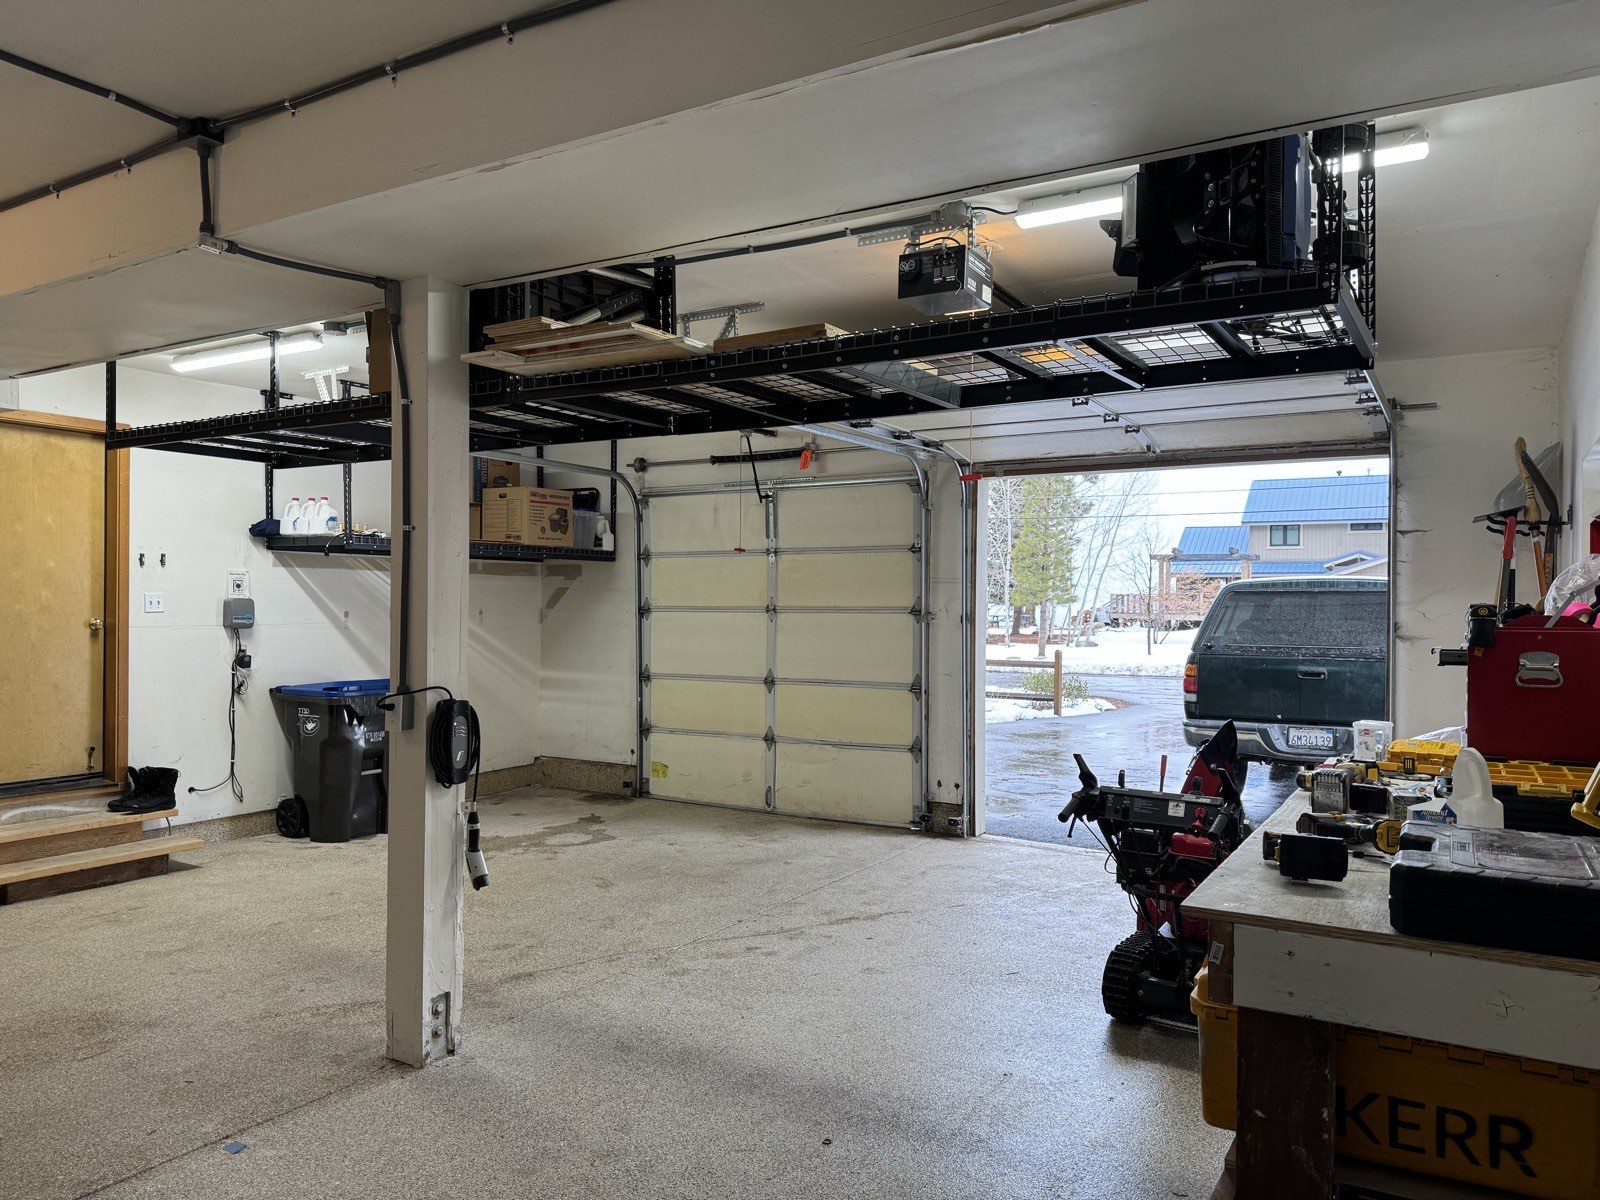
By Errol Kerr · Excavation Foreman & Certified Structural Welder · Truckee, CA
Vlogs, photos, and stories from the mountain, the jobsite, and the shop. Real work, real lessons, no filter.
Latest Posts
27 posts
2 min read
Twenty Hours of Heat From a Tongue Box — The Diesel Heater Station Build
EK
Errol KerrOlympic Skier · Excavation Foreman
July 19, 2026DIYBuild0 comments
It's 90 degrees out and I'm going to tell you about a heater. Stay with me. Propane heat in an enclosed winter jobsite is a bad bet, so I built a self-contained diesel heater station — steel tongue box, LiFePO4 battery bank, 20-plus hours of heat on a single charge, about a grand in parts.
0 views
Read more
So, it's the middle of July, the lake is full of paddleboards, and I'm writing about a heater. There's a reason. If you read last week's post, you know NOAA just confirmed the El Niño everybody's been watching. The winter that's coming doesn't care what the thermometer says today, and winter gear built in January is gear built in a panic. July is when you build it right.
Here's the problem this thing solves. Winter jobsites up here drop below zero, and crews need heat somewhere — a conex, a cure tent, an enclosure over fresh concrete. The default answer is propane, and propane in an enclosed space is asking for trouble. It's a combustion source pumping moisture and worse into the air you're breathing, the bottles are heavy, and they sulk when it gets seriously cold. I wanted heat I could trust, move with one hand, and forget about for a full shift.
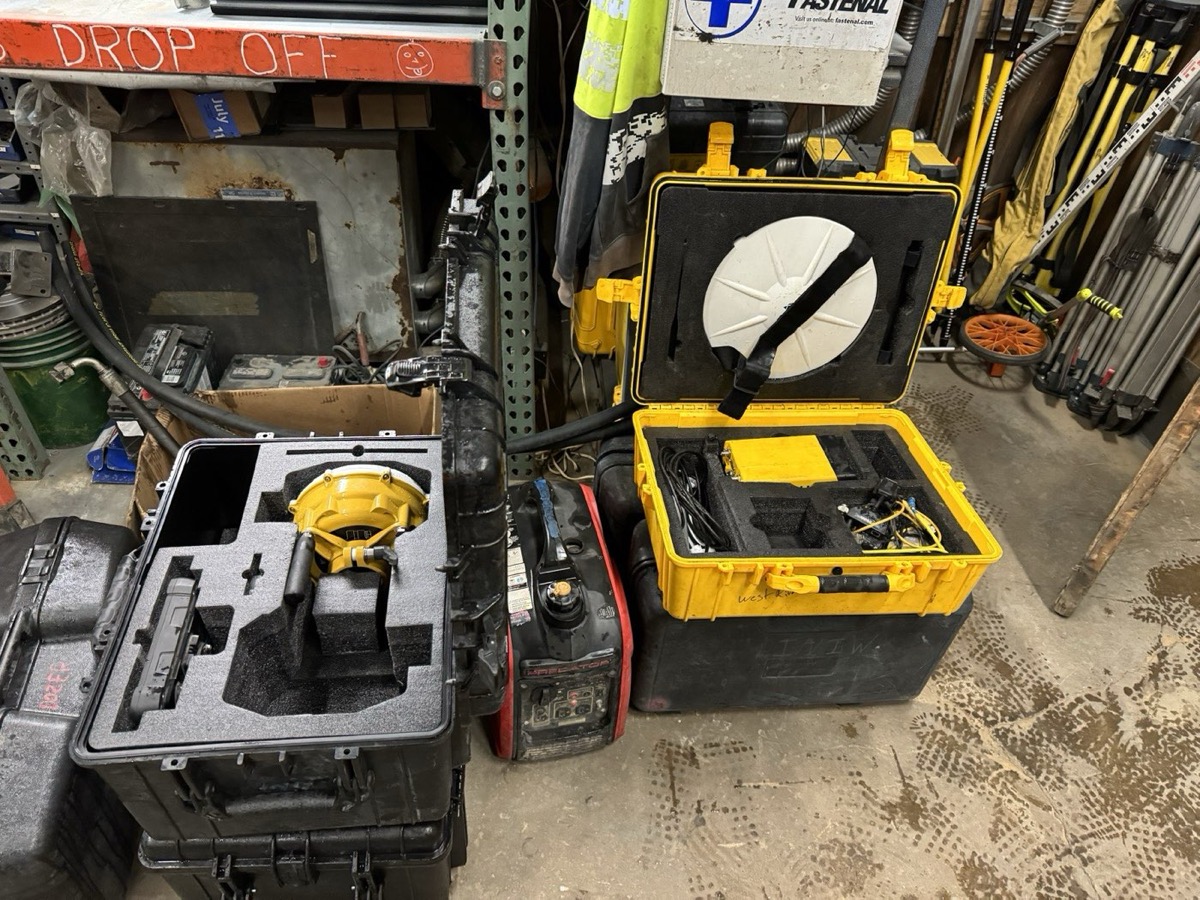
The heart of the build is an HCALORY TB-MAX diesel heater. These Chinese diesel heaters have been keeping truckers and vanlifers alive for years, and the design is solid: sealed combustion, so the burn air and exhaust never touch the air you're heating. It sips fuel and draws about 40 watts running — one to four amps at 12 volts, with a brief 12-amp spike at ignition. That low draw is what makes the rest of the build possible.
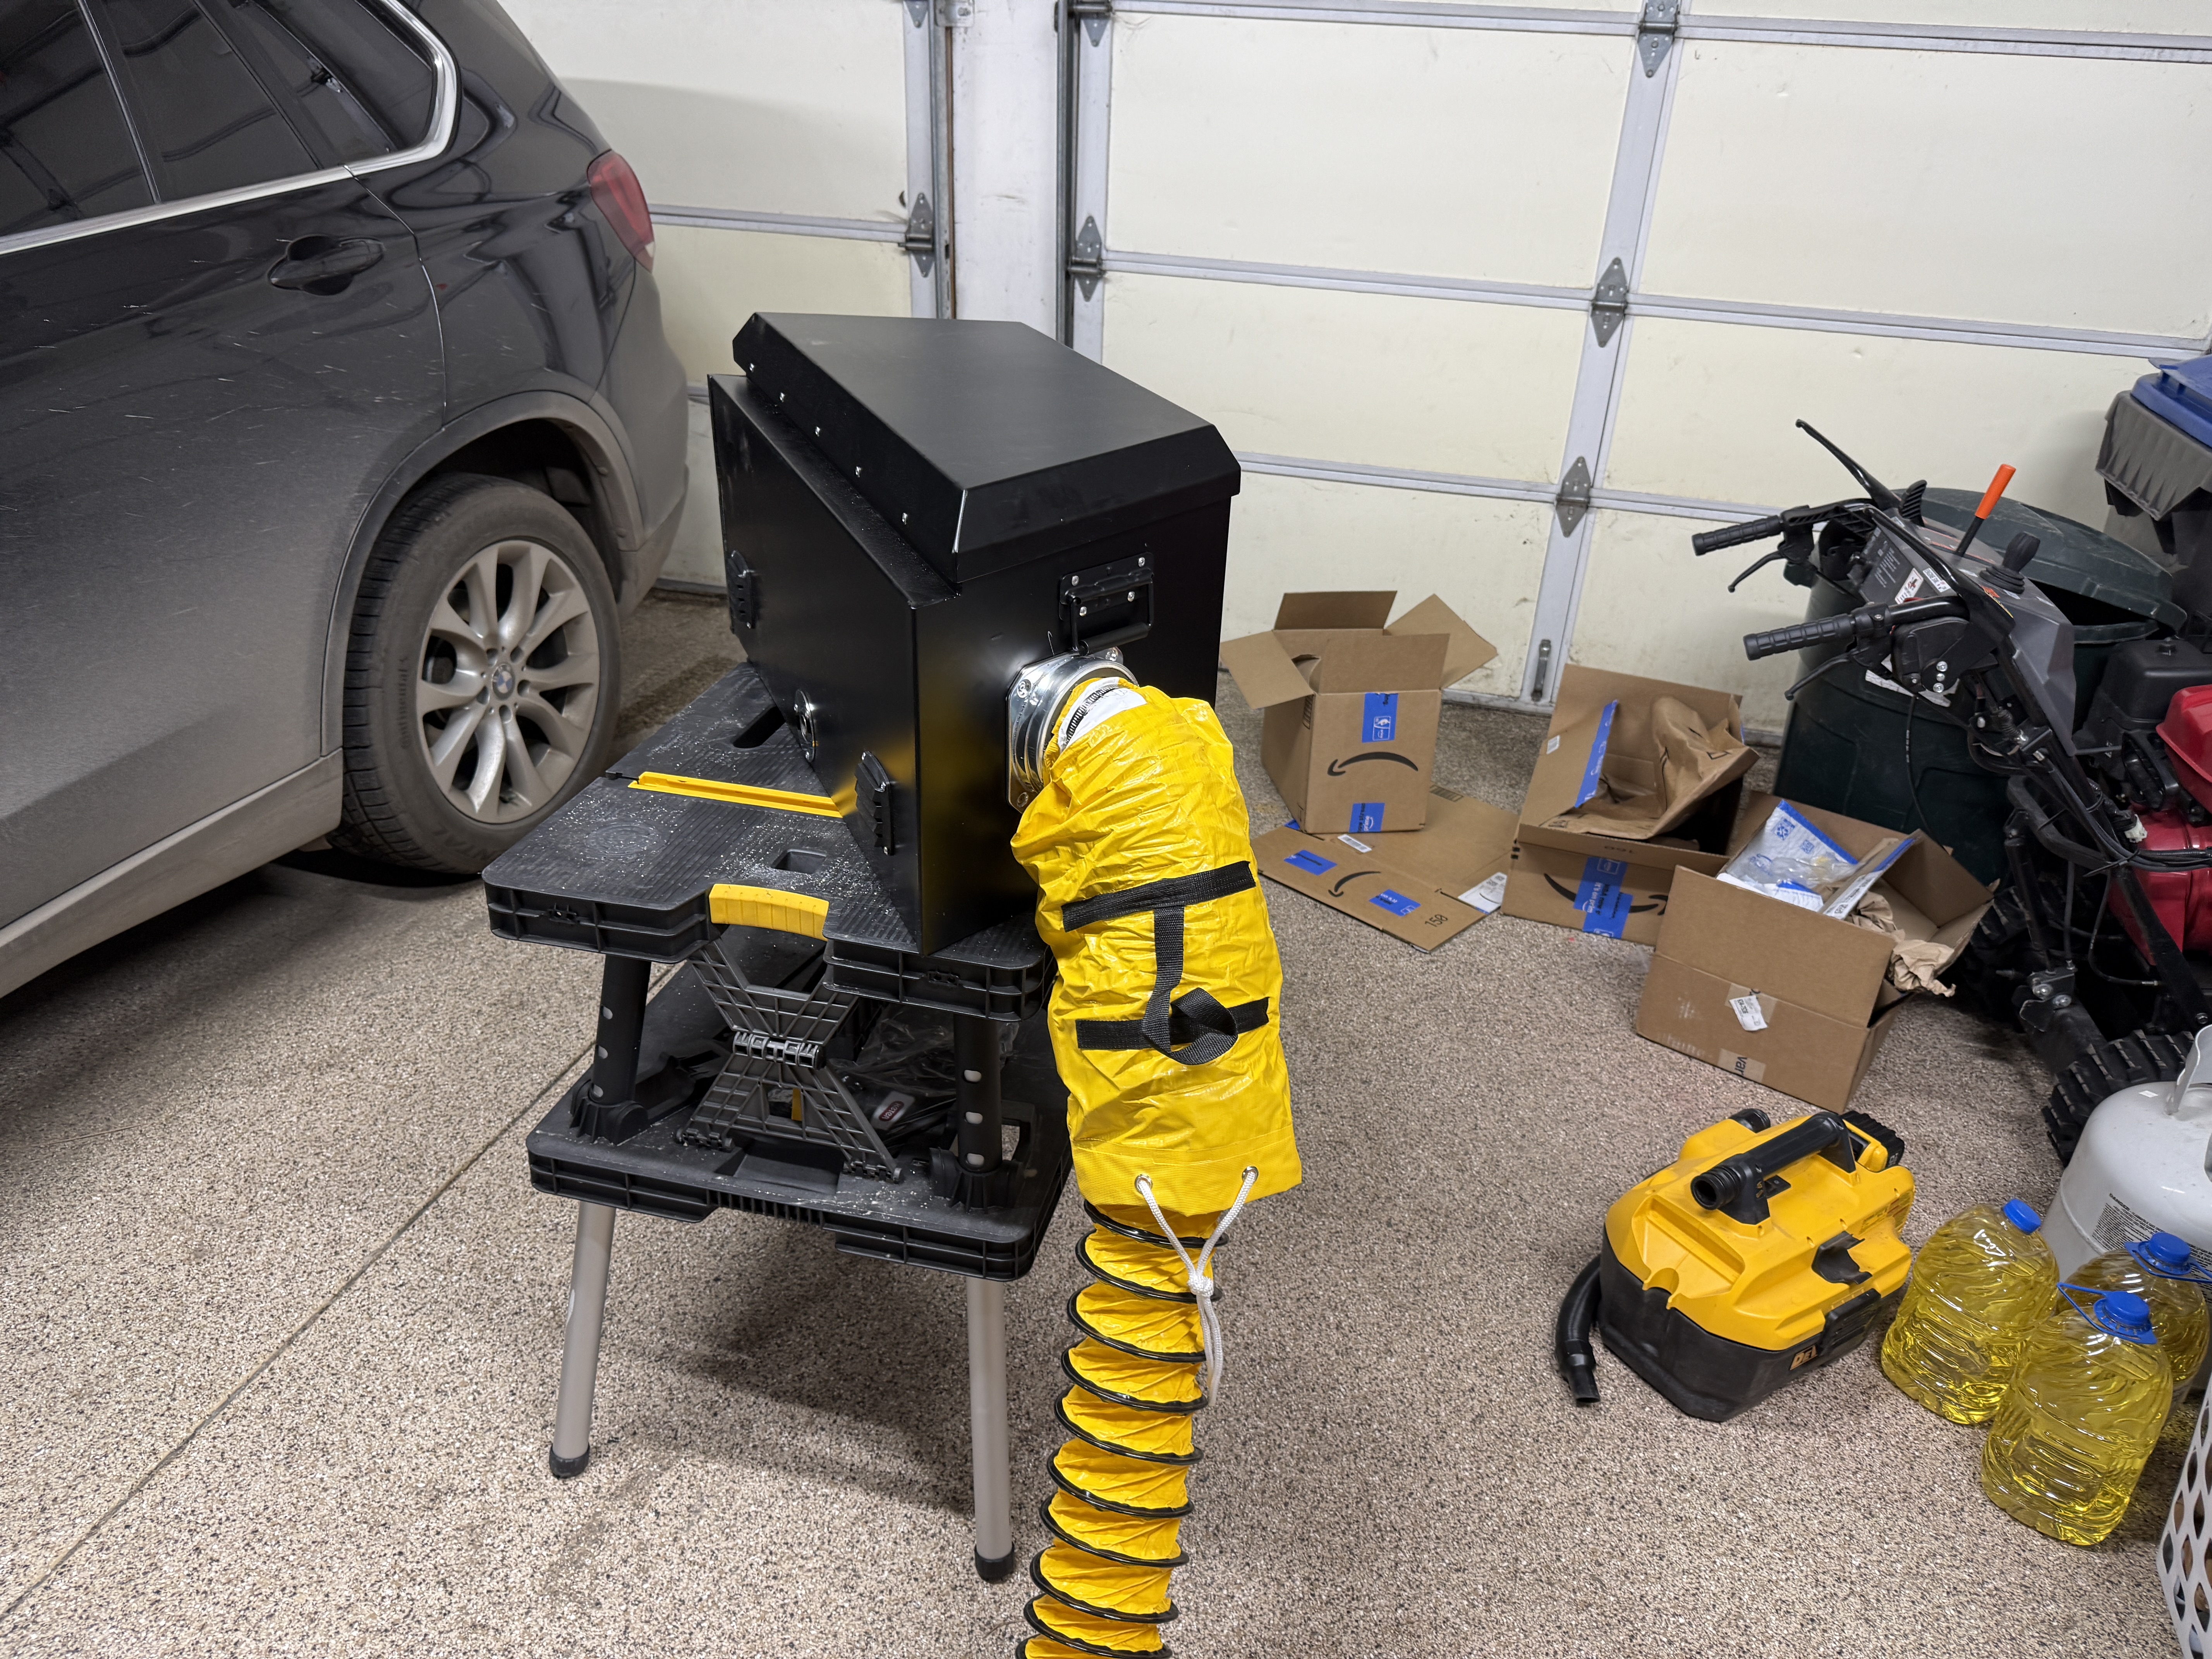
The heater lives inside a weatherproof steel tongue box with sealed flexible ducting out the side, so you park the box outside and duct warm, dry air to wherever it's needed. Power comes from two 120Ah LiFePO4 batteries in their own box — 240 amp-hours total. Lithium iron phosphate matters here: you can actually use 80 to 90 percent of the capacity without hurting the batteries, where lead acid taps out around half. Do the math on a 40-watt draw and the 20-plus hours I'm claiming is the conservative end — at that rate the pack's got days in it. Overnight concrete cure? Covered, with margin.
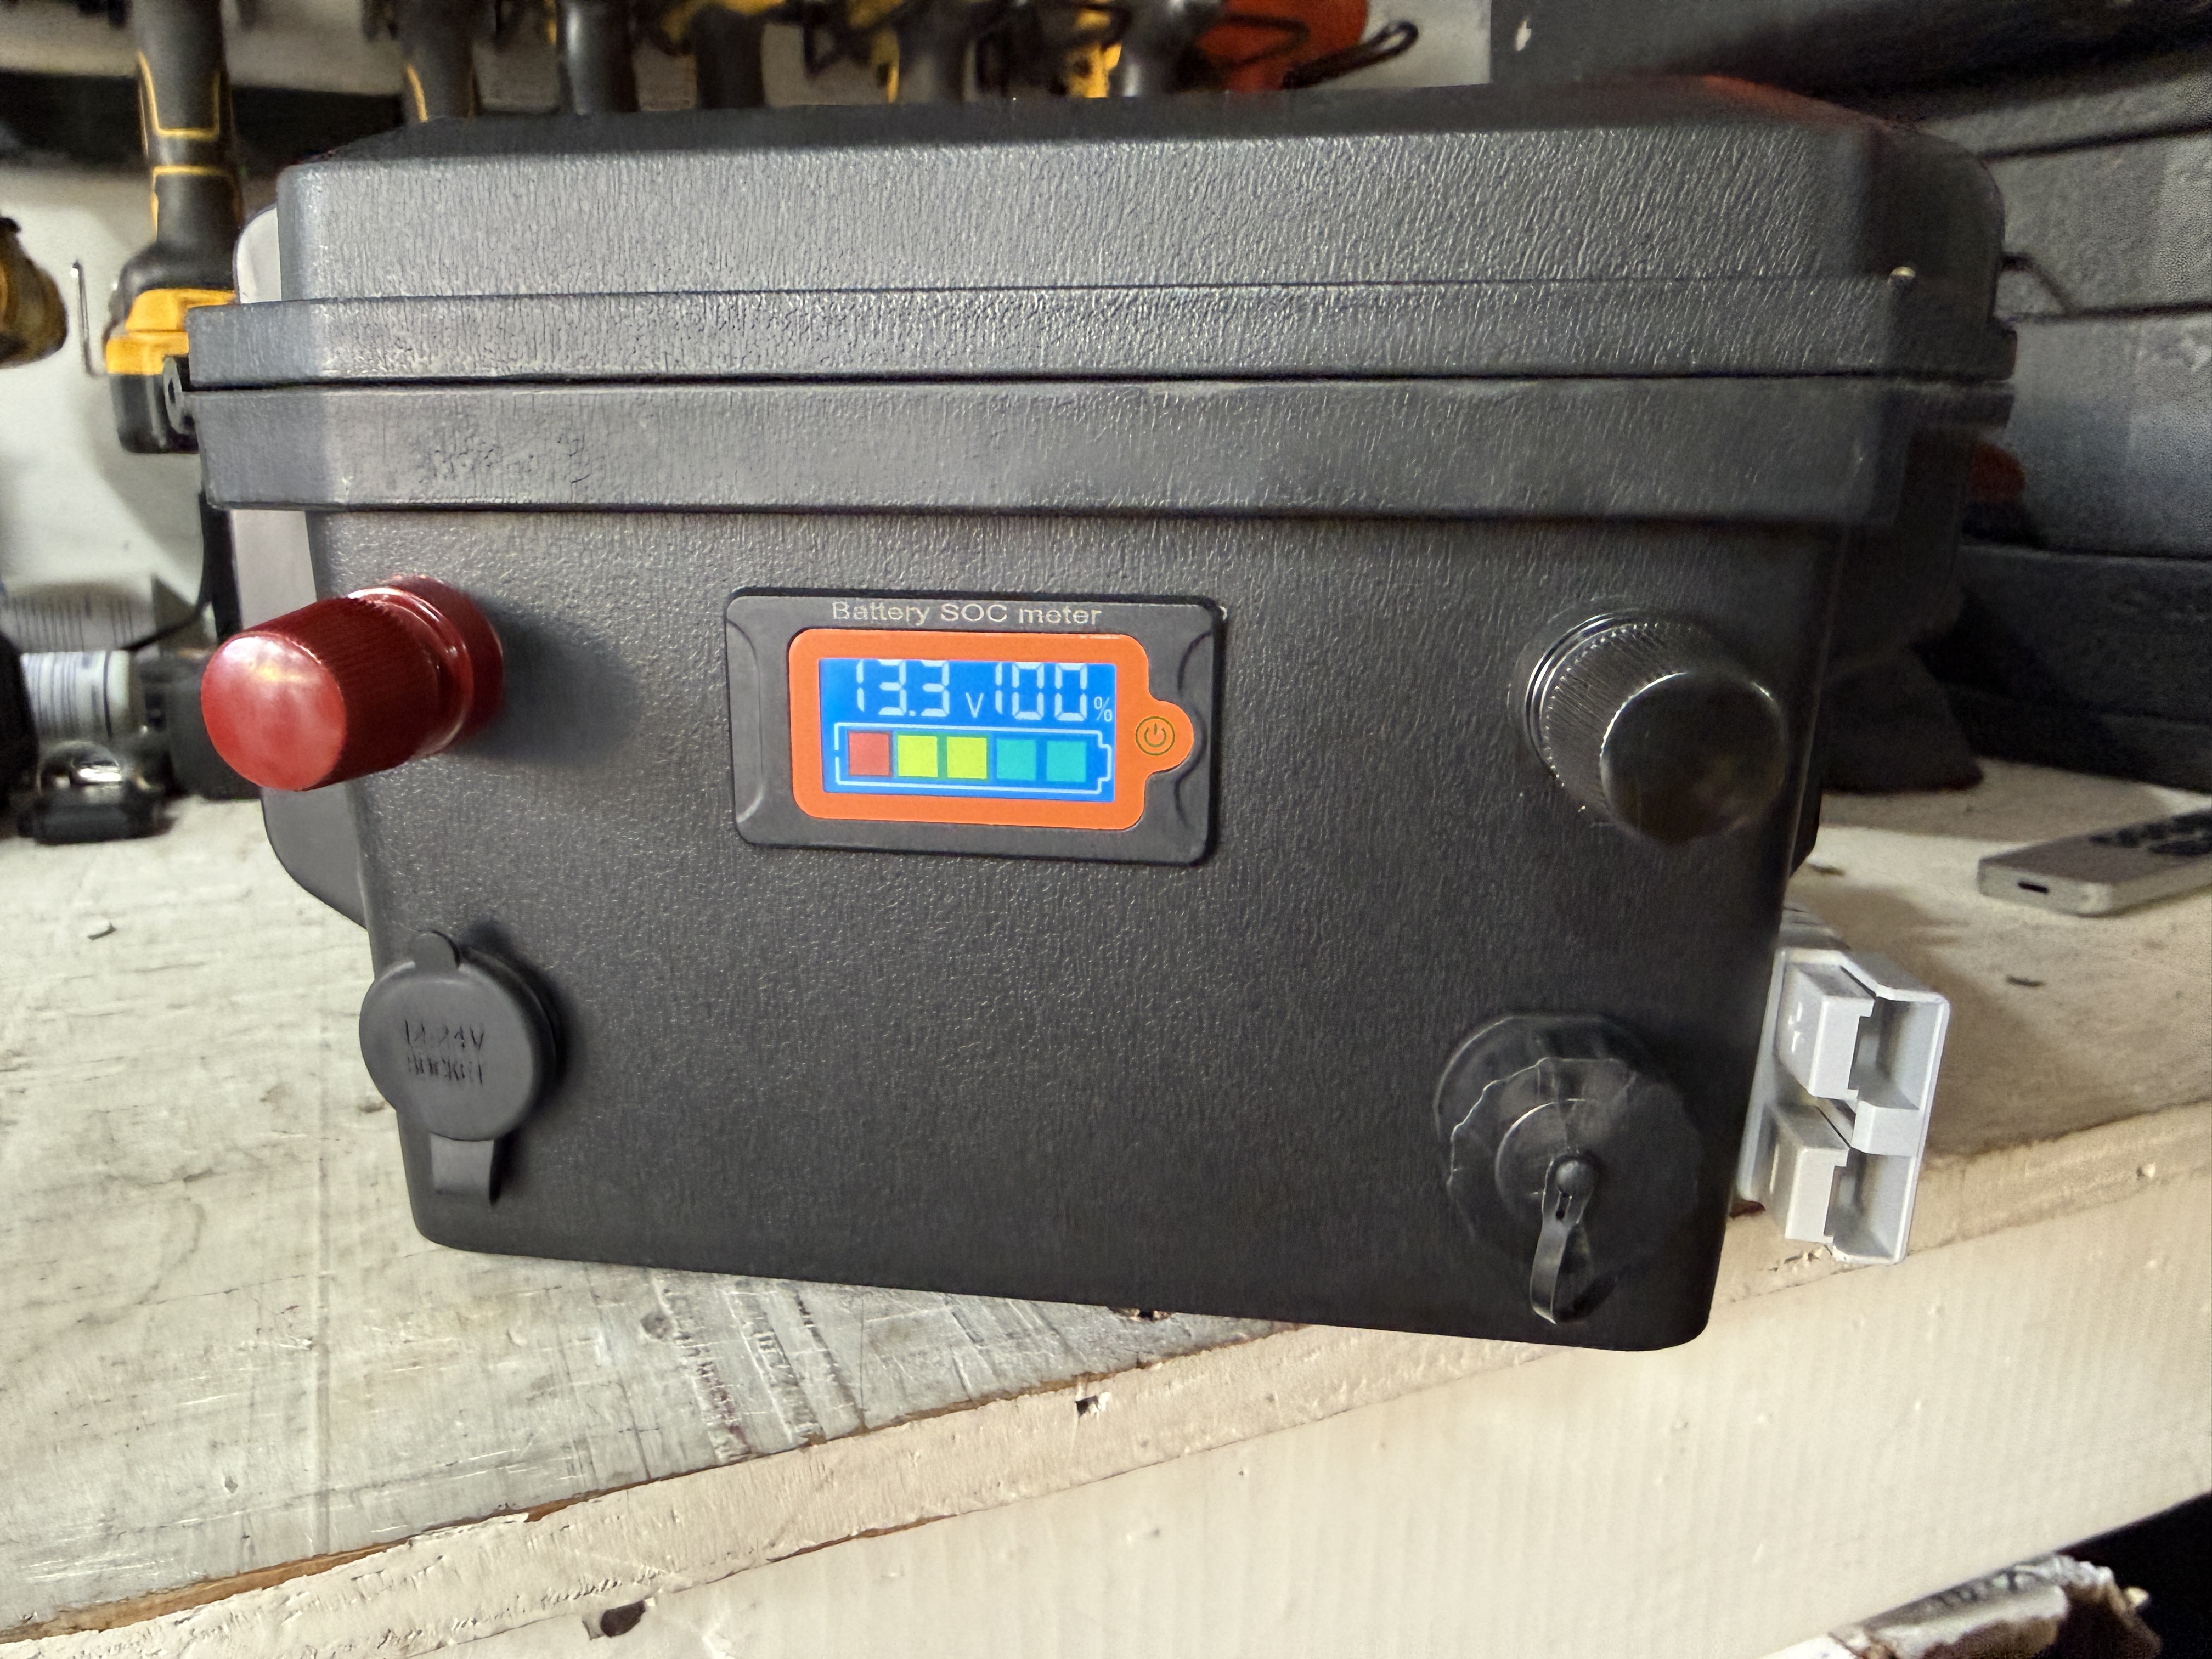
The battery box holding 13.3 volts at full charge — 240Ah of LiFePO4 feeding a 40-watt draw. That's your 20-plus hours right there.
Everything connects with Anderson quick-disconnects, and the charging system rides in its own orange Apache case. That's the part most people skip and regret. Loose chargers and bare cable ends don't survive a winter of truck beds and snowbanks. Give every piece of the system its own sealed home and it'll still work in February.
Total build cost: $1,047.35. For that you get a heat source rated to 20 below, no cords to a generator, no propane bottles to babysit, and clean dry air instead of combustion moisture fogging up the enclosure. It's been battle-tested on real winter sites and it earns its spot on the trailer every single cold morning.
Full parts list, specs, and every build phase in photos are over in the DIY section. If the models are right about this winter, build yours now. The mountain doesn't wait for you to be ready.
4 min read
GODZILLA EL NIÑO UPDATE: NOAA Confirms — The Monster Is Real
EK
Errol KerrOlympic Skier · Excavation Foreman
July 18, 2026WeatherSkiingEl Niño0 comments
Three weeks ago we called it. NOAA just confirmed it. El Niño conditions are officially present. 97% chance it persists through spring 2027. 81% chance of very strong. Models peaking above the +2.0°C very-strong line by early winter. The monster is real, and it's stronger than we thought.
So, back in June the ocean was already telling on itself. SSTs climbing, warm water rolling east under the surface, all 24 models leaning the same way. We published the Godzilla El Niño post and told you to pay attention.
NOAA just made it official. They've issued a formal El Niño Advisory, meaning conditions aren't developing, they aren't emerging, they are present. Right now. The tropical Pacific has crossed the threshold and there's no ambiguity left. The monster is real.
When a monster El Niño locks the jet stream onto the Sierra, the mountains just collect. History says 600+ inches.
When we wrote the original post, the chance of a very strong El Niño was 63%. Here's where the probabilities stand now:
NOAA El Niño Probabilities — July 2026 Update
Persists through Spring 202797%
Very Strong (Oct-Dec)81%
Source: NOAA Climate Prediction Center · July 2026
Official NOAA CPC ENSO Strength Probabilities (issued July 2026). Dark red = very strong El Niño (Niño 3.4 ≥ +2.0°C). Near-100% El Niño probability in every seasonal window through spring 2027. Source: NOAA CPC ENSO Strength Probabilities
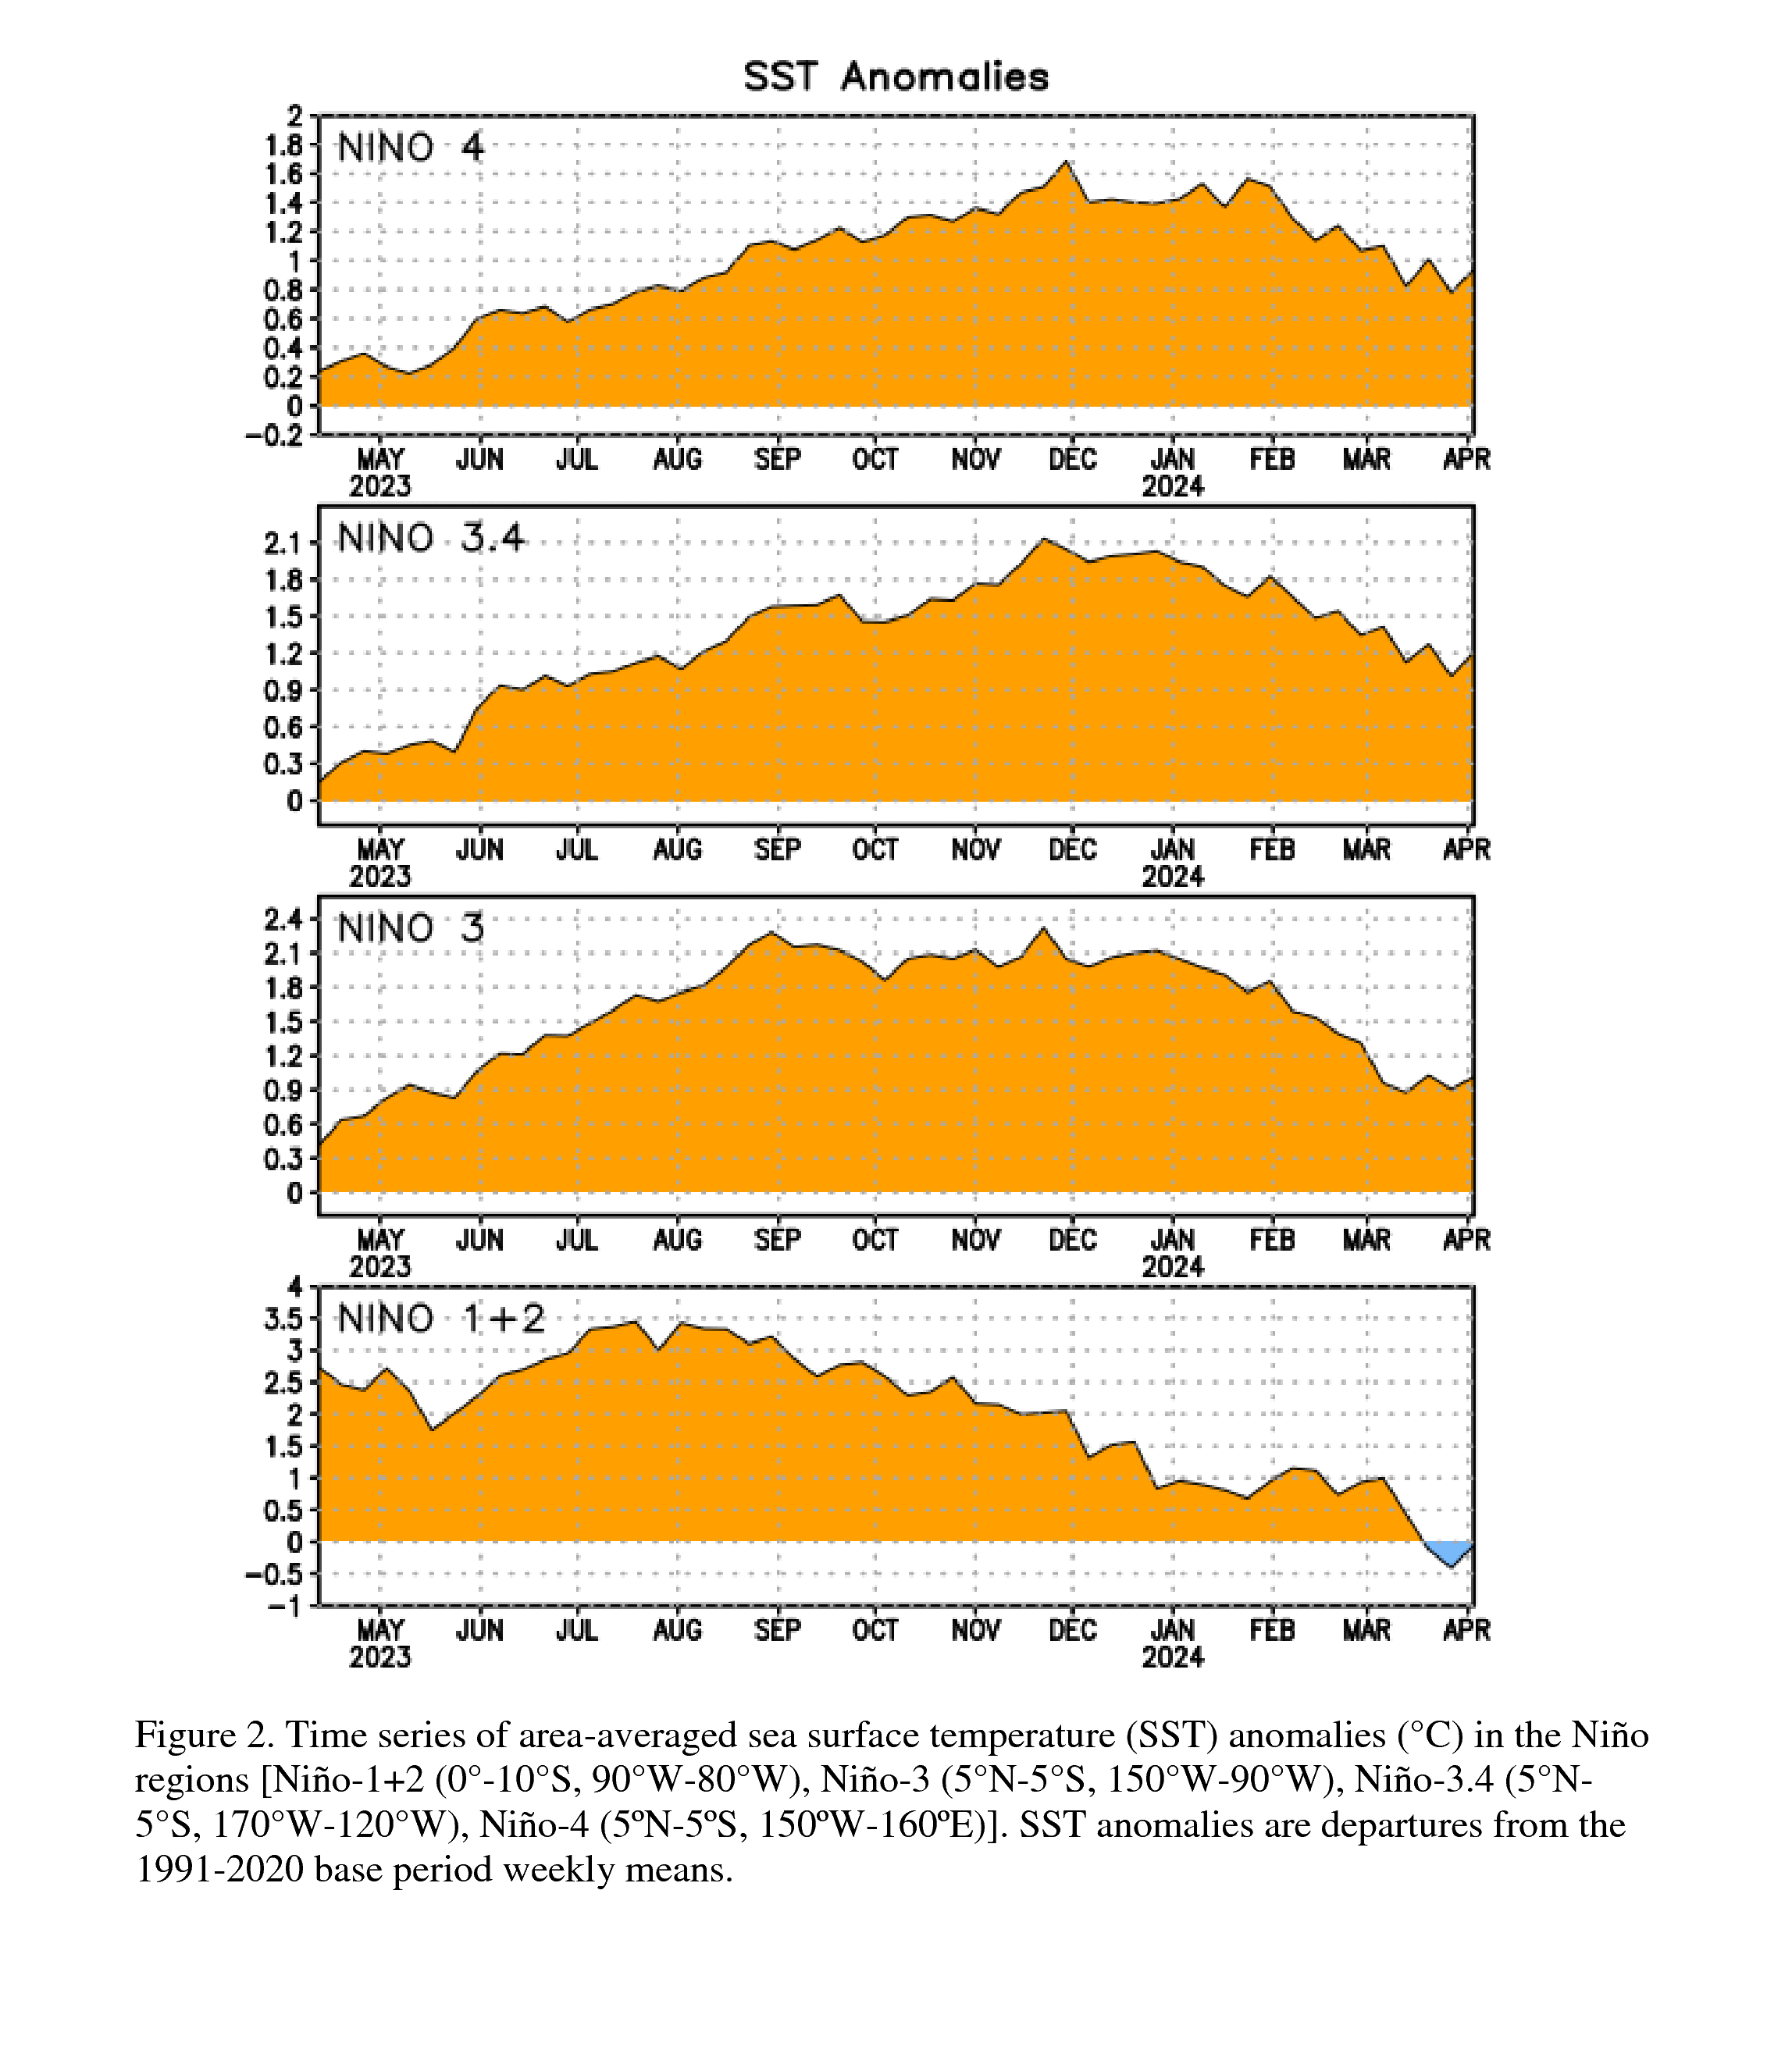
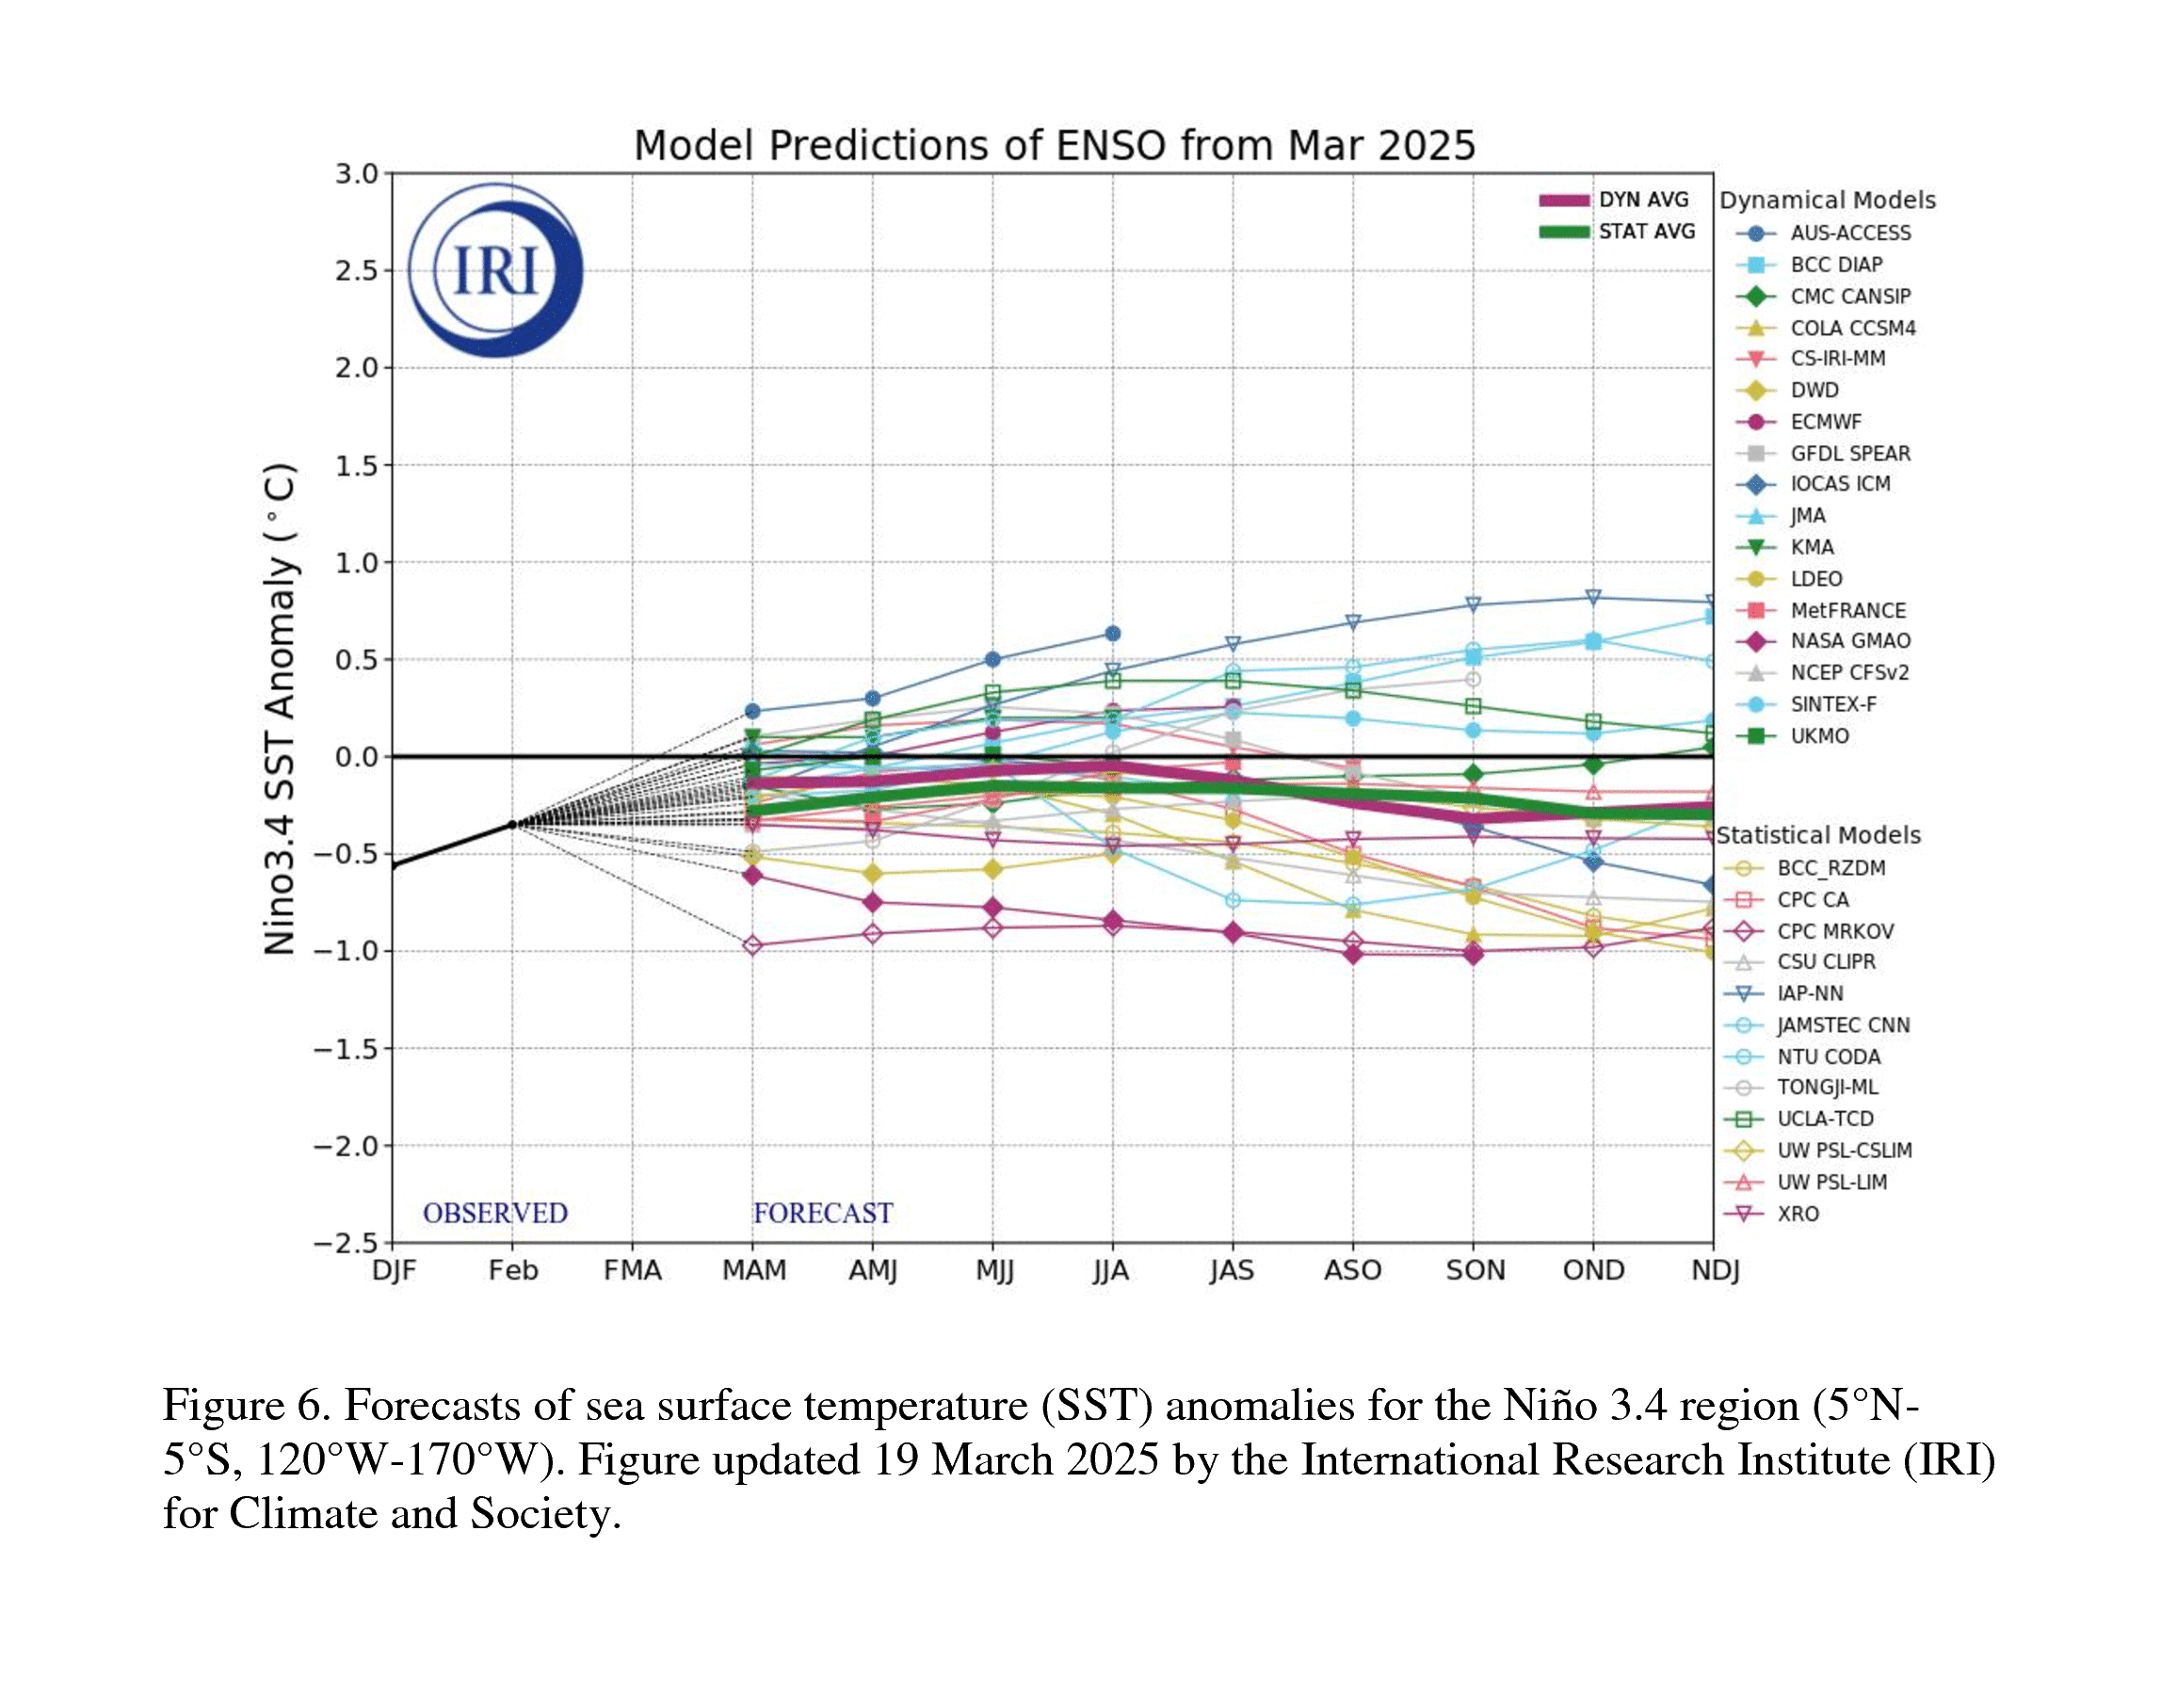
The Niño 3.4 SST anomaly is at +1.2°C above average and climbing. The easternmost Niño-1+2 index has already hit +2.7°C. All 24 IRI/Columbia forecasting models are in strong agreement: this event is strengthening, not fading. Weather.com is calling it one that could "rank among the largest events in historical record since 1950."
"Very strong" El Niño means the Niño 3.4 index exceeds +2.0°C above average. NOAA has only recorded a handful of events that strong since 1950. Models now project we cross that threshold in the October-December window, right when the winter storm track starts paying attention.
Niño region SST indices — anomalies climbing across all monitoring regions. The Niño 3.4 index at +1.2°C and accelerating. Source: NOAA CPC ENSO Diagnostic Discussion, July 2026
The Kelvin Wave: The Engine Under the Surface
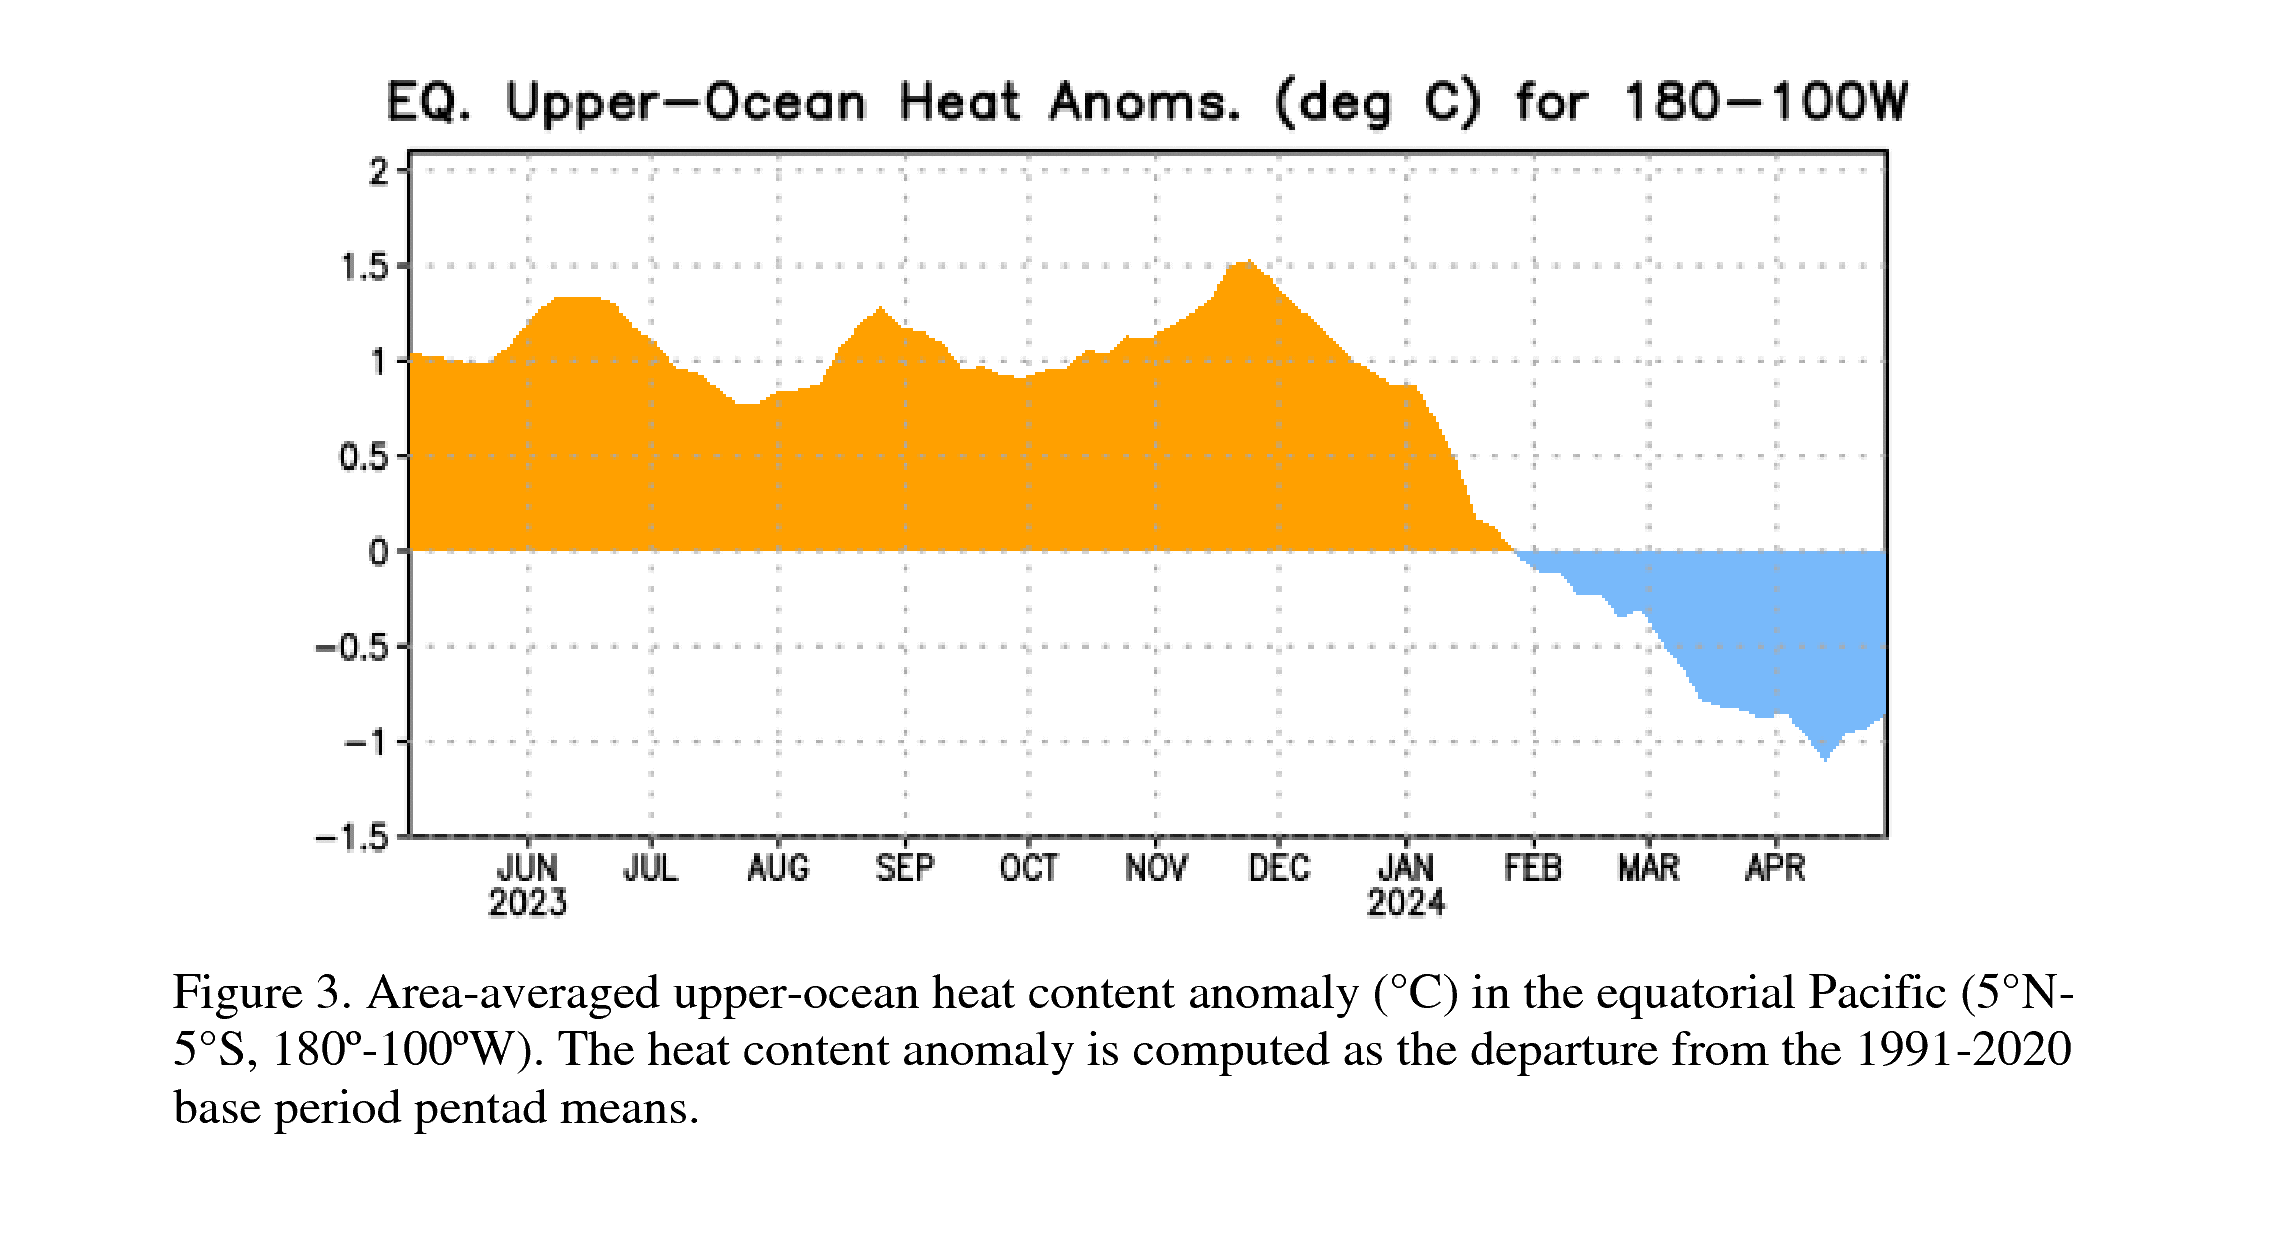
Here's what most weather coverage misses. Beneath the surface, a downwelling Kelvin wave has spent months shoving warm water east across the equatorial Pacific, and the fuel gauge shows it: upper-ocean heat content is running about +2.3°C above average across the eastern half of the basin. That warm water is surfacing now, feeding the SST climb. The engine's running and nobody can shut it off.
Equatorial upper-ocean heat content (0-300m) — the fuel tank. About +2.3°C above average and climbing again as the Kelvin wave's warm water surfaces. Source: NOAA CPC, July 2026
Every Model Agrees: This Is Going Up
Look at the forecast plume below. Every spaghetti line lives in El Niño territory through winter. The CFSv2 median peaks just above +2.0°C in the October-December window, over the very-strong line, with the warm end of the ensemble pushing +2.5°C. The NMME and IRI multi-model runs tell the same story: this event strengthens through fall and holds deep into 2027.
CFSv2 model forecast plume — the full ensemble in El Niño territory, peaking above the +2.0°C very-strong line in October-December. Updated 6 July 2026. Source: NOAA CPC
The Big Three Might Get Company
Let's put this in context. The three biggest El Niños in the modern record peaked at +2.2°C (1982-83), +2.4°C (1997-98), and +2.6°C (2015-16). The July runs put this one's median right at the bottom of that club, with the warm end of the ensemble near +2.5°C. If the warm end verifies, this event pulls up a chair with those three.
And we're stacking this on top of the hottest ocean baseline in recorded history. The equatorial Pacific hit 26.99°C in April. Those model numbers are relative anomalies — the same reading means more actual heat than it did in 1997. The monster's swimming in a warmer ocean.
What This Means for Tahoe: 400-600+ Inches
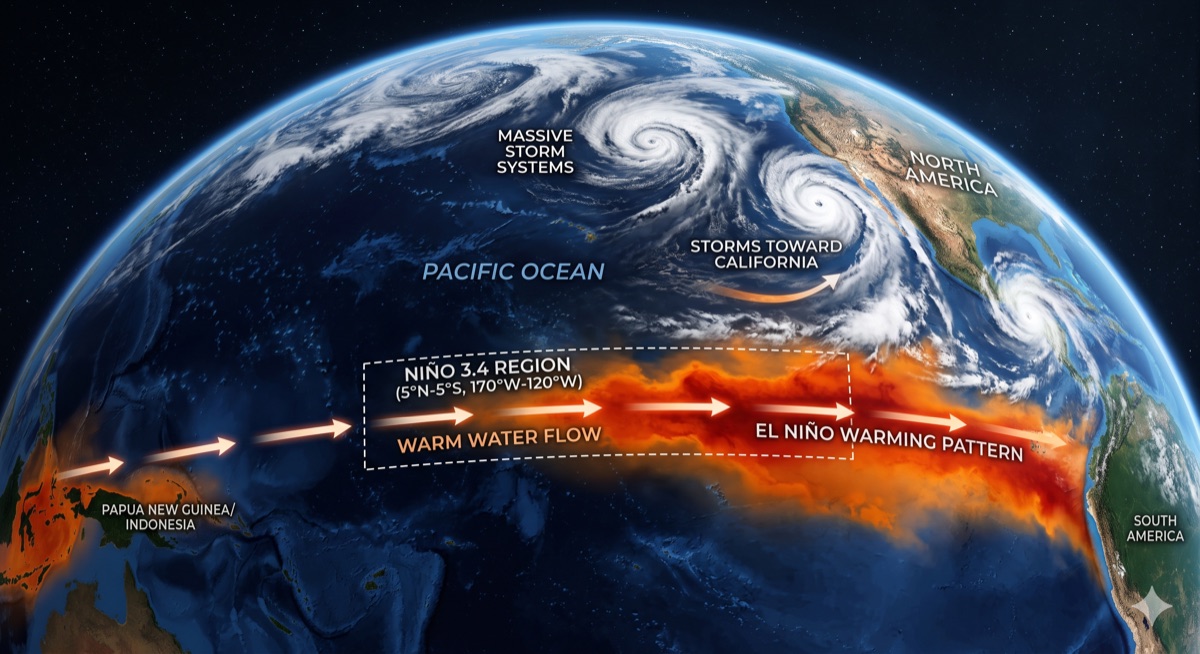
The Niño 3.4 region is on fire. When SSTs push past +2.0°C, the jet stream overwhelms everything and aims directly at California.
We said it in the original post: regular El Niños are a gamble for Tahoe. Monster El Niños deliver. With an 81% chance of very strong by the October-December window, we're firmly in monster territory. Here's what history tells us about seasons like this:
1982-83: Norden near Donner Pass recorded nearly 804 inches. Snowpack hit 15 feet by February. Atmospheric rivers stacked for weeks. It snowed every single weekend from January 15 to May 15.
1997-98: Snowpack exceeded 200% of average. Squaw Valley reported 68 inches in 24 hours on New Year's Day. Lake Tahoe rose 6.5 feet from runoff.
If the very-strong projections verify, those two seasons are the blueprint. We're talking about above-average precipitation, potential for 400-600+ inch snowfall seasons at elevation, extended atmospheric river events, storm cycles that stack for weeks, rain-on-snow at lake level, and pure powder at the peaks. Early-season storms could hit by late October. The ski season could run November through July.
What We're Watching Next
The August NOAA update is the next big checkpoint. If SSTs keep climbing at this rate through August, the October-December projections get locked in. We'll also be watching for the first atmospheric river setup of the fall. Historically, monster El Niños announce themselves with an early-season bomb before Halloween.
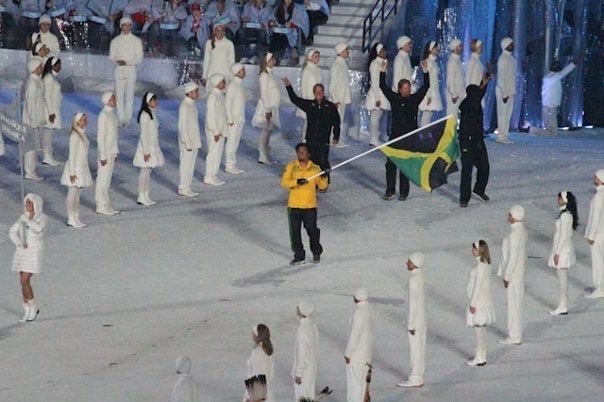
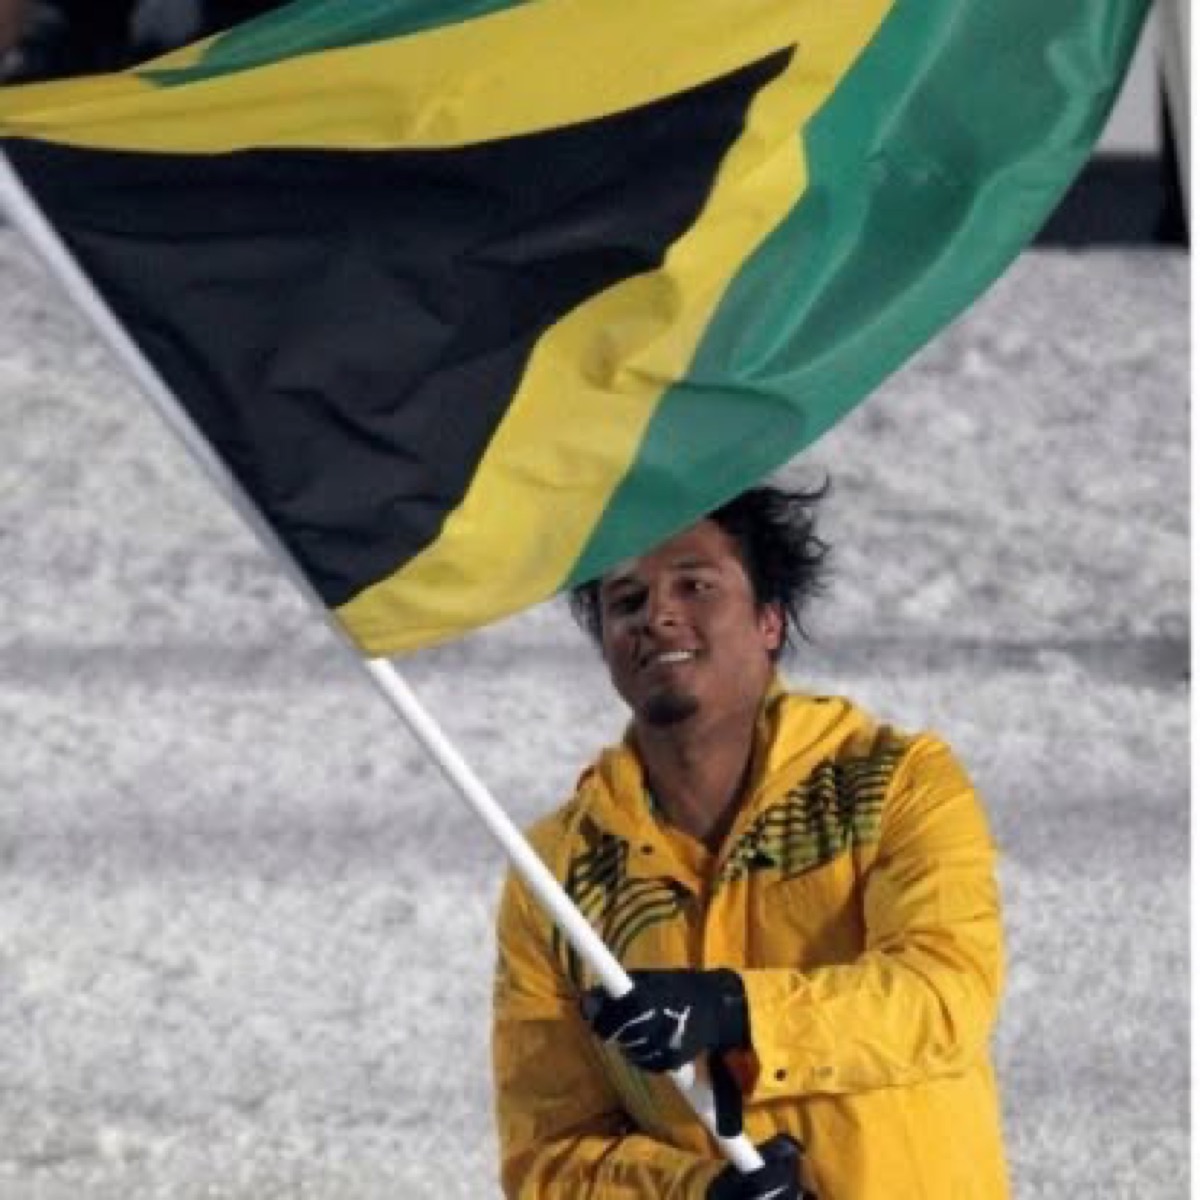
I carried the Jamaican flag at the 2010 Olympics. I've skied on every continent. I run heavy equipment at 6,000 feet for a living and ski 60+ days a year. I've been tracking this since March, and I've never seen models this aggressive, this unified, this early in the season.
The original Godzilla post has the full baseline data, the SST trajectory chart, and the historical snowfall comparisons. This update confirms what the ocean already told us: the monster is real, and it's bigger than we thought.
Get your season pass. Service your avalanche gear. Buy real tire chains. Stock the pantry. If you're in the backcountry, take the AIARE course. A 600-inch season is an avalanche season.
We'll keep tracking this. Next update when the August NOAA data drops (scheduled for August 13). Bookmark the page. The monster isn't slowing down.
Mid-July in Tahoe. The lake finally warmed up, the skis are waxed and racked, and every skier in town is pretending they don't miss winter. Here's the thing nobody tells you about ski racing — the season you watch in December got built in July.
0 views
Read more
So, the skis went into storage months ago and the whole town's acting like winter never happened. Bikes out, paddleboards on every Subaru, dust on the trailheads. That's the civilian version of the off-season, and there's nothing wrong with it. But racing taught me a different calendar, and I still run on it.
The Off-Season Myth
Ski cross is four people banging elbows down a course at highway speed. What decides those races isn't talent in December — it's what your legs did in July. Dryland season was the real season. Squats until your vision went sideways, trampoline work for air awareness, balance drills that made you feel like a toddler learning to walk.
By the time snow flew, the racing was mostly already decided. You were just finding out who did their summer homework.
Some summers we chased snow anyway — up on the glacier at dawn, lapping a salted course that turned to mashed potatoes by 11. Ski boots and sunscreen at the same time messes with your head the first time. You get used to it.
Training at 6,000 Feet, Then and Now
These days my off-season program looks different. Nobody writes it on a whiteboard and there's no trampoline. It's ten hours a day on a jobsite at 6,000 feet — in and out of trenches, humping pipe, walking grade all day in the thin air.
I used to pay a trainer to make me do step-ups with a weighted vest. Now the vest is high-vis and the step-ups are free. The altitude base I spent years building as a racer just quietly maintains itself, one shift at a time.
The Warren Miller “Line of Descent” days. Every turn in that poster was bought with a summer of dryland nobody filmed.
The Photo Up Top
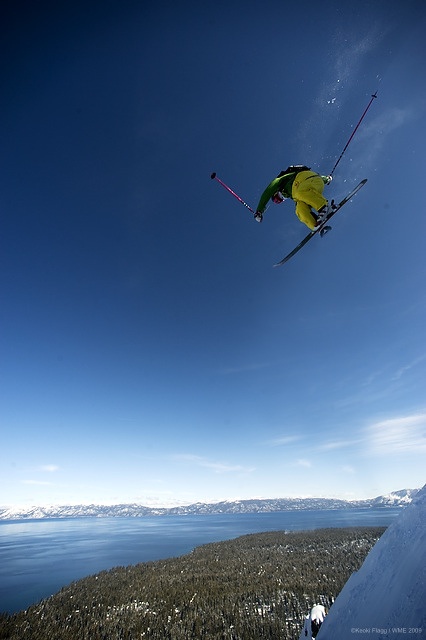
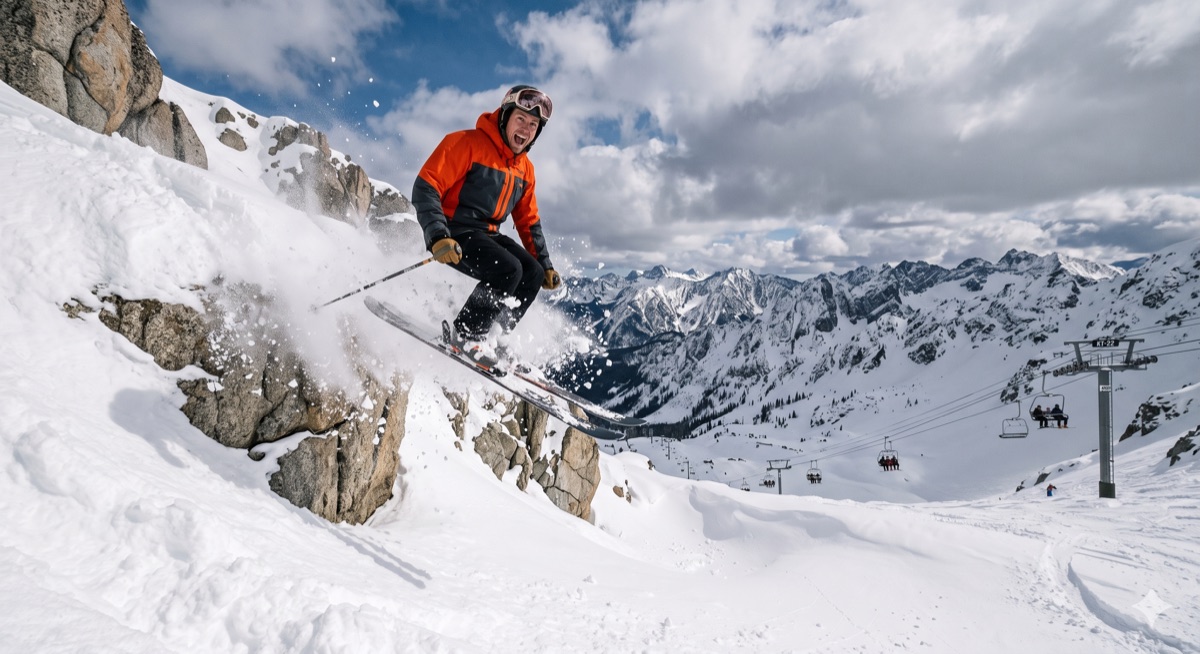
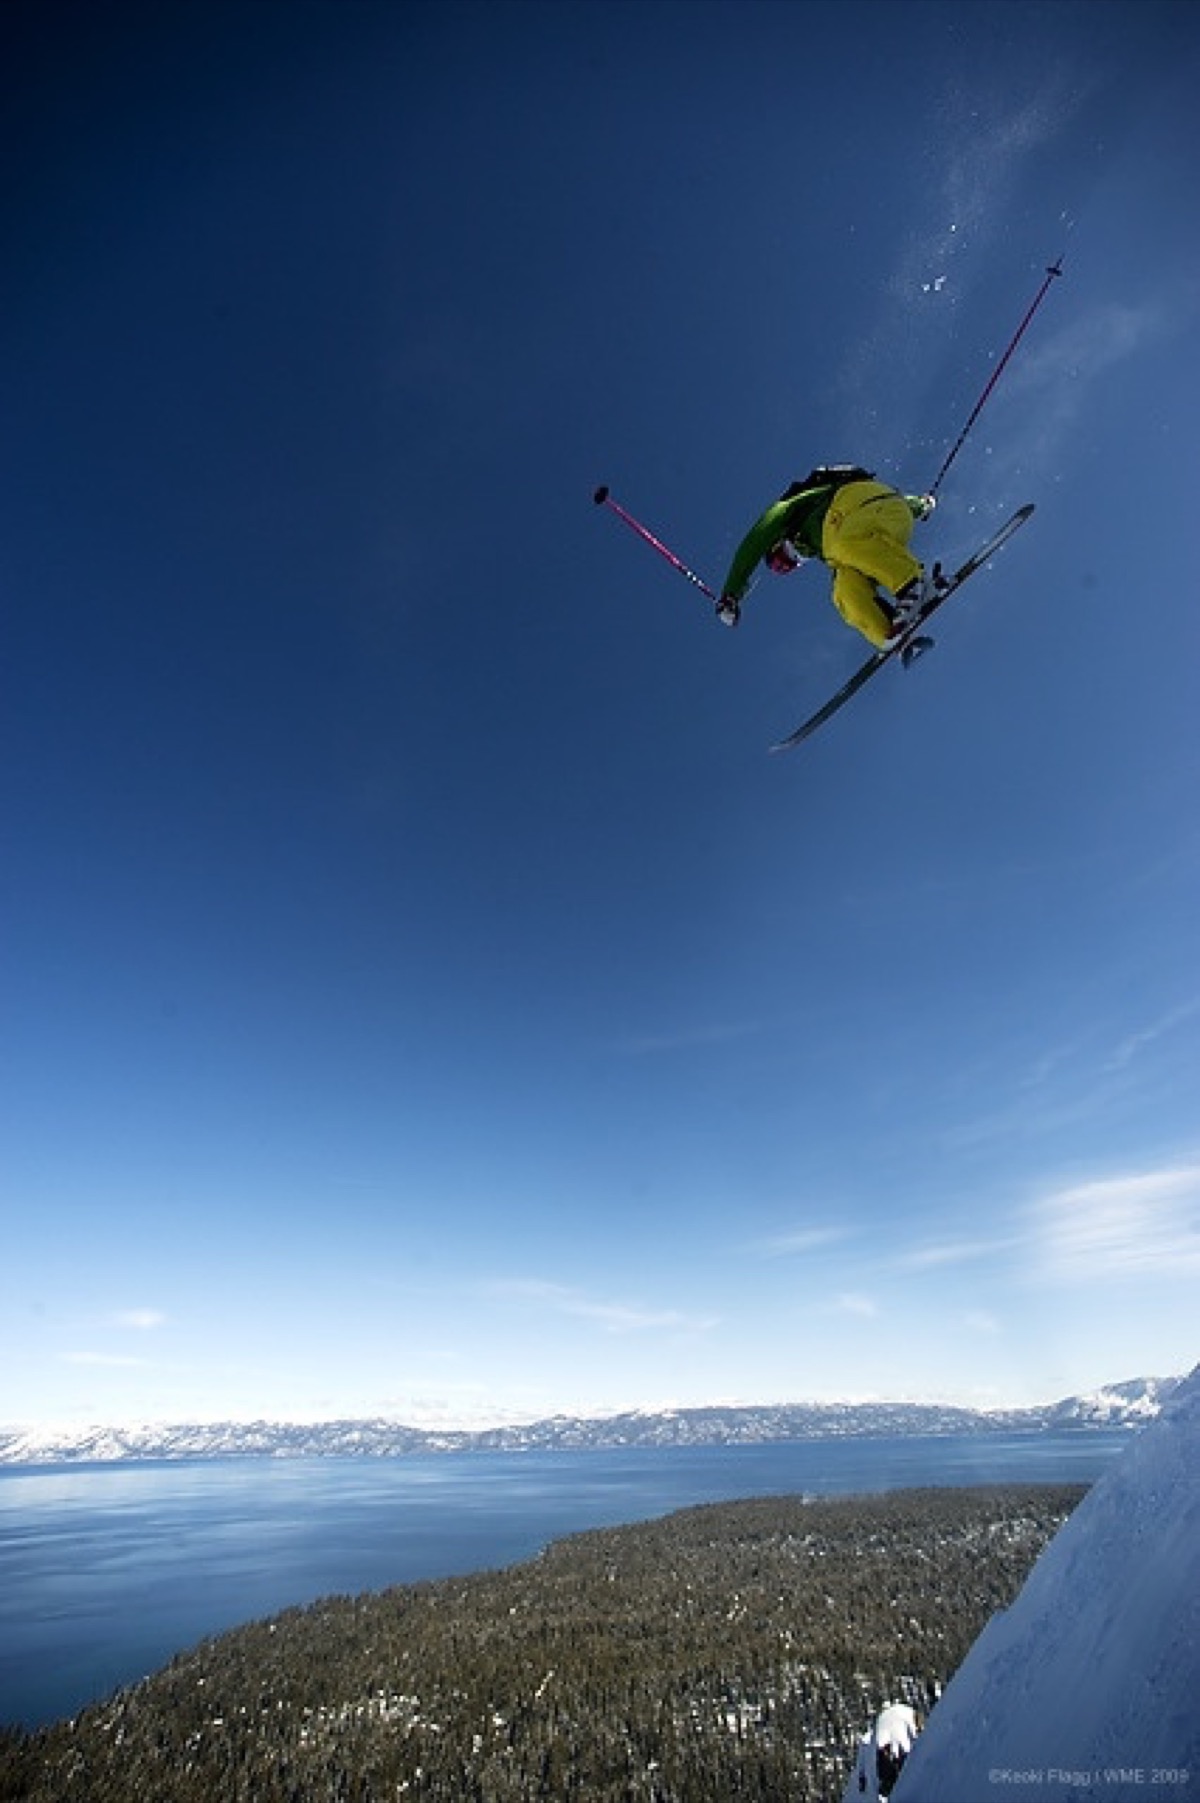
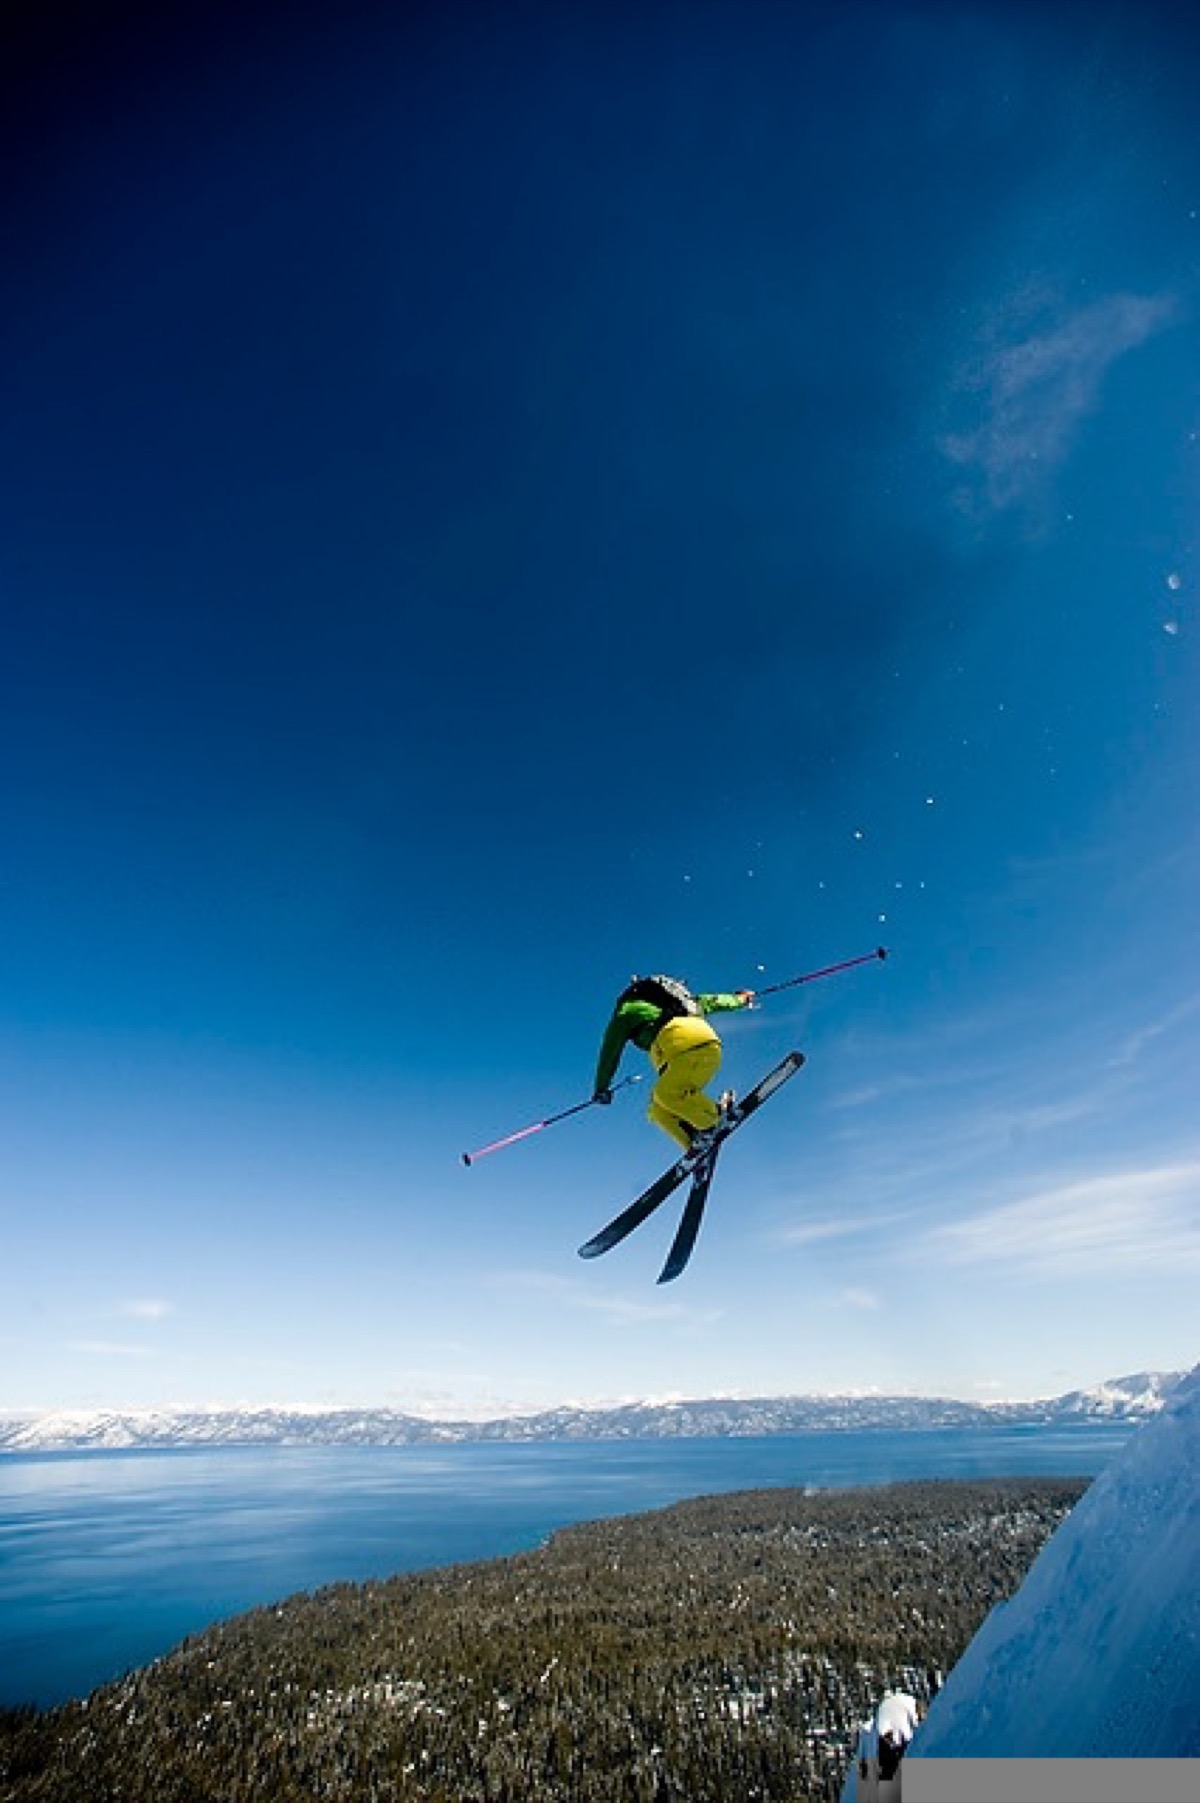
That shot of me floating over Lake Tahoe is a Keoki Flagg frame from 2009. People see a photo like that and think it's one perfect moment. It's not.
It's hundreds of reps, a photographer who knows the light, and legs that spent all summer getting ready to be that calm in the air. The moment is winter. The work is now.
Your July Homework
If you ski, here's the honest version: the season you'll have in January is being decided right now. Hike something steep. Ride the bike uphill, not just down. Do the boring single-leg stuff. And check your gear this month — boots, bindings, edges — while the shops are empty and the techs are bored.
Winter always comes back to Tahoe. The only question is whose legs show up ready.
Share
2 min read
The July Sprint — Five Months to Do a Year's Worth of Digging
EK
Errol KerrOlympic Skier · Excavation Foreman
July 5, 2026ConstructionTruckee0 comments
Fourth of July weekend in Truckee. The lake traffic's backed up to the roundabout and everyone's summer is in full swing. For an excavation crew, the holiday means something different — the dig season's half spent, and everything still open in the ground is a promise you made to winter.
0 views
Read more
So, the Fourth just came through Truckee and did what it always does — doubled the population, tripled the boat traffic, and turned the grocery store into a contact sport. Great weekend. But if you dig holes for a living up here, the holiday is also a calendar alarm you can't snooze: the season is half gone.
The Season Math
Down in the valley, an excavation crew works more or less year-round. At 6,000 feet, the ground doesn't give you that. It stays locked up or soaked well into May, and the first real storm can land in October like it owns the place — because it does.
Call it five workable months, maybe six if the fall is kind. Whatever a valley outfit spreads across a year, we compress into that window. Every clean, dry, 75-degree day in July isn't just a nice day. It's inventory.
Holiday Week on a Crew
Here's the part nobody puts in the brochure: half the crew wants the Fourth off, and the ground couldn't care less about the calendar. So you rotate. Somebody takes the lake day with their kids, somebody covers, and next holiday it flips.
A crew that never gets a summer day with their family burns out by August, and a burned-out crew makes mistakes around open trenches. Keeping people fresh isn't soft — it's the cheapest safety program there is.
Night Moves
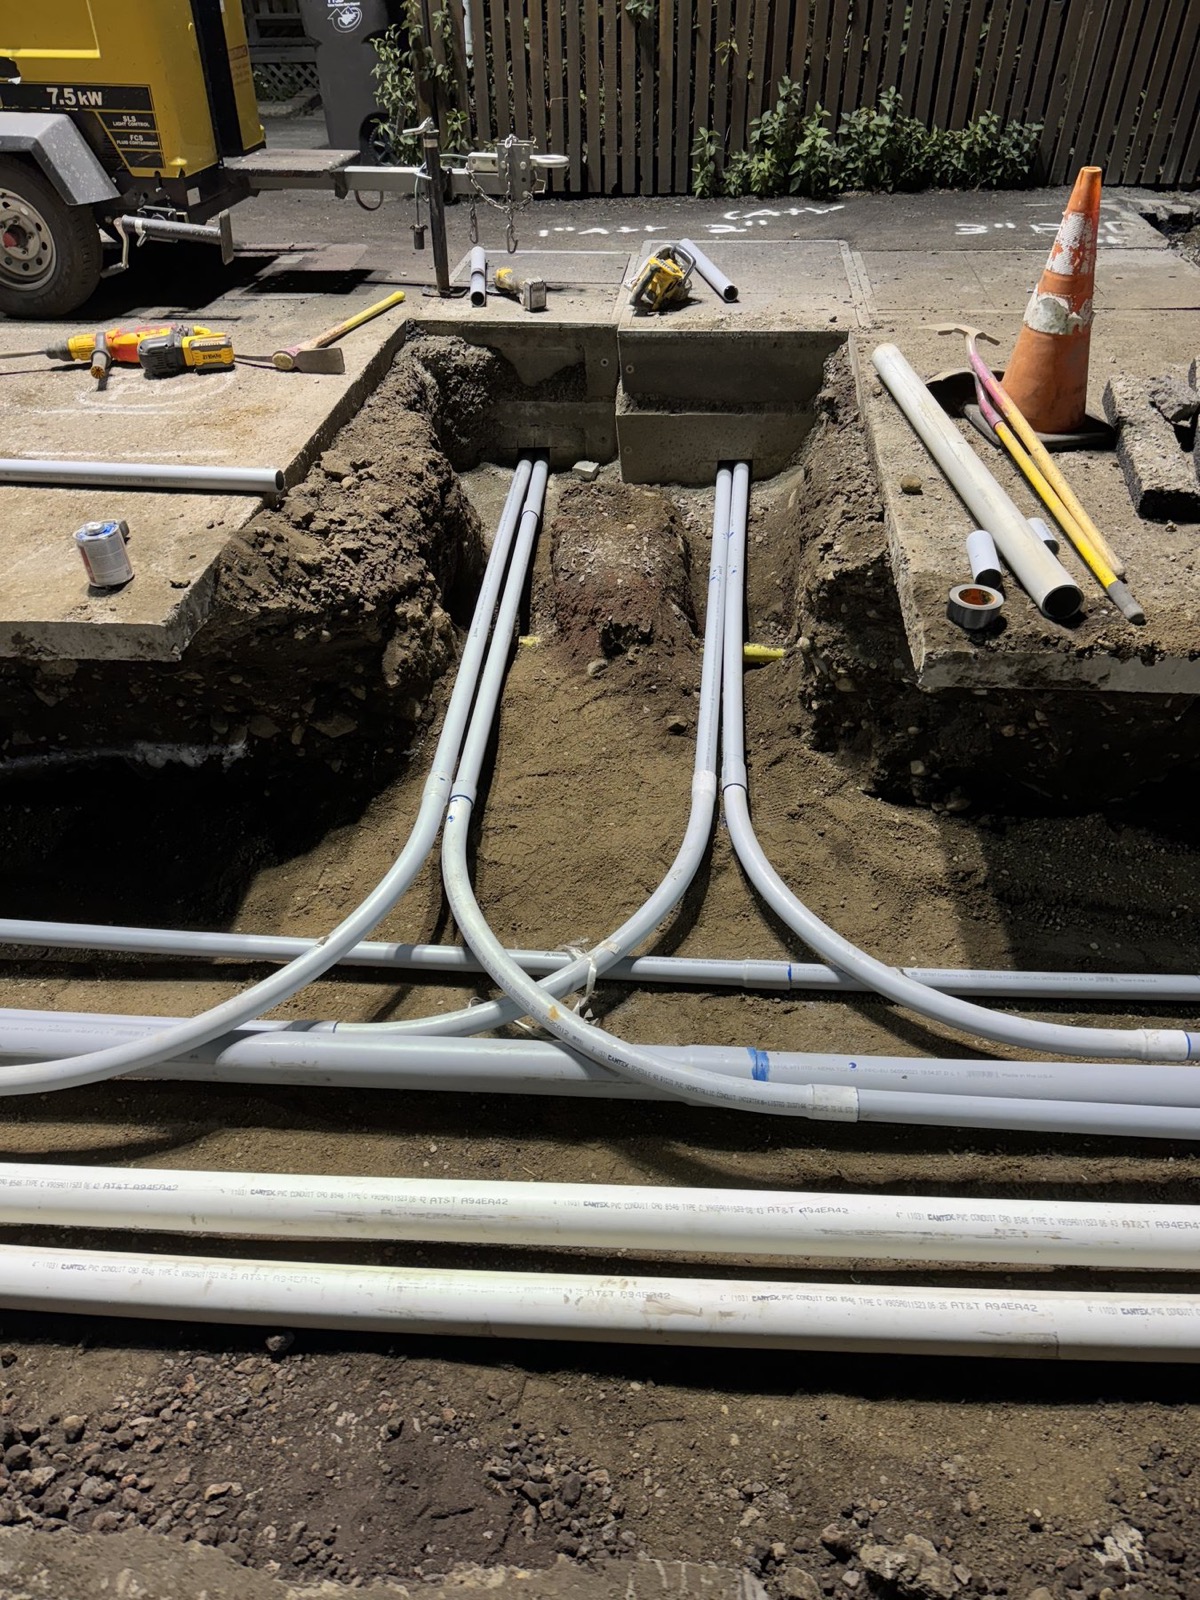
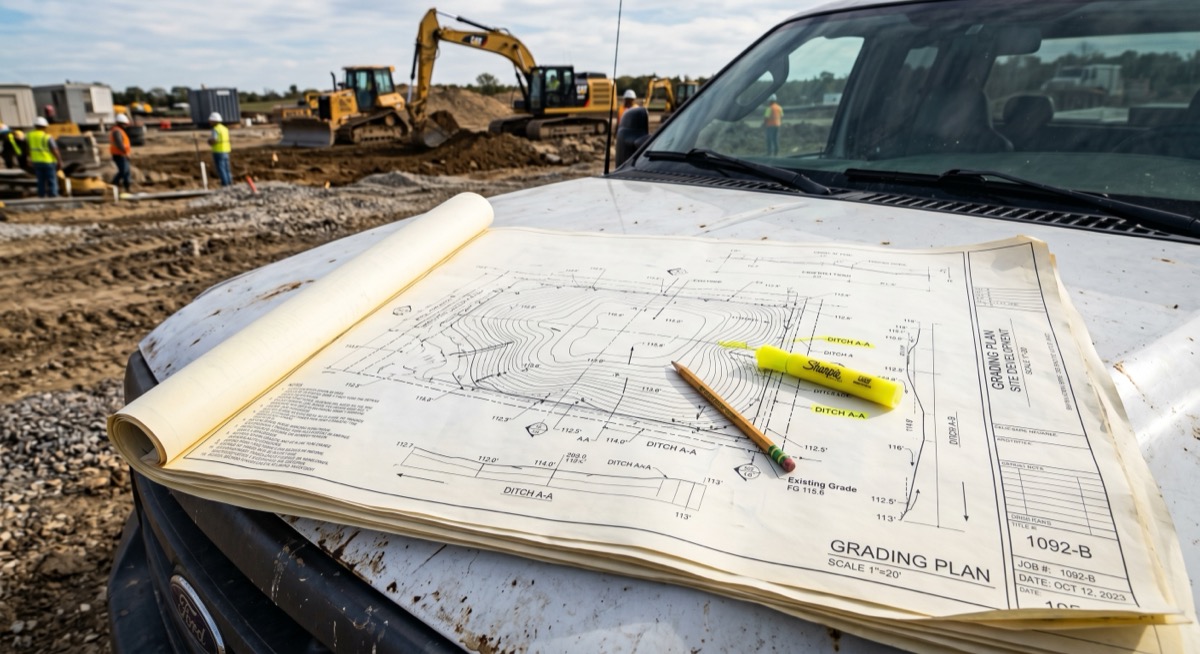
Some of the work only happens when the town is quiet. Utility crossings and conduit runs under pavement get done at night, under light towers, when the road can actually be closed without turning the whole grid into a parking lot. There's something clean about night work — no traffic, cool air, just the sweep of the conduit dropping into the pull box exactly the way the drawing said it should.
The Screen That Keeps Us Honest
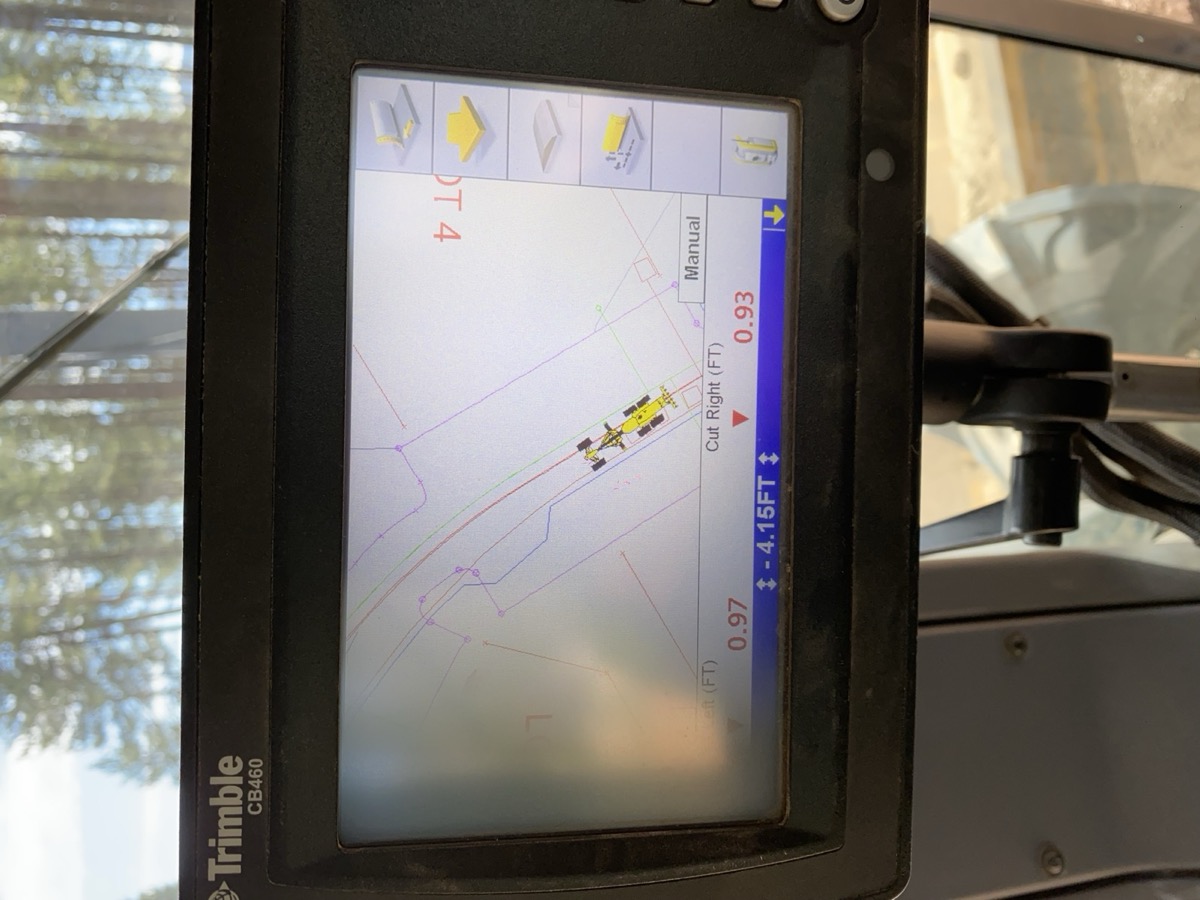
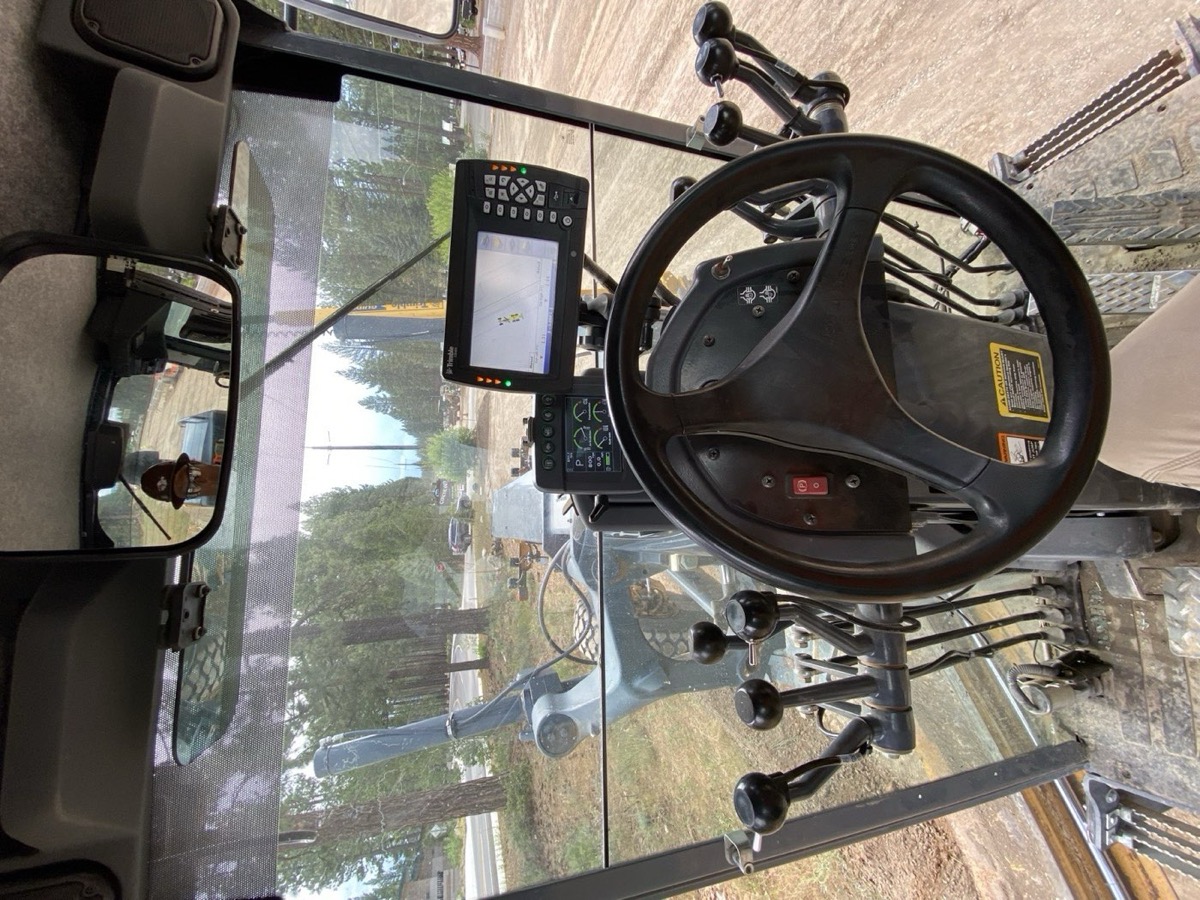
The other half of the sprint is not wasting motion. Machine control has changed what a short season can hold. The screen in the cab shows cut and fill in real time against the design surface — no waiting on stakes, no re-checking grade three times, no digging it twice. When you've only got five months, the hours that screen saves aren't a convenience. They're the season.
Cut left 0.97, cut right 0.93. The design surface rides along in the cab, and grade gets checked every second of the day.
By October the trenches will be closed, the pavement patched, and the machines staged for snow. Winter always collects up here. The whole job in July is making sure that when it does, you don't owe it anything.
Share
2 min read
Running Heavy Equipment at 6,000 Feet — What the Thin Air Takes
EK
Errol KerrOlympic Skier · Excavation Foreman
June 28, 2026ConstructionEquipment0 comments
Most equipment specs are written for sea level. Truckee is a mile up, and the mountain quietly skims power off every diesel, runs your coolers hotter, and gasses out anyone who isn't acclimated. Here's what altitude actually does to a machine and a crew, and how you work around it.
0 views
Read more
So, nobody warns you about this when you move your operation up into the Sierra — the mountain takes a cut off the top of everything. Your engine, your crew, your patience. Every machine I run sits around 6,000 feet, and the thin air doesn't care what the spec sheet promised down at sea level.
The Engine Math
A naturally aspirated diesel gives up roughly three percent of its power for every thousand feet of elevation. Run that math at 6,000 and you've handed back close to eighteen percent before you turn a bolt. That's the difference between a bucket that breaks rock and a bucket that polishes it.
The turbocharged machines claw most of it back — the turbo crams the thin air down to something the cylinders still recognize. The little naturally aspirated stuff just runs leaner and works harder for the same hole. You feel it in the hydraulics on a hot afternoon.
Heat Is the Other Half
Thin air cools worse than thick air. Same radiator, less air mass moving through it, so coolant and hydraulic temps climb faster than they ever did down in the valley. Up here I keep the coolers blown out clean and I watch the gauges in July like a hawk. A clogged cooler at sea level is an annoyance. A clogged cooler at 6,000 feet in the afternoon sun is a tow bill.
The Ground Fights Back
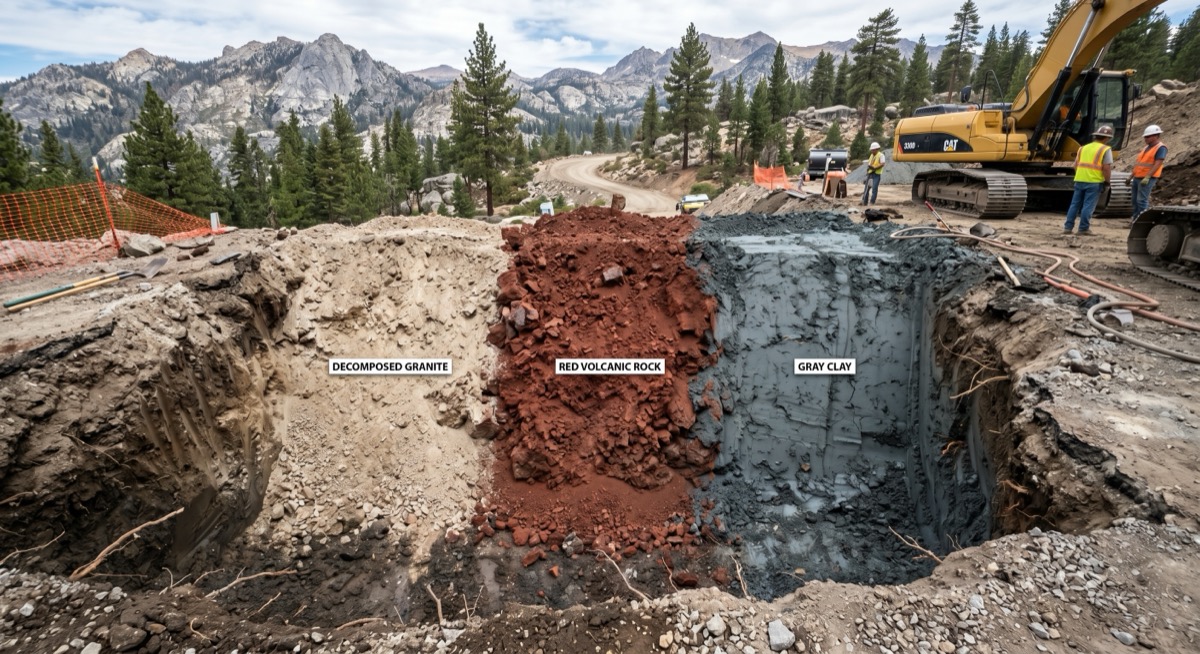
Then there's what you're digging into. The Sierra is granite, decomposed granite, and the occasional boulder the size of a chest freezer that the plans swore wasn't there. Teeth wear fast. You learn to read the ground by feel through the sticks — back off before you stall the machine, reposition, take a smaller bite. Patience saves more steel than horsepower does.
A clean trench is all technique — read the ground, take the bite the machine can actually pull, and let the hydraulics breathe between passes.
Cold Mornings, Short Windows
We froze at the tail end of June this year. That tells you everything about the season up here. Block heaters earn their keep, you let the hydraulics warm before you ask the machine for anything real, and you respect the cold start.
The dig season is short, so when the ground's open, you move. Alarm at 5:30, truck by 6:15, boots on the jobsite by 7, off by 3:30 if the day cooperates.
The Crew Runs on Thin Air Too
Don't forget the people. Altitude pulls the water right out of you, and the sun up here is brutal because there's less atmosphere standing between you and it. New guys gas out by lunch their first week and figure they're out of shape. They're not. They just aren't acclimated yet. Water, shade, sunscreen, and a hard hat that actually stays put.
None of this is in the operator's manual. That book was written for sea level. Out here you learn the mountain's edits the hard way, then you build them into the plan. Respect the altitude and it'll let you work. Ignore it, and it'll cook a machine just to prove the point.
Share
3 min read
GODZILLA EL NIÑO: The Monster Storm Season Coming to Lake Tahoe 2026-27
EK
Errol KerrOlympic Skier · Excavation Foreman
June 27, 2026WeatherSkiing0 comments
NOAA just issued an El Niño Advisory. SST anomalies are at +0.9°C and climbing. Models give a 63% chance this becomes a very strong event, the kind that only happens twice in a generation. The Pacific is loading up. Here's what the data says, what history tells us, and why I'm already waxing my skis.
0 views
Read more
The Setup
The Pacific Ocean is the hottest it's ever been measured. The equatorial Pacific hit 26.99°C in April 2026, blowing past the previous record. On June 11, NOAA issued an El Niño Advisory. Two weeks later the Niño 3.4 anomaly is at +0.9°C and still climbing. That's not a gradual warming. That's a rocket ship.
All 24 IRI/Columbia forecasting models agree El Niño will strengthen through the fall. NOAA puts the probability of El Niño during December 2026 through February 2027 at 96%. The chance of a very strong event: 63%. The CFSv2 forecast plume has the median peaking just above +2.0°C in the October-December window, with the warm end of the ensemble near +2.5°C. The previous record holders peaked at +2.6°C (2015) and +2.4°C (1997). If the warm end verifies, this event sits at the same table as both of them.
A downwelling Kelvin wave is moving east across the equatorial Pacific, dragging a deep pool of warm water with it — and NOAA's upper-ocean heat content charts are climbing right alongside the surface numbers. That's the engine no one can shut off. We're stacking a monster El Niño on top of the hottest ocean baseline in recorded history.
What It Means for Tahoe
When the Pacific jet stream locks onto the Sierra, the mountains don't negotiate. They just collect.
I'll be honest: the correlation between regular El Niño and Tahoe snowfall is historically weak. Of 27 El Niño winters on record, only 15 produced above normal snow. But the two verified very strong events, the true monsters of 1982-83 and 1997-98, both delivered exceptional Sierra snow. When the SST anomaly pushes past +2.0°C, the jet stream overwhelms the geographic uncertainty and funnels moisture directly into California. Regular El Niños are a gamble for Tahoe. Monster El Niños deliver.
The Numbers
We just limped through 348 inches. Below average. Now look at what the monster years produced. In 1982-83, Norden near Donner Pass recorded nearly 804 inches. Snowpack hit 15 feet by the end of February. In 1997-98, snowpack exceeded 200% of average and Squaw Valley reported 68 inches in 24 hours on New Year's Day.
SST Trajectory
Warm water piling east through the Niño 3.4 region — the classic El Niño pattern, aimed straight at California.
The Niño 3.4 anomaly was negative as recently as March. It crossed the +0.5°C El Niño line in June and hit +0.9°C by the last week of the month. That rate of change is aggressive.
The previous record El Niños peaked at +2.42°C (1997) and +2.57°C (2015). We're at +0.9°C in June with five months of strengthening ahead. Hold that curve through fall and we're knocking on the all-time record.
Ski Season Forecast
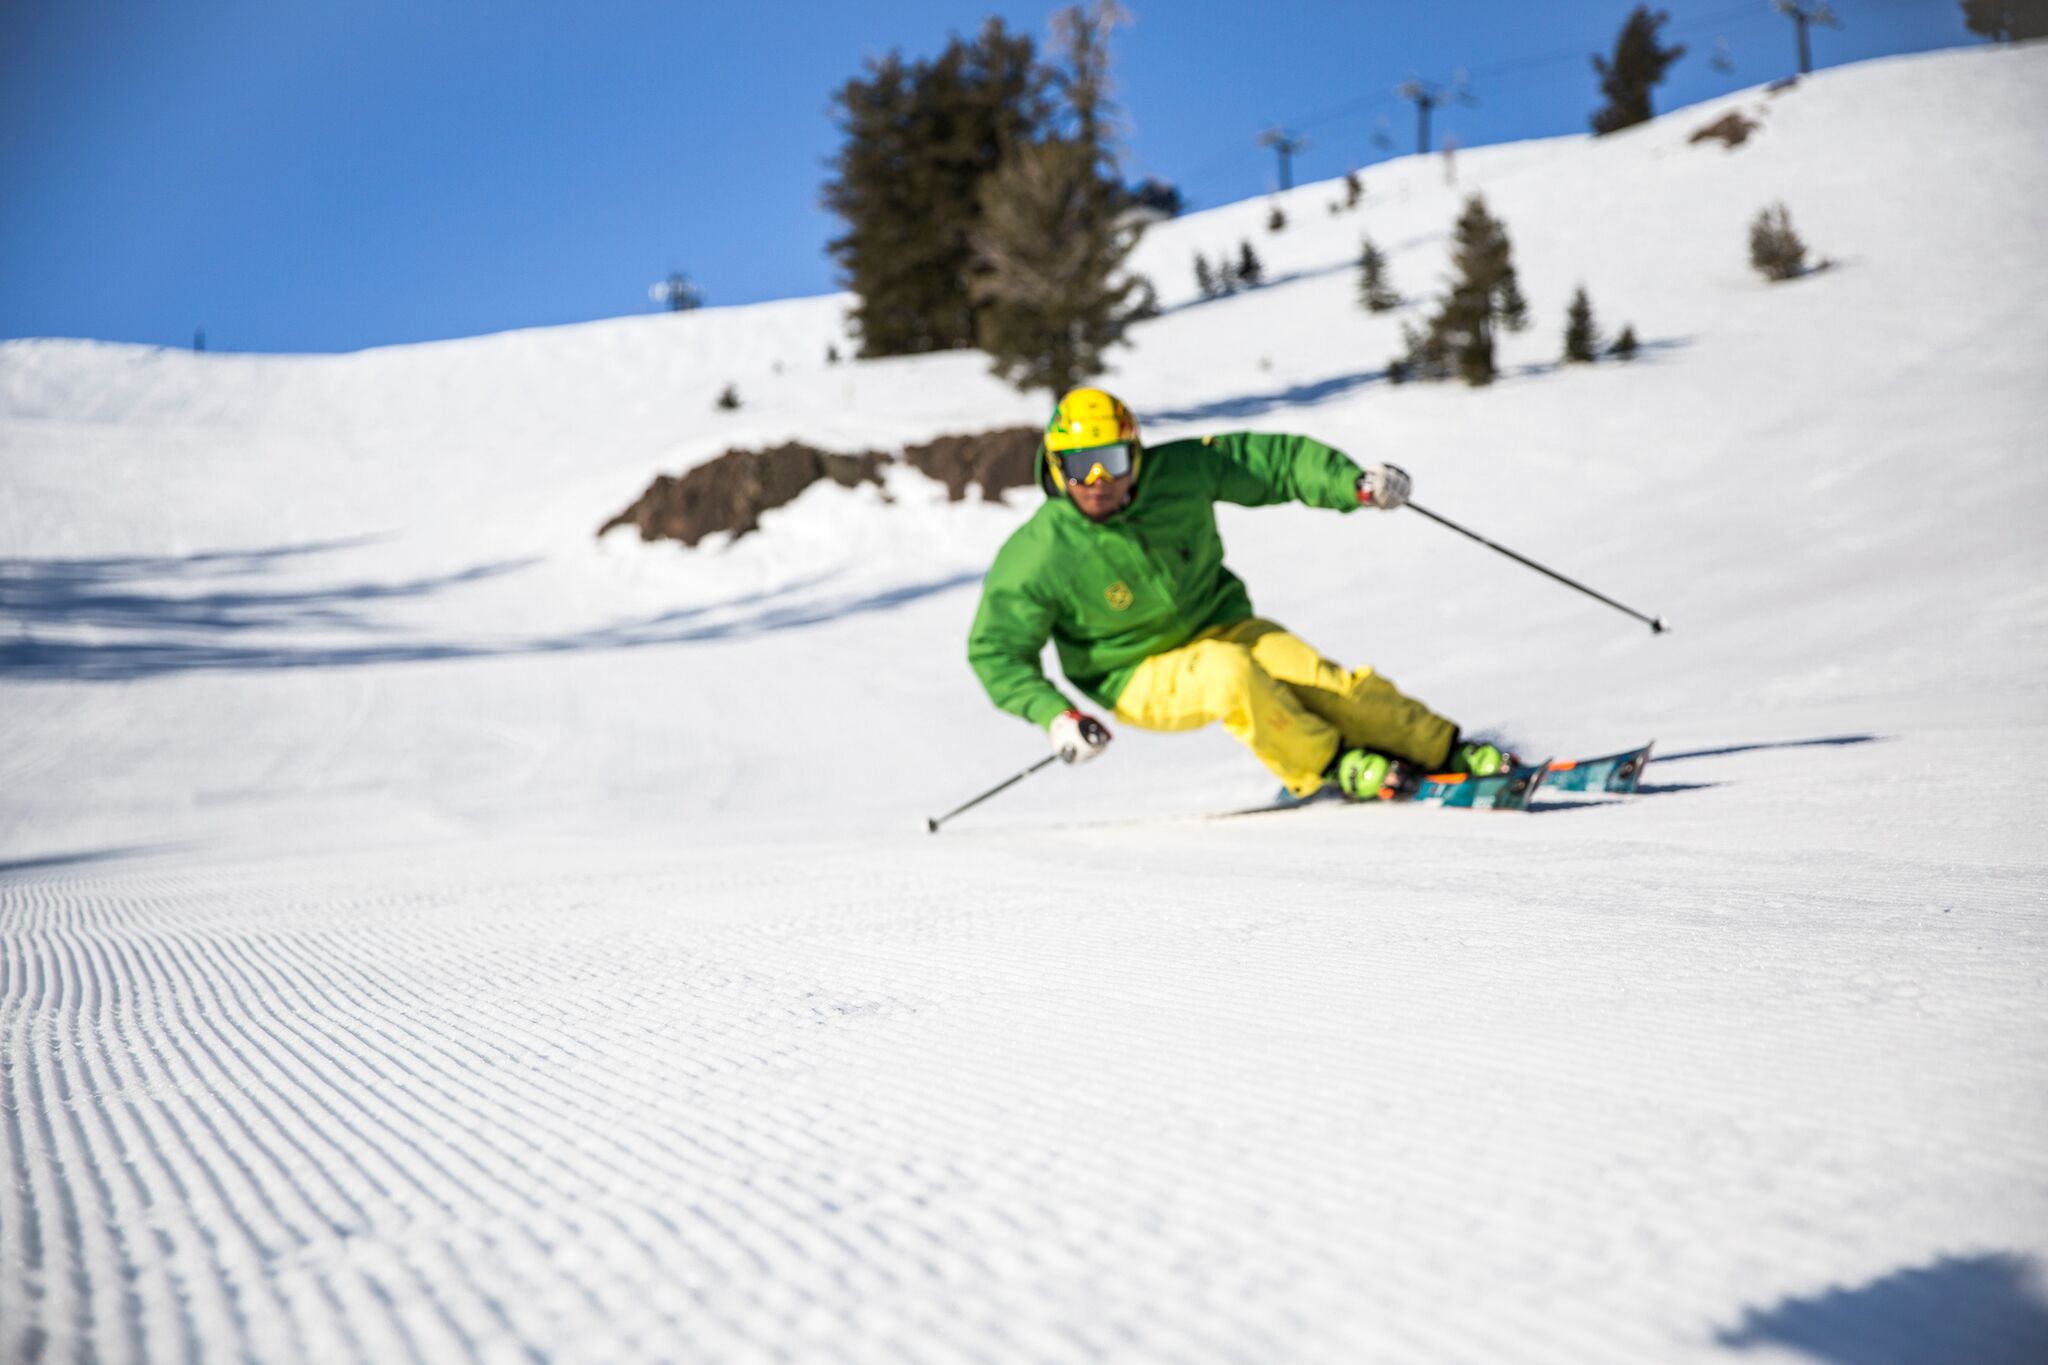
Bluebird day, rocks out, somebody sending it anyway. In a 700 inch season, all of this disappears.
If this event reaches +2.0°C, the historical analogs point to a 600 to 700+ inch season at Palisades Tahoe. Nearly double the average. Early season storms could hit by late October. We could be skiing into July. In 1982-83, it snowed every single weekend from January 15 to May 15.
Expect stacked atmospheric rivers, rain on snow events, 100 mph ridge winds, and avalanche cycles that run for days. Lake Tahoe rose 6.5 feet in 2016-17. A stronger event pushes that higher. This isn't just a big winter. It's a force of nature.
Get Ready Now
Season pass, gear check, real tire chains, a stocked pantry, and a roof rake. If you ski the backcountry, get your avalanche gear serviced and take the AIARE course. A 700 inch season is an avalanche season.
I carried the Jamaican flag at the 2010 Olympics. I've skied every type of snow this planet produces. I run a CAT 299 for a living and ski 60 plus days a year. When they start talking Kelvin waves, I start checking my boot liners.
The mountains looked tired by March. Now the ocean is running a fever nobody alive has seen: the warmest equatorial Pacific ever measured, a Kelvin wave feeding it from below, and every model on the board pointing the same way.
Respect the mountain. Get ready. See you out there.
This is a developing story. I'll be tracking the models, the SSTs, and the Kelvin wave all through the fall. Updates coming as the data evolves. If this thing stays on track, we're looking at a genuine Godzilla El Niño. Bookmark this page.
Share
3 min read
Late June Freeze — When the Sierra Reminds You Who's Boss
EK
Errol KerrOlympic Skier · Excavation Foreman
June 24, 2026WeatherTruckee0 comments
30°F Sunday morning. In late June. The Sierra doesn't care what month it is. Here's the full breakdown of this weekend's rare cold front, what it means for crews and the community, and how the weather engine flagged it days out.
0 views
Read more
So, it's June 24th and I'm writing about a freeze warning. Let that land for a second. Most of the country is sweating through triple digits right now, firing up the AC, complaining about humidity. Up here at 5,900 feet in Truckee we're about to watch the thermometer fall 47 degrees in three days — 77° midweek to 30° by Sunday morning. Thirty. Below freezing. In late June. If you've lived in the Sierra long enough, this doesn't surprise you. If you just moved here, welcome. The mountain doesn't read the calendar.
Live temperature overlay — watch the cold air mass slide over the Sierra crest in real time. Open full map
Here's what the models are showing. Friday brings the front door. Sustained winds out of the west-northwest climbing through the afternoon, gusts to 34 mph by evening. That's enough to blow tarps off a grade, send unsecured plywood sailing, and make any crane work a hard no. Saturday the upper-level trough digs in and drags cold Pacific air right over the crest. We're looking at up to a half inch of snow above 7,500 feet. Snow. On June 27th. The high stays right around 50, which means if you're working in a trench all day you're reaching for a hoodie by two o'clock. Then Sunday morning the bottom drops out. The snow shuts off, the sky clears, radiational cooling does its thing, and Truckee wakes up at 30°F.
The daily temperature swings this weekend are borderline absurd. We're talking 30 to 35 degree spreads between the overnight low and the afternoon high. You'll start the morning scraping frost off windshields and end the afternoon in a t-shirt. That kind of swing is hard on people, hard on equipment, and especially hard on fresh concrete.
For construction crews, this isn't a novelty forecast. This is a work-stopper if you're not paying attention. Concrete poured Thursday or Friday needs protection. If the surface temperature of a fresh pour drops below 40°F in the first 24 hours, you're looking at reduced strength, surface scaling, and potential microcracking that doesn't show up until months later. Blankets go on. Curing compounds go down. No exceptions.
Any exposed waterlines that haven't been buried and backfilled need to be drained or heat-traced by Friday afternoon, because a 30°F morning will freeze an exposed half-inch copper line before the sun gets to it. Fresh grading work is at risk too. Frost heave on an uncompacted subgrade can push your elevation a quarter inch overnight, and that quarter inch is the difference between passing and failing a grade check on Monday.
Live radar — track precipitation as the system moves through the northern Sierra.
Our crew runs a GO/NO-GO system for exactly this kind of event. Every morning the 8-model weather engine pulls forecasts from GFS, NAM, HRRR, ECMWF, and four other sources, stacks them against each other, and flags any day where conditions cross a threshold. Wind above 25 sustained is a yellow flag. Freezing temps on active pour work is a red flag. The system doesn't make the call for us, but it puts the data in front of the foreman before the crew leaves the yard. This weekend popped a red flag on Wednesday morning, three full days before the trough digs in. That's three days to cover pours, drain lines, and reschedule any wind-sensitive work. Three days because the models agreed early and the engine caught the convergence.
Crew Weather Status — This Weekend
Friday Jun 26
CAUTION
Gusts to 34 mph · High 62°F No crane ops · Secure loose material
Low 30°F · 0.5" snow · Hard freeze No pours · Protect lines · Drain exposed pipe
FREEZE + SNOW
Status from the 8-model weather engine · Updated Jun 25, 2026. Live at errolkerr.com/weather
For the community, the playbook is simple but it matters. Bring the pets inside Saturday night. Cover any tomato plants, pepper starts, or anything else you optimistically put in the ground in early June thinking summer was here. It wasn't. Disconnect and drain garden hoses. If you have exposed exterior plumbing on the north side of the house, a couple wraps of pipe insulation and twenty minutes of work saves you a burst pipe and a Sunday morning you didn't plan for. And if you're driving over Donner Pass this weekend, check conditions before you go. Snow at elevation combined with gusts pushing 36 mph means chain controls aren't impossible, and I've seen CHP close the summit for less.
If you want to track this front in real time as it moves through, the full dashboard is live at errolkerr.com/weather. Eight models, hourly resolution, wind and temperature overlays, all updated every six hours. Built it from the cab of a truck on a jobsite because the existing forecasts weren't cutting it for field decisions, and events like this weekend prove exactly why.
The Sierra giveth and the Sierra taketh away. Last week we had 15 hours of daylight and 80 degree afternoons. This weekend we might see frost on the windshield and snow on the ridgeline. Same mountain. Same town. Different week. If you're not ready for that range, you're not ready for Truckee. Stay warm out there.
Share
3 min read
The Shop That Drives: Eight Years With a DIY Carpentry Trailer
EK
Errol KerrOlympic Skier · Excavation Foreman
June 24, 2026DIYBuild0 comments
Eight years ago I turned a bare 6x12 cargo trailer into a rolling carpentry shop. It still cuts every two-by-four I touch. Here's what that build taught me about doing it right the first time.
0 views
Read more
So, back in late 2017 I bought a plain 6x12 enclosed cargo trailer. White aluminum box, diamond-plate floor, three clearance lights, and one dome bulb bright enough to find your own hand and nothing else. I didn't want another pile of tools to load and unload every morning. I wanted a shop that drives to the site. So I built one, and eight years later it's cut every two-by-four on every job I've run since.
Here's the lesson that matters most, and it lands before you ever touch a saw: wait. That trailer sat in my driveway for three months before the first cut. Three sets of sketches, two material lists, one full rebuild of the plan. A cargo trailer punishes hasty decisions. Drill the wrong stud, mount a saw at the wrong height, run your wires in the wrong order, and you pay for it for the next decade. The patience up front is the build.
Then the heaviest thing goes in first. I dropped a loaded Kobalt tool chest into place before I framed a single wall, because once you build cabinetry around 280 pounds of steel you can't pull it out again without tearing the whole cabinet down. Set your anchor, square your bench height off it, and build everything else to that line.
One thing nobody warns you about: the interior plywood on these trailers won't hold a lag bolt. It's stapled to thin metal channels behind the wall. Find those channels with a stud finder, every sixteen inches, and cleat your framing into the steel. Skip that step and your nice new cabinet rips off the wall the first time you hit a pothole on the way to the grade.
The finished interior — the Kobalt chest anchors the build, the DeWalt miter sits on its own platform, and the marine switch panel runs everything.
The phase I'm proudest of is the wiring, which is exactly where most trailer builds die. Somebody runs wires straight off a battery with no fuses, no labels, and no plan, then spends ten years wondering why nothing works. I did mine like a boat. Marine-grade tinned copper, every circuit on its own breaker and its own switch, and an eight-channel lit rocker panel so I can see at a glance what I left running. Tinned wire costs about double what regular automotive wire does and lasts about ten times as long. Trailers get damp. Spend the money.
Power runs two ways. Plug into shore power if the site has it, run off a deep-cycle battery if it doesn't. A shunt on the battery negative tells me exactly how much I have left instead of guessing, and guessing is what kills batteries. The saws sit on platforms aimed straight out the open ramp, so I can rip sixteen-foot stock without dragging anything outside. That single design choice drove the entire layout.
Three weeks of nights and weekends got me a finished shop on wheels. Eight years on, it's just part of the truck. I documented the whole thing end to end, every phase and every part and every mistake, over in the DIY section. Steal the whole build. That's what it's there for.
EK
Errol KerrOlympic Skier · Excavation Foreman
June 24, 2026PlatformConstruction0 comments
I'm writing this from the cab of my truck on a construction site in Truckee, tethered to my phone for internet. Every line of code, every product link, every weather model comparison you see on this site was built from spots exactly like this one.
0 views
Read more
So, it's Prime Day week and I'm sitting in the cab of my truck on a construction site outside Truckee, hotspotted off my phone, pushing code through a cellular connection that would make most developers cry. And I'm thinking about feedback loops.
Here's the deal. Every product on my deals page is something I actually use or have vetted for field work. The DeWalt impact driver. The Klein multimeter. The boots. When you click through and buy something, a small commission comes back to me. That's how affiliate works. But here's where it gets interesting.
That commission doesn't go into a vacation fund. It goes straight back into building this platform. Better hosting. More API calls for the weather engine. More time I can spend tuning the 8-model ensemble that tells my crew whether tomorrow is a GO or a NO-GO. The weather system on this site runs real forecasts for real crews making real decisions about whether to put people on a grade in the Sierra.
I built the entire weather engine from places like this. Tailgates, truck cabs, hotel rooms after 10-hour days in the dirt. Same mentality I had training for the Olympics. You don't wait for perfect conditions. You work with what you have and you make it count.
So when I say every click matters, I mean it literally. A drill bit purchase funds a weather API call that might keep a crew off a ridge during a lightning cell. That's the loop. That's why I'm out here building this thing from a construction site instead of waiting for a desk and a fiber connection.
The platform doesn't care where the code comes from. It cares that the code is right.
Click something. Build something. That's how it works.
3 min read
Solstice Week in Truckee: What the Models Called and What Showed Up
EK
Errol KerrOlympic Skier · Excavation Foreman
June 21, 2026WeatherTruckee0 comments
We hit the longest days of the year this week and the weather mostly cooperated. Warm afternoons, cold mornings, and a couple of skies that looked like they wanted to do something and then thought better of it. Here's how the week actually played out and how the forecast ensemble I run did against reality.
0 views
Read more
So, we just came through the longest stretch of daylight of the year, and for once the sky played along. If you were outside in Truckee this past week you already know the drill: warm afternoons, cold mornings, and a couple of afternoons where the clouds loaded up like they meant business, then quit before dinner.
I check the forecast ensemble every morning before the truck rolls. Here's how the week actually went, and how the models did against it.
The Setup
A broad ridge of high pressure parked itself over the Great Basin for most of the week. That's the classic late-June pattern up here. High pressure means sinking air, sinking air means clear skies and warming temperatures, and clear skies at 6,000 feet means the heat bleeds right back out overnight. Daytime highs ran in the upper 70s to low 80s in town. Mornings dropped into the high 30s and low 40s. That 40-degree daily swing is normal for us, and it catches flatlanders off guard every single summer.
Afternoon cumulus building over the Sierra crest. When you see towers like this stacking up by 1 PM, that ridge is pumping moisture upslope.
Models vs Reality
The 8-model ensemble nailed the big picture days out. Every member agreed on the ridge, agreed on the warming trend, and agreed the valley would stay dry. When the models all shake hands like that, you can plan a week of work with confidence. We did.
Where they argued was the middle of the week. A few members tried to break out afternoon thunderstorms over the crest, pumping up CAPE values as a little moisture sneaked in from the south. Two models went all-in on storms. Three kept it bone dry. The rest split the difference with isolated afternoon cells.
What actually happened was a classic Sierra tease. The cumulus built tall and dark over the Carson Range one afternoon, we heard a couple of rumbles up high, and then the whole thing fell apart by dinner without dropping much on the valley floor. The members that hedged toward isolated cells got it right. The two models screaming severe over-cooked it, which is exactly what high-resolution models tend to do with mountain convection. They see the instability and assume the worst.
Why It Matters on the Grade
This isn't just weather-nerd stuff. When the models disagree on afternoon storms, that's a GO with a watch, not a NO-GO. We worked, we kept an eye on the sky, and we had a plan to pull off the high ground if a cell organized. It never did. Reading the spread between the models is how you avoid both burning a workday for a storm that never comes and getting caught flat-footed by one that does.
Looking Ahead
The ridge holds into early next week. Expect more of the same: warm, dry, and breezy in the afternoons. The one thing I'm watching is a weak disturbance the long-range members hint at toward the end of the month that could drag monsoon moisture north and bump our thunderstorm odds back up. Long range, low confidence, but it's on the board.
Enjoy the long days while they're here. They don't last.
Share
VLOG
12 MIN
EK
Errol KerrOlympic Skier · Excavation Foreman
June 20, 2026VlogSki CrossDocumentaryOlympics
Errol Kerr and Crew Documentary — The Full 12 Minutes
Somebody put a camera on us during the ski cross years. Race results, mountain footage, and the crew that made all of it possible. Twelve minutes of what the grind actually looked like before the Olympics, before the flag, before any of it made sense to anyone but us.
0 views
Read more
So, this video has been sitting on my YouTube channel since December 2013. Twelve years. Two hundred and change views. I never promoted it, never shared it, never really talked about it. But it's one of the most honest pieces of footage from that entire chapter of my life, and I think it's time people saw it.
The documentary is about twelve minutes long and it covers me and my crew during the ski cross racing years. This was the period where I was grinding through the circuit, chasing FIS points, trying to qualify for international competition, and doing it all with basically no budget and no federation behind me. Just a crew of people who believed in the mission and were willing to show up.
What You're Looking At
The footage opens on the National Brotherhood of Skiers website. The NBS has spent decades putting Black athletes on the U.S. team and getting them to the Olympics. They run the largest continuously operating ski convention in America. Night parties, competitions, fundraisers, youth camp, the whole program. Their Olympic Scholarship Fund helped make it possible for athletes like me to compete when nobody else was writing checks.
That NBS connection wasn't a footnote. It was a lifeline. When you're a Black ski racer trying to put together a campaign with no money and no infrastructure, the people and organizations who step up are the difference between racing and watching from the couch. The Brotherhood stepped up.
The Race Sheet
There's a shot in the documentary of a race results board. Handwritten. Old school. And if you look close you can see it: KERR, E. Highlighted. That's what it looked like. You'd show up to a race, check the start list taped to the timing shack, find your name, and that was your whole world for the next ninety seconds. Everything you had been training for, every gate you drilled, every hill you hiked because you couldn't afford a lift ticket, it all came down to what happened between the start wand and the finish beam.
I loved that part. The simplicity of it. You're either fast enough or you're not. The clock doesn't lie. The clock doesn't care about your story or your background or how hard you worked. It just measures. And on the days when the number next to your name was lower than everyone else's, nothing in the world felt better.
The Crew
The title of this documentary is "Errol Kerr and Crew" and that word matters. Crew. None of this happened alone. You see people in this footage, on the mountain, at the races, in the parking lots, and every single one of them was part of making it work. Coaches who donated their time. Friends who drove twelve hours to hand me a pair of skis because mine broke. My mom, Catherine, who held the whole operation together from the administrative side while I was out there trying not to crash into a fence at 60 miles per hour.
You don't race ski cross solo. It's a team sport disguised as an individual one. Somebody waxes the skis. Somebody films the runs so you can study your line. Somebody makes the phone calls to get you registered. Somebody picks you up when you yard sale into the B-net and can't feel your left knee. That's the crew. And this documentary catches a piece of that.
The Soundtrack
We cut the whole thing to Alter Bridge and Michael Franti. Two Alter Bridge tracks off the Blackbird album and a Michael Franti and Spearhead track from Yell Fire. That was the music of that era for me. Alter Bridge is heavy enough to match the intensity of racing but melodic enough to carry a story. Myles Kennedy's voice over footage of the mountains just works. And Franti brought the soul. The positivity. The "keep going" energy that you need when everything around you says quit.
Music matters in a project like this. It tells you what the filmmaker was feeling. And what I was feeling was: this is hard, this is beautiful, and I'm not stopping.
Why Post This Now
I'm sitting in Truckee in 2026. I run excavation crews for a living. Lindsay and I have a baby on the way. I'm a completely different person than the guy in this documentary. But I'm also exactly the same person. The guy who shows up early, works until the job is done, surrounds himself with good people, and doesn't quit when it gets hard.
Ski cross taught me that. The crew taught me that. And this little twelve-minute documentary that's been collecting dust on YouTube for over a decade is proof of it.
So hit play. Watch the whole thing. See what it looked like before the Olympics, before the flag, before any of it made sense to anyone but us. It's raw, it's real, and it's twelve minutes of my life that I'm proud of.
Two hundred views in twelve years. Let's fix that.
Born in Brooklyn. Raised in Lake Tahoe. Squaw Valley Ski Team. U.S. Ski Team. Then I walked away from all of it to represent Jamaica, the land of my father, at the 2010 Vancouver Olympics. Sole athlete. Flag bearer. Ninth in the world. There’s no golden ticket. You earn everything.
0 views
Read more
So, let me take you back. Born in Flatbush, Brooklyn. April 12, 1986. My parents met in Jamaica — my mom Catherine was on vacation, met my father, fell in love, got married on the island. Jamaica was in my blood before I took a breath.
But I wasn’t in Brooklyn long. Before I turned one, my mother moved us to California. Lake Tahoe. The Sierra Nevada. And that’s where everything starts.
I grew up on the mountain. Not visited. Not vacationed. Grew up. Snow wasn’t some novelty I discovered later. Snow was my whole childhood. While kids in Brooklyn were playing basketball on concrete, I was standing at the top of a mountain watching the sun come up over the ridge. Somebody put me on skis when I was four, and that was it. Game over. The closest thing to flying without leaving the ground.
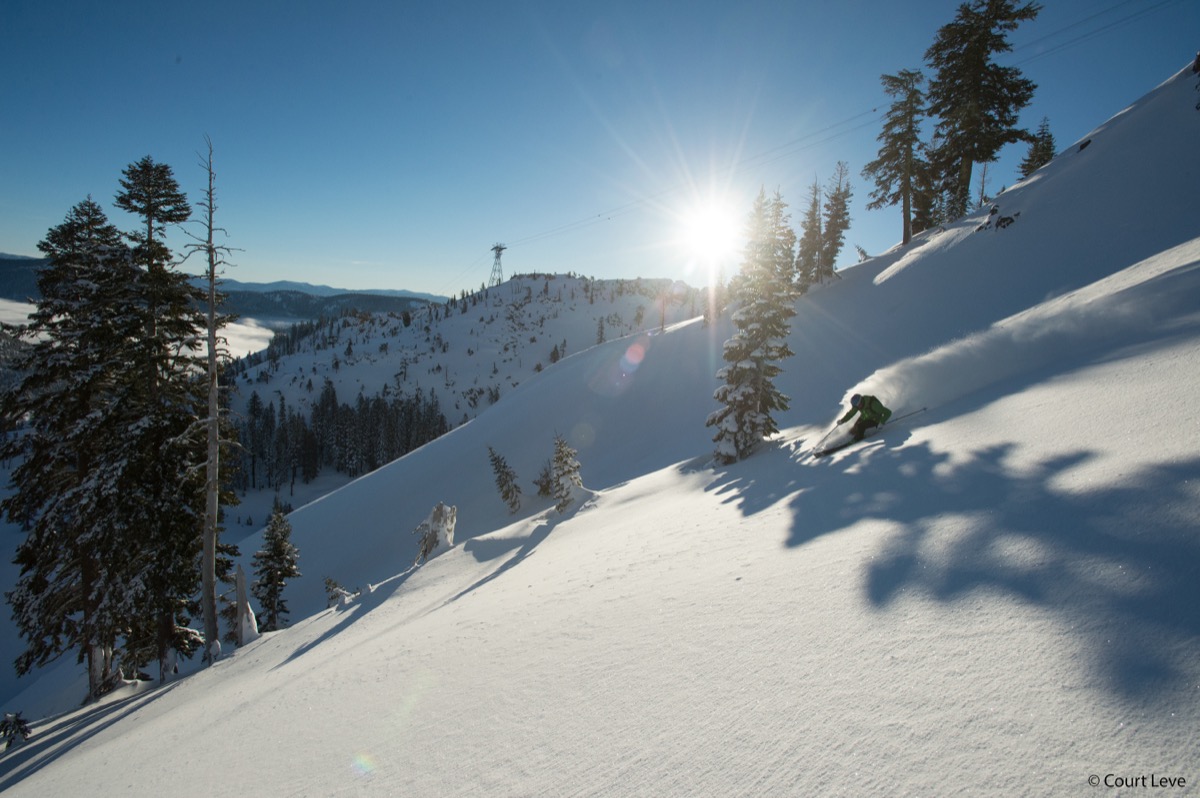
Charging through Sierra powder. This is what growing up in Tahoe looks like.
I joined the Squaw Valley Ski Team — Palisades Tahoe now — and that’s where I learned to race. Real racing. Gates, courses, the whole program. Same mountain as Daron Rahlves, Marco Sullivan, Travis Ganong. Squaw produced some of the best ski racers in the country, and I was right there in the mix. A Black kid on the ski team in the ’90s in Tahoe? I got the looks. But I wasn’t a tourist. I was a local. And the mountain doesn’t care what you look like. Gravity works the same on everybody.
I was also racing BMX and motocross, which sounds unrelated until you realize that reading terrain at speed and fighting for position in a pack is exactly what ski cross demands. I just didn’t know it yet.
The U.S. Ski Team
Then ski cross entered the picture. Four racers, one course, first to the bottom wins. No judges, no style points. Just racing. It combined everything — alpine technique from Squaw, terrain instincts from motocross, pack-racing mentality. The sport was built for me.
I made the U.S. Ski Team. My coach was Tyler Shepherd, who ran the U.S. skicross program. My rookie World Cup season, 2007-08: twelfth at Les Contamines. Eighth at Meiringen-Hasliberg. Fifth at X Games Buttermilk Mountain — in my first year. Ranked 24th in the world. Stars and stripes, World Cup starts, the whole dream.
Full send above Lake Tahoe. Photo by Keoki Flagg.
And then I walked away from it.
For the Land of My Father
My father was Jamaican. He died when I was twelve. That changes a kid. I’d been wanting to ski for Jamaica for nearly a decade before it finally happened.
So here’s the decision nobody understood: I was a ranked member of the United States Ski Team. The best program in the world. Nobody walks away from that.
I walked away from it.
I teamed up with coach Carlos Guisado and built Jamaica’s ski program from scratch. No federation. No funding. No coaching staff. No equipment warehouse. You know Cool Runnings? The fun part is Hollywood. The reality is a hundred phone calls, letters to people who don’t write back, and figuring out FIS certification for a country that’s never had a ski team.
I earned every FIS qualifying point on courses in the Alps and Japan, sleeping in budget hotels, running a three-person operation while the Americans and Austrians showed up with fifteen-person crews. Tenth at the Skicross World Championships in Inawashiro, Japan. For Jamaica. A country where it’s never snowed.
Vancouver 2010
February 12, 2010. BC Place Stadium, Vancouver. Sixty thousand people. The Opening Ceremony of the XXI Winter Olympic Games.
I was the sole athlete representing Jamaica. Every other country walks in with a delegation. Jamaica walks in with one guy. Me. And they hand me the flag.
Carrying the Jamaican flag at the Vancouver 2010 Opening Ceremony. Green, black, and gold. My father’s colors.
Standing in that tunnel, waiting for them to call “Jamaica,” I lost it. Everything I’d fought for. Every door that got slammed. Leaving the U.S. Ski Team. My father, who never got to see any of it. All of it at once.
Then the announcer says it. “JAMAICA.” And you walk out.
Sixty thousand Canadians losing their minds for Jamaica. I walked slow. Moments like that don’t come back. You hold the flag high and you walk tall.
Nine days later. Cypress Mountain. The first ski cross event in Olympic history — the sport had never been in the Games before. Eight seconds in the start gate. Pure adrenaline and focus. Then the gate drops, everything goes quiet in your head, and your body takes over. React. Absorb. Attack.
I finished ninth. Out of thirty-three of the best ski cross racers on the planet. The best result by a Caribbean athlete at any Winter Olympics. Ever. A kid from Flatbush, Brooklyn, who grew up on the Squaw Valley Ski Team, made the U.S. Ski Team, walked away to represent his father’s island, and finished ninth in the world.
The Mountain Doesn’t Stop Giving
I live in Truckee now. I run excavation crews — heavy equipment, underground utilities. Everything the mountain taught me goes straight into the work. Preparation. Composure under pressure. Respect for the terrain. The mountain can end you if you don’t respect it. A trench can do the same. First one there, last one to leave. That’s not a bumper sticker. That’s how you build something real.
I still instruct at Palisades Tahoe in the winters. The mountain that raised me as a racer, I give back to by putting the next generation of kids on snow. Lindsay and I are building our life here. A baby on the way. The same mountains that raised me, turned me into a racer, then an Olympian, then a foreman, and now a father.
Summit day at Palisades. The Sierra stretching out forever. This is why I stayed.
There’s no golden ticket. There never was. You earn everything — every turn, every race, every flag you carry, every trench you dig. The mountain doesn’t care where you came from. It cares if you show up.
Snow Removal at Palisades Tahoe — When the Mountain Buries the Village
KCRA Channel 3 came up to Palisades Tahoe Village to see what snow removal looks like when the Sierra dumps three feet overnight. Here's what 24/7 operations at 6,100 feet actually involve, and why the mountain doesn't wait for anyone.
0 views
Read more
So, a TV crew came up this past winter to do a story on snow removal at the Village and found out the guy running one of the loaders used to race ski cross for Jamaica at the Olympics. That guy's me. The KCRA segment aired February 24, 2026, and the video above is the full piece. But the real story is what happens out there every time the Sierra decides to bury us.
I work snow removal at Palisades Tahoe Village for Ruppert Inc. When a big storm rolls in, and up here that can mean two to four feet overnight, we go to 24/7 operations. There's no waiting until morning. There's no "we'll get to it tomorrow." The Village has to be open. Guests are arriving, employees need to get to work, and the storm doesn't run on anyone's schedule.
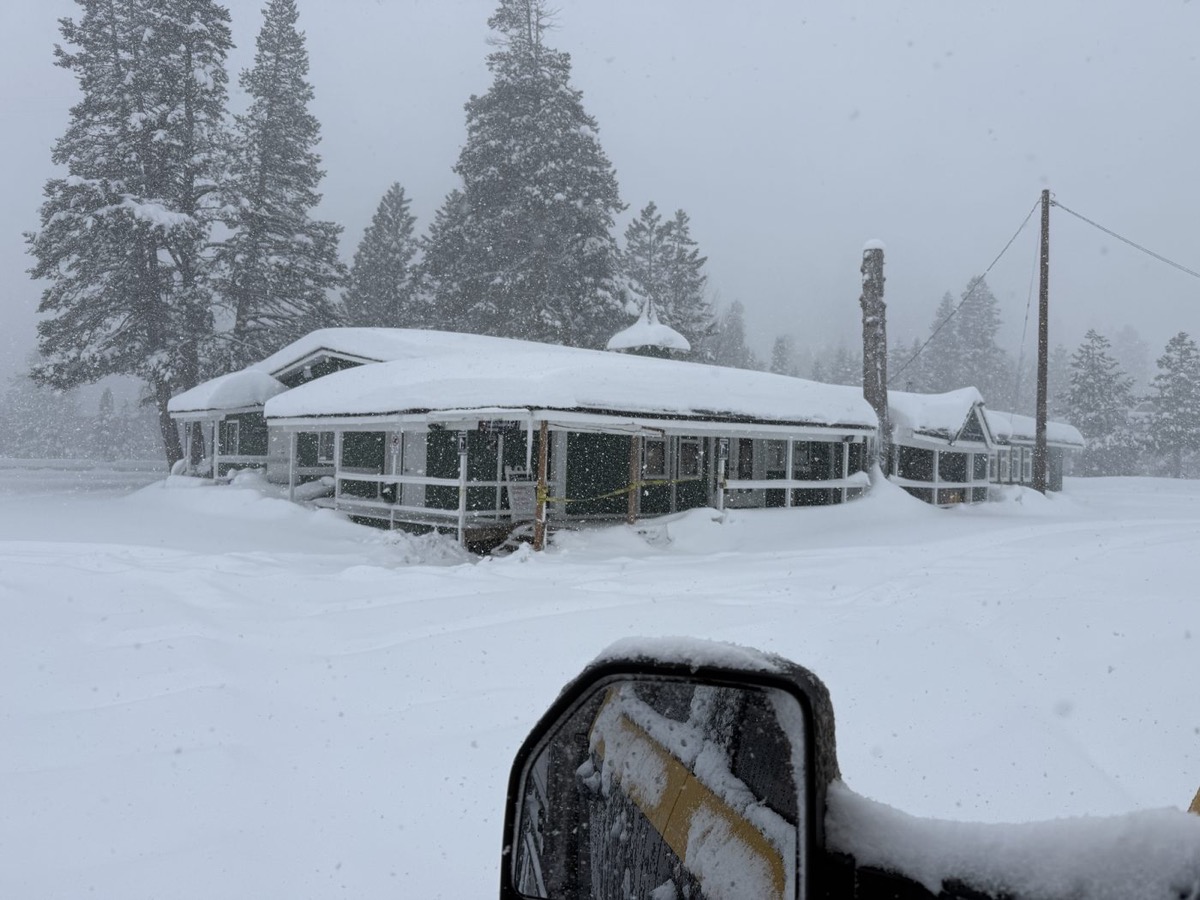
Palisades Tahoe Village during a heavy storm cycle. This is what we wake up to before the loaders start rolling.
The operation runs loaders, plows, and hauling trucks around the clock during storm cycles. We push snow out of the pedestrian areas, clear the access roads, open up parking structures, and haul the excess out to designated snow storage areas. At 6,100 feet, the snow is heavy and it piles up fast. You're not just plowing a dusting off the sidewalk. You're moving walls of snow taller than the loader cab.
The nights are where the real work happens. Most of the heavy clearing runs between about 10 PM and 6 AM, when foot traffic is lowest and we can move freely through the Village without dodging pedestrians. You're out there in the dark, running under lights, snow still coming down, pushing load after load. The loaders are running constant cycles, and the hauling trucks are making trips out and back all night.
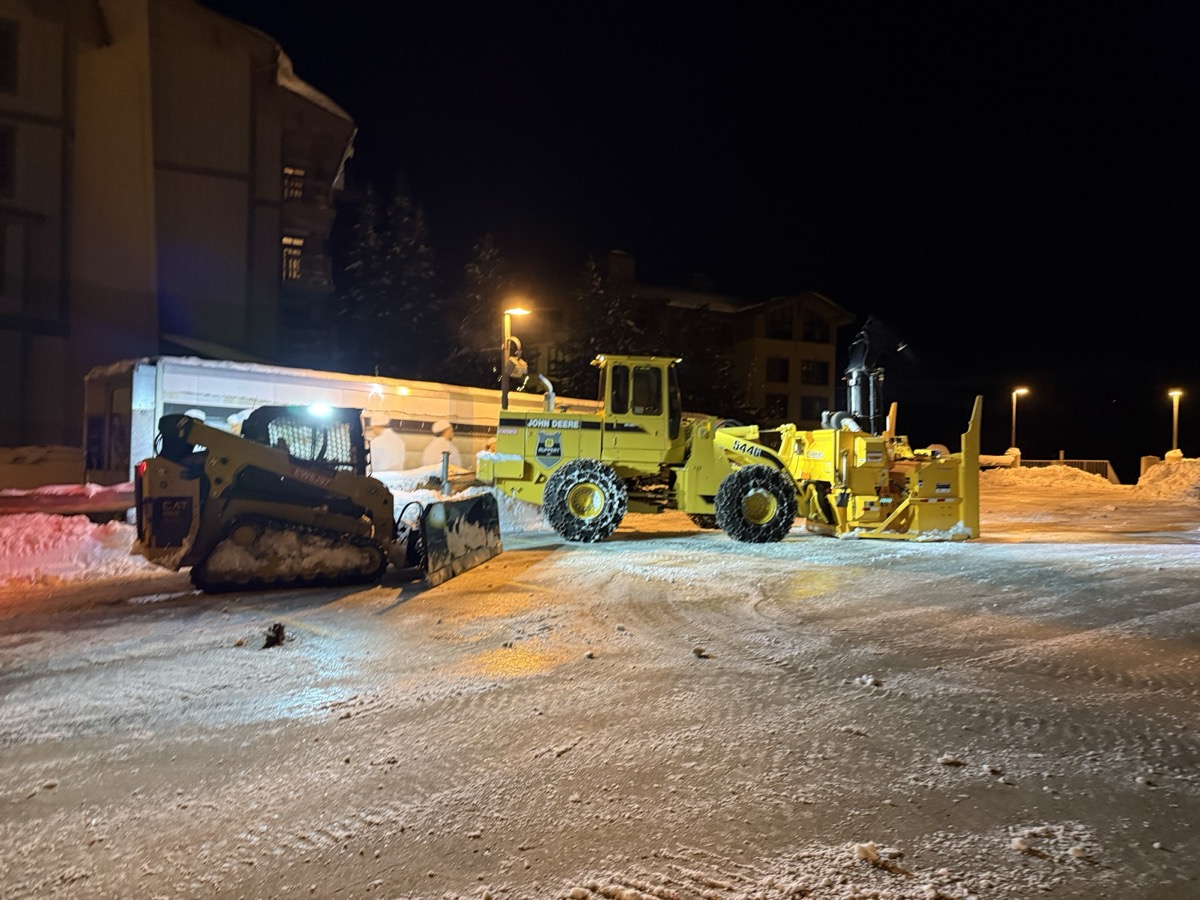
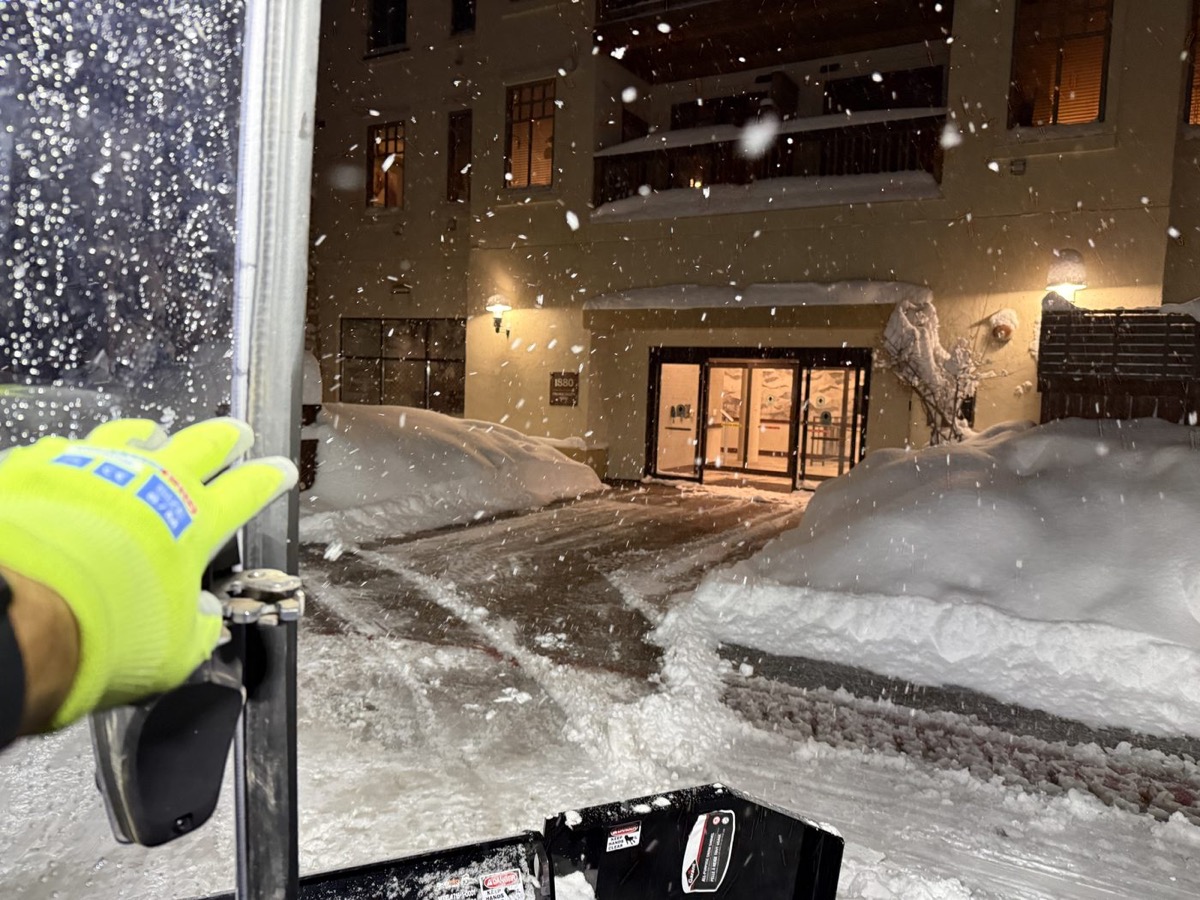
Night ops. The CAT with the pusher box and the John Deere with the blower, staged under the lights between rounds.
What people don't realize about snow removal at elevation is the volume. A three-foot storm across the Village footprint is thousands of cubic yards of snow that has to go somewhere. You can't just push it to the side and call it done. It stacks up. After a few storms the piles are 15, 20 feet tall and you're running out of room. That's when the hauling trucks earn their keep, moving snow off site so you have somewhere to put the next round.
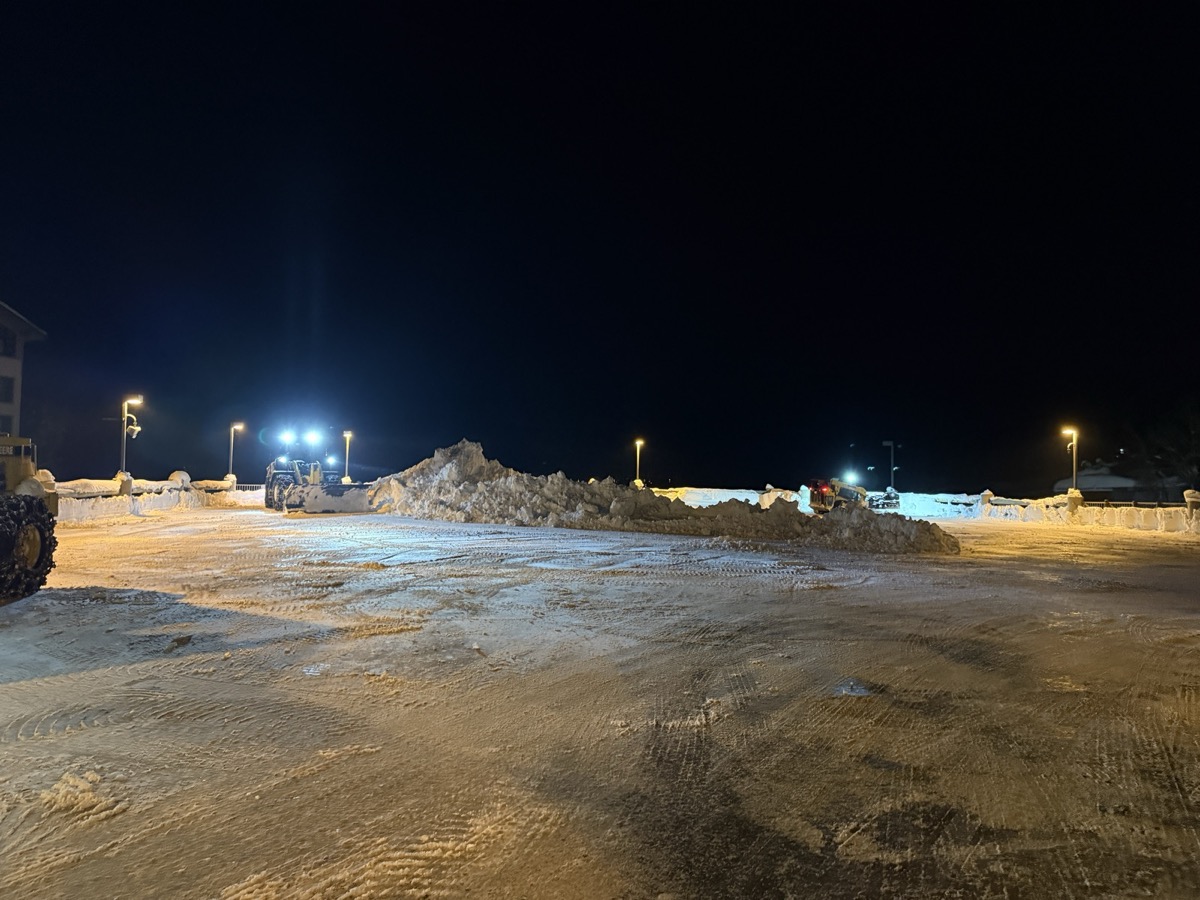
Middle of the night shift. The lot's clear, the piles are pushed to the edges, and there's still a machine working the stack in the back.
The cold is a factor too. We're regularly working in single digits, sometimes below zero with wind chill. Equipment gets sluggish. Hydraulics are slower to warm up. Your hands stop working right after a while even with good gloves. But the work doesn't stop. The storm doesn't stop, so we don't stop.
I've been doing snow removal up here for several seasons now, and every winter is different. Some years we get hammered early and it never lets up. Some years it's dry until January and then the sky opens up. But the job is the same every time: when the snow falls, we move it. Before the sun comes up, before the Village opens, before anyone walks out their front door, the crew has already been out there for hours making sure the place is passable.
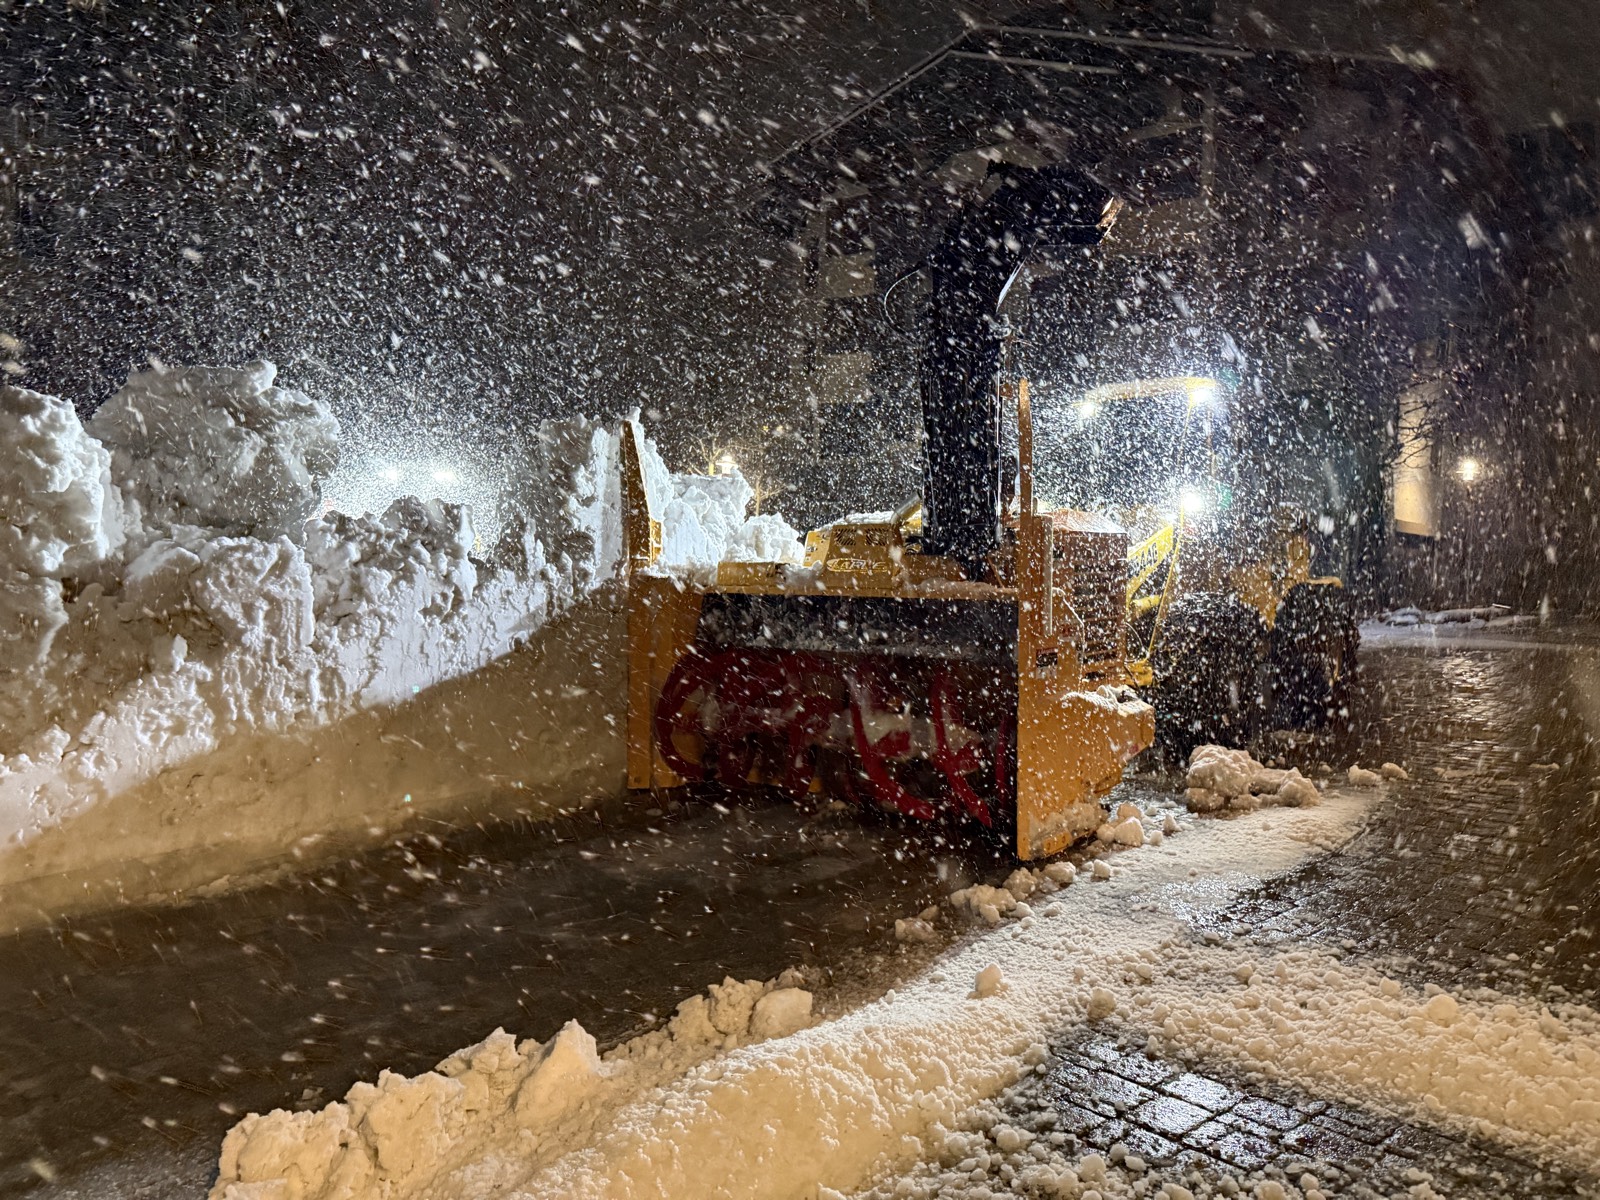
Snowblower running at night. When the piles get too tall for the loaders to stack, we blow it out.
That KCRA piece was a good look at what we do. Most people see the finished product, the cleared walkways and the open roads. They don't see the 14-hour overnight shifts, the frozen equipment, or the crew grinding it out in a blizzard. Now they have a better idea. And yeah, the Olympian thing makes for a good headline. But the work is the work regardless of what you did before you got here. The mountain doesn't care about your resume. It just wants the snow moved.
Compaction Testing: How to Know Your Backfill is Right
EK
Errol KerrOlympic Skier · Excavation Foreman
June 20, 2026ExcavationField Guide0 comments
You can fill a trench in an hour and spend the rest of the week fixing it if the compaction is wrong. Here's how I make sure every lift passes the first time, what the testing methods actually measure, and why moisture content is the variable most crews ignore.
0 views
Read more
Compaction is the thing that separates a backfill job that holds up from one that settles, cracks the pavement, and turns into a callback six months later. I've seen crews dump material in a trench, run a plate compactor across the top, and call it good. That's not compaction. That's a warranty claim waiting to happen.
So here's what compaction actually means. You dig a trench, you put material back in, and that material is loose. Air voids everywhere between the particles. Compaction is you mechanically forcing those particles closer together, squeezing the air out, making the soil denser. Denser material is stronger material. It stays where you put it.
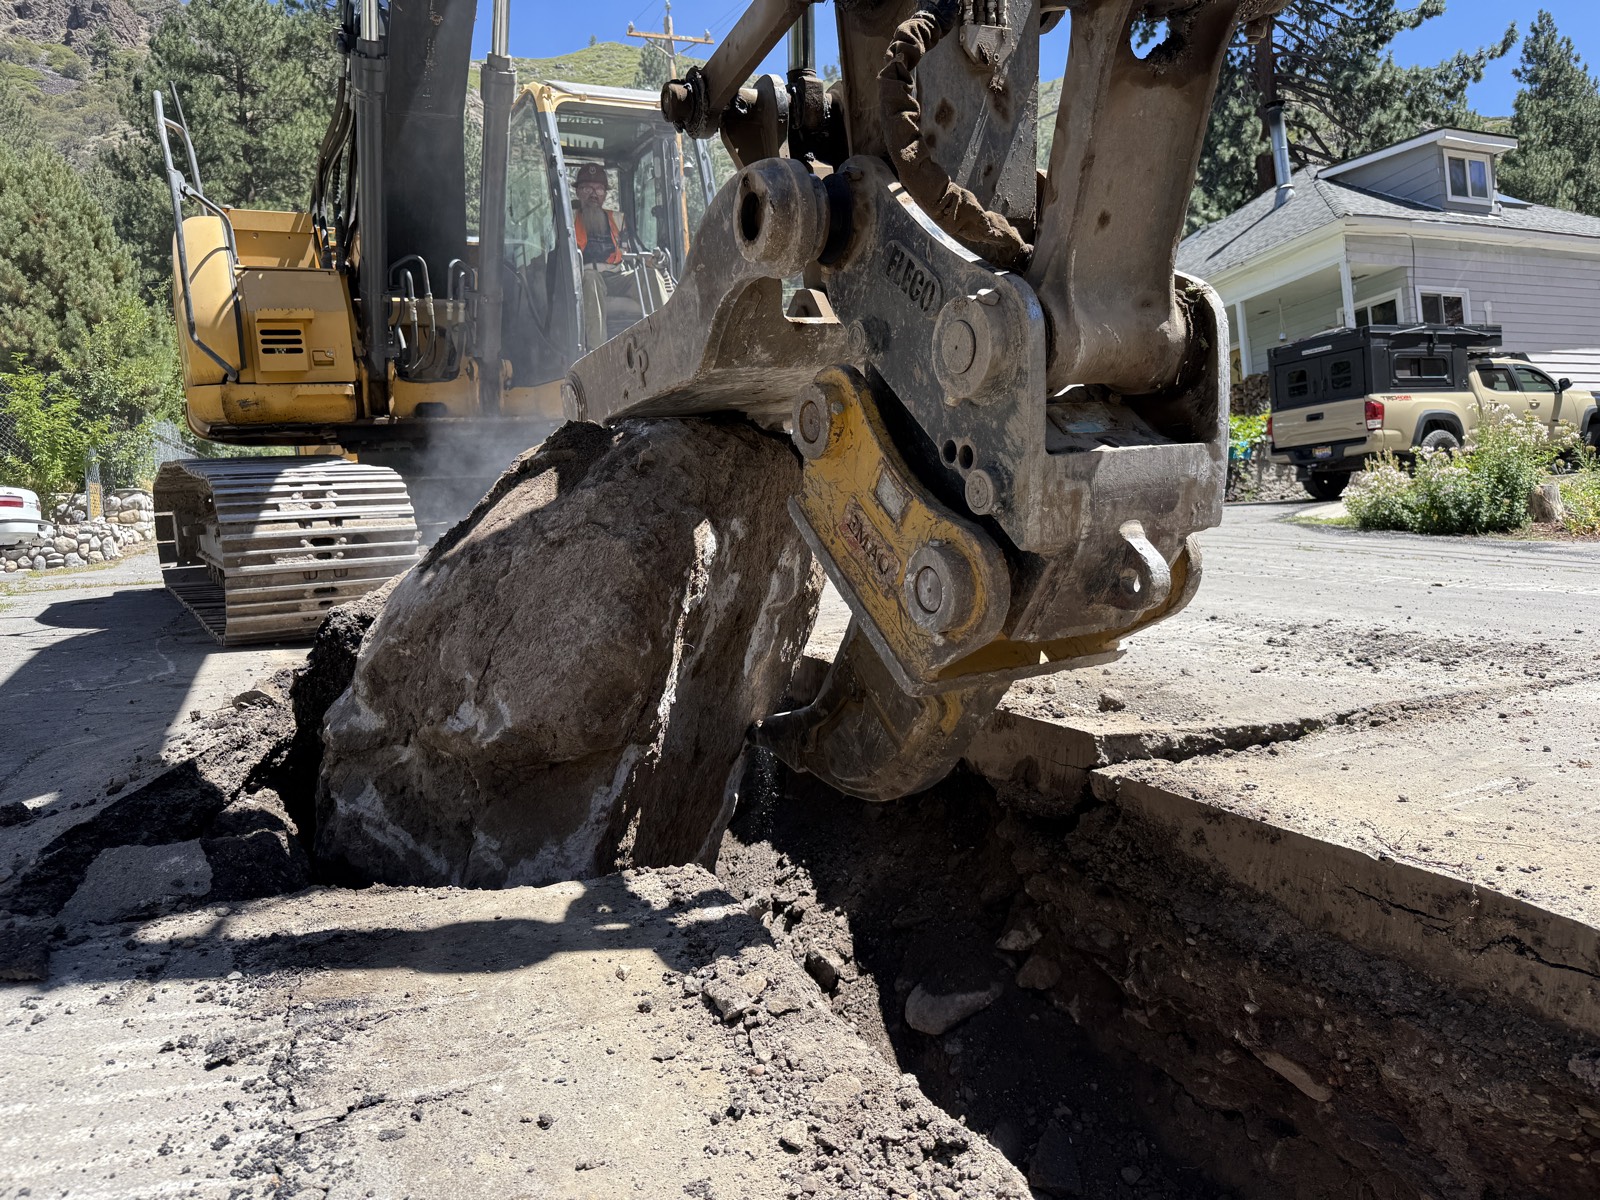
Opening a trench through old pavement means dealing with whatever's under it — this boulder came out before the pipe went in
The number you hear on every spec is 95% compaction. That comes from a lab test called a Proctor test. A geotech takes a sample of your backfill material, adds different amounts of water, compacts it in a mold with a standardized hammer, and gets two numbers: maximum dry density and the optimum moisture content to reach it. When the spec says 95%, it means the soil in your trench needs to hit at least 95% of the max density the lab got under controlled conditions. Miss it and you're digging it back up.
There are two versions of the Proctor test. Standard Proctor uses a lighter hammer and is typical for utility trench backfill. Modified Proctor uses a heavier hammer and produces a higher maximum density. Make sure you know which one the spec references. Hitting 95% of Modified Proctor is significantly harder than 95% of Standard Proctor for the same material.
Nuclear Density Gauge is the most common field test. The gauge contains a small radioactive source that emits gamma rays into the soil. A detector measures how many rays pass through versus how many are absorbed. Denser soil absorbs more radiation. The gauge gives you wet density, dry density, and moisture content in about 60 seconds. It's fast, accurate, and the industry standard. The catch is that you need a Nuclear Regulatory Commission license to own and operate one, and the source has to be leak-tested every six months. Most testing firms handle this, not the excavation crew.
Conduit runs in place before backfill — once these are bedded and covered, every lift of fill above them gets compacted to spec
Sand Cone Test is the manual alternative. You dig a small hole in the compacted lift, weigh the soil you removed, then fill the hole with calibrated sand from a jar and measure how much sand it took. The volume of sand equals the volume of the hole. Weight of soil divided by volume gives you density. It's simple, accurate, and doesn't need a radioactive source. The downside is that it takes 15 to 20 minutes per test, and you need a flat, clean surface to get a good seal with the base plate.
Plate Load Test is less common for trench work but shows up on large earthwork projects. A hydraulic jack applies load to a plate on the soil surface and measures deflection. It tells you the bearing capacity rather than density directly, but it gives a real-world measure of how the soil will perform under load.
The variable most crews underestimate is moisture content. Soil compacts best at its optimum moisture content, the number the Proctor test identifies. Too dry and the particles won't move together no matter how many passes you make with the compactor. Too wet and you're just pushing mud around. In Truckee, the native decomposed granite is usually dry enough that we need to add water. I run a hose into the trench between lifts and let the material soak for a few minutes before compacting. In spring, when snowmelt is running, the problem is the opposite. The material is too wet, and we have to let it dry out or swap it for imported granular fill.
Pulling boulders before the trench is clean enough for pipe — rock removal is the step before bedding, backfill, and compaction
Lift thickness is the other critical factor. A lift is a single layer of material that you compact before adding the next layer. For most trench backfill, the spec calls for 6 to 8 inch loose lifts compacted to about 4 to 6 inches. If you try to compact a 12-inch lift with a plate compactor, the bottom half won't reach density. The compaction energy dissipates before it gets to the bottom of the lift. Larger equipment like a sheepsfoot roller can handle 12-inch lifts, but you're not fitting a sheepsfoot in a 3-foot-wide trench.
I've seen compaction tests fail for three reasons, and it's almost always one of these: the lift was too thick, the moisture was wrong, or the operator didn't make enough passes. A jumping jack or plate compactor typically needs 3 to 5 passes over the same area to reach density. One pass isn't enough. I tell my crew to count their passes and make at least four on every lift. It takes an extra couple of minutes per lift, and it saves you from ripping the trench back open when the test fails.
When the testing firm shows up and your compaction fails, you have two options: add water and recompact, or remove the material and start the lift over. If it's a moisture issue, adding water and hitting it again usually works. If the lift was too thick, you're pulling material out. Either way, it's time and money. Get it right the first time.
Share
5 min read
Dewatering an Excavation: Pumps, Pits, and Keeping the Trench Dry
EK
Errol KerrOlympic Skier · Excavation Foreman
June 20, 2026ExcavationField Guide0 comments
Water in the trench changes everything. You can't lay pipe in a swimming pool. You can't compact saturated soil. Here's how I deal with groundwater on the jobsite, from a single sump pump to full wellpoint systems.
0 views
Read more
So, every excavator hits water eventually. You dig down four feet, five feet, six feet, and suddenly the bottom of the trench starts filling up. In Truckee the water table varies wildly depending on where you are, time of year, how close you are to the river or any of the creeks that feed it. I've dug trenches in July where the ground was bone dry at eight feet. Dug trenches in May where water was seeping in at three. You don't get to choose. You deal with what the ground gives you.
The simplest dewatering method is a sump pump in a pit. You dig the trench to grade, then dig a small pit at the low end, about two feet deeper and two feet wider than the trench. Water flows to the low point by gravity and collects in the pit. A submersible trash pump sits in the pit and pushes water out through a discharge hose. For low to moderate groundwater inflow, this is all you need. I keep a 2-inch and a 3-inch trash pump on the truck at all times during spring work. The 2-inch handles most seepage. The 3-inch is for when things get serious.
Groundwater moving in while the trench is still being cut — the pit gets dug at the low end as soon as there's a low end, and the pump goes in right behind it
The key to sump pumping is keeping ahead of the water. If the pump can't keep up with the inflow, the water level in the trench rises, the bottom turns to soup, and you can't compact or lay pipe. I size the pump based on how fast the pit fills. A 2-foot by 2-foot by 2-foot pit holds about 60 gallons, so if it fills in 5 minutes, that's about 12 gallons a minute of inflow. A standard 2-inch trash pump moves 100 to 150 GPM, so it'll handle that with room to spare. If the pit fills in under a minute, you're looking at 60-plus GPM of inflow — and once hose runs and lift eat into pump capacity, that's when the 3-inch comes off the truck.
Wellpoint Systems are what you use when sump pumping isn't enough. A wellpoint system lowers the water table around the excavation before you dig. You drive a series of small-diameter well screens into the ground along the trench alignment, connect them with a header pipe, and attach the header to a vacuum pump. The pump pulls water out of the ground through the wellpoints, lowering the water table below your excavation depth. When you dig, the trench is dry.
Wellpoint installation is specialized work. The screens are typically 2 to 3 inches in diameter and 3 to 5 feet long, driven 10 to 15 feet deep depending on the required drawdown. Spacing depends on soil permeability. In sandy ground like the decomposed granite we see around Truckee, wellpoints every 3 to 6 feet will do the job. In silty soil the spacing gets tighter, not wider — the water moves slower, so each point only drains a small circle around itself. The header pipe connects all the wellpoints to a central pump, usually a diesel-powered vacuum unit that runs 24 hours until the excavation is complete and backfilled.
Active dewatering on a saturated site — the pump runs continuously while the crew works around it to keep the excavation dry enough to operate
For calculating the flow rate you need to handle, the basic formula starts with the permeability of the soil. Sandy gravel can transmit water at 1,000 gallons per day per square foot. Fine sand is closer to 100. Silt is 1 to 10. Clay is essentially zero, which is why you rarely need dewatering in clay. Multiply the permeability by the cross-sectional area of the excavation face that is below the water table, and you get the approximate inflow rate. It's not exact, but it gets you in the right ballpark for pump sizing.
Environmental Discharge is the part most crews don't think about until the inspector shows up. You can't just pump groundwater into the street. In California, construction dewatering discharge is regulated by the Regional Water Quality Control Board. If the water is clean groundwater with no contamination, you can usually discharge to the storm drain system with a permit. If the water has sediment, which it almost always does when you're pumping from a sump pit, you need to run it through a sediment control system before discharge. That can be as simple as a straw wattle filter or as complex as a settling tank and filter bag system.

On our jobs, I run the discharge hose into a sediment bag or a straw bale check dam before the water reaches any drainage inlet. The goal is to keep sediment out of the storm drain. If you're on a site with a SWPPP, the dewatering plan should already be in the document. If it's not, you need to add one before you start pumping. The fines for discharging turbid water to a waterway in California can run into the thousands per day. It's cheaper to buy ten sediment bags than to pay one fine.
The problem before the solution — a flooded trench with no pump yet, standing groundwater making pipe work impossible
Timing matters too. If you know the water table is high, plan your dewatering before you dig. Set up wellpoints or have pumps staged and ready. Don't wait until the trench is full and the pipe crew is standing around. On one job near Donner Lake, we started wellpoints two days before excavation. By the time we cut the trench, the ground was dry enough to work in without any sump pumping at all. That two-day lead time saved us three days of fighting water during the pipe installation.
The other option is to rethink the schedule. If you're doing sewer work in an area with a seasonal water table, and you have any flexibility on timing, wait until late summer when the water table drops. In Truckee, the difference between May and August water table levels can be three feet or more. That three feet can be the difference between a dry trench and a full-time dewatering operation. I plan wet-area work for July and August whenever the schedule allows.
Dewatering isn't complicated in concept. Water goes in, pump takes it out. But managing it well — sizing the right equipment, staying ahead of the inflow, keeping the discharge clean, planning for it before you're standing in a flooded trench — is what separates a crew that handles groundwater from one that drowns in it.
Share
3 min read
How to Read Utility Markings Before You Dig
EK
Errol KerrOlympic Skier · Excavation Foreman
June 20, 2026ExcavationField Guide0 comments
Before any bucket touches dirt, you read the paint. The APWA color code system tells you exactly what's buried under your feet. Miss a marking, hit a line, and your day gets very expensive very fast.
0 views
Read more
Every excavation job starts the same way. Before I fire up the machine, before the crew even grabs a shovel, I walk the site and read the paint. Those spray-painted lines on the ground aren't decoration. They're a map of everything down there, and if you can't read them, you have no business running a bucket.
The system is called the APWA Uniform Color Code, and it's the same across the entire country. Every color means a specific utility. Learn them once and you'll never second-guess what you're digging over.
Conduit run exposed in an open trench — knowing what's below before you dig keeps the crew safe
Red means electric. Power lines, conduit, cables. Hit a live electric line with a steel bucket and the best case is a blown fuse on a transformer. The worst case is someone doesn't go home. I treat every red mark like it's hot until the utility company confirms it's de-energized. No exceptions.
Yellow means gas. Natural gas, oil, petroleum, steam. A gas line strike can evacuate an entire block. On our jobs in Truckee, the gas lines are usually polyethylene pipe buried about 18 inches. You won't see it until your bucket is already through it. That's why you hand-dig within 24 inches of any yellow mark. Every time.
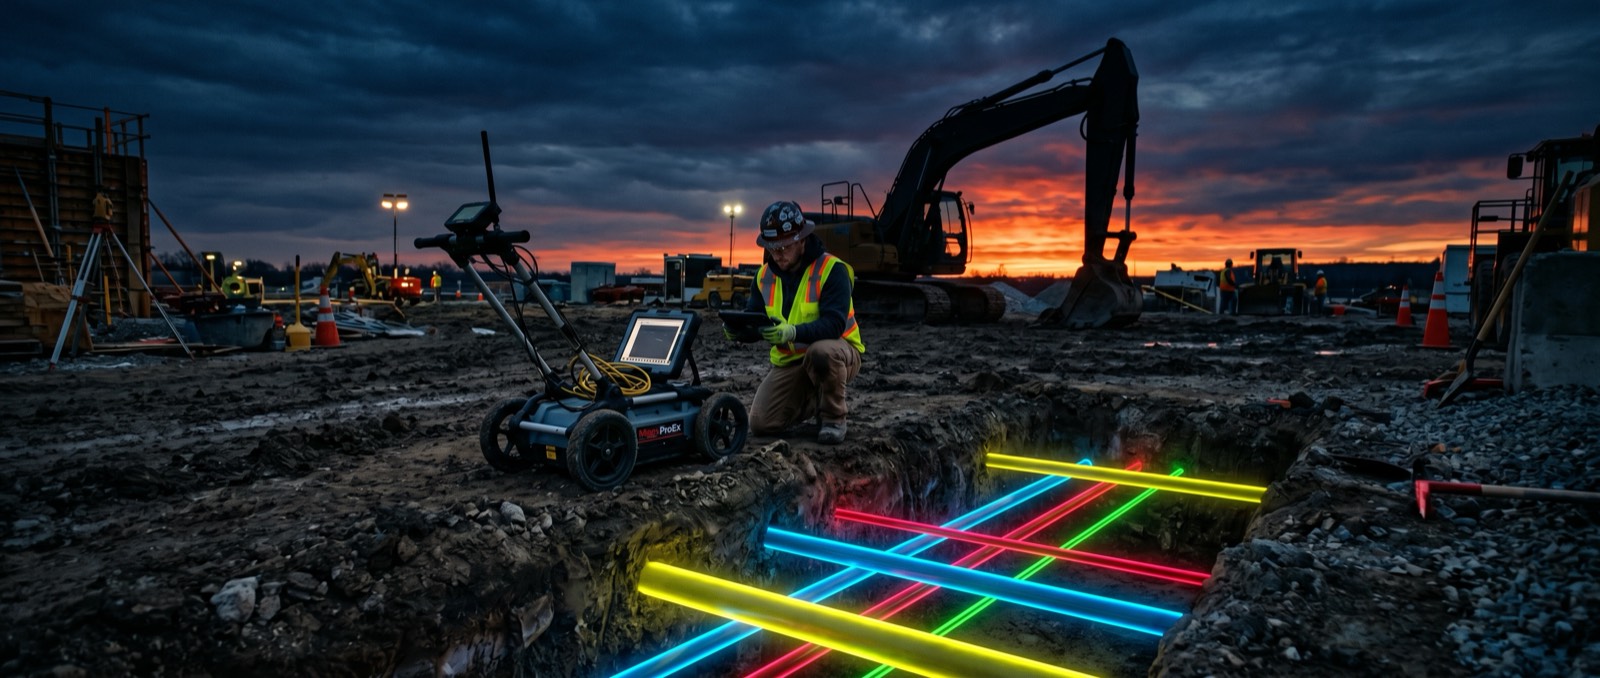
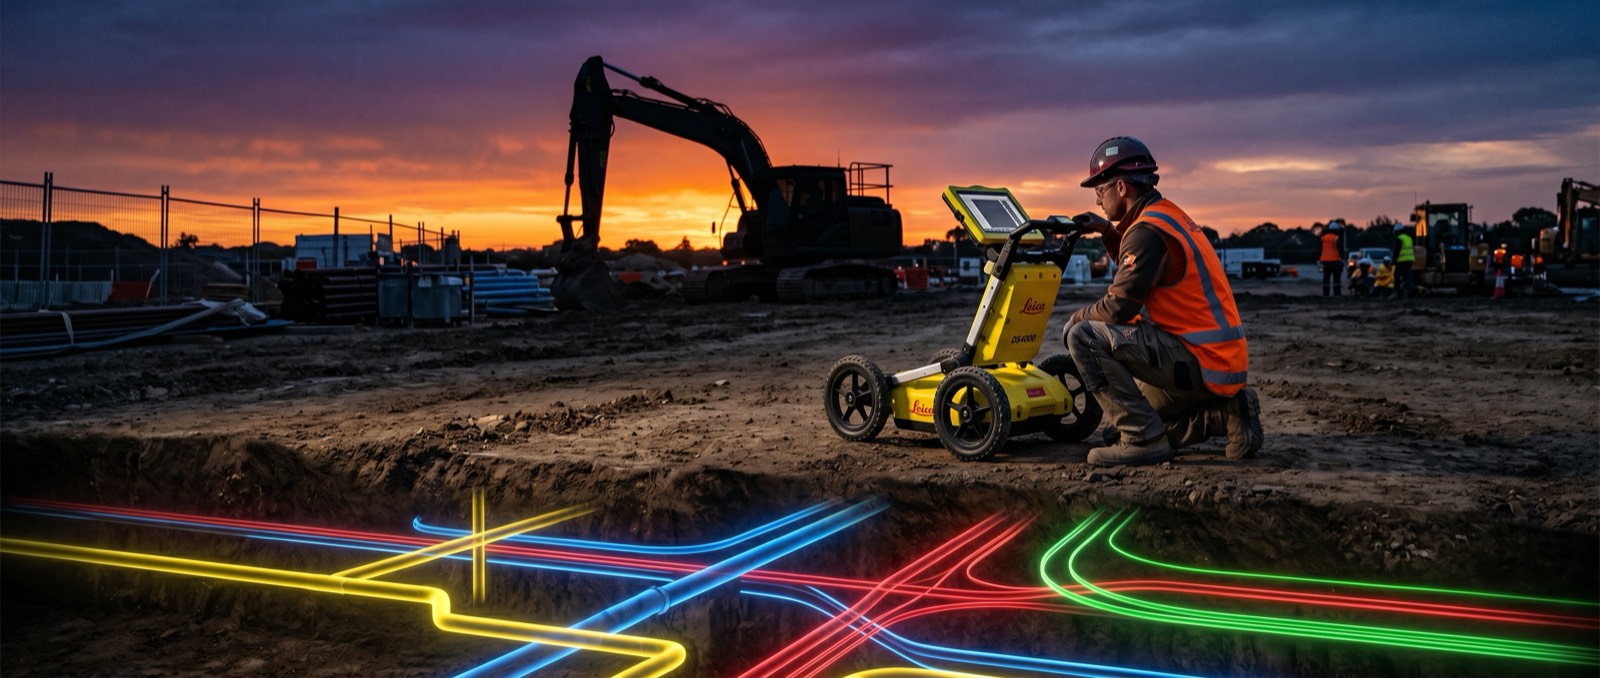
When the paint isn't enough, we rent a ground penetrating radar unit through DirtPrep and verify what's down there before the bucket goes in
Blue means potable water. Drinking water mains and service lines. Reclaimed water, irrigation, and slurry lines get purple — you'll see it on landscape jobs. A water main break isn't as dangerous as gas or electric, but it'll flood your trench, shut down the street, and cost you a day of production plus the repair bill. On mountain jobs, water lines can be deeper than you expect because of frost depth requirements.
Green means sewer. Sanitary sewer, storm drain, drain lines. Sewer is usually the deepest utility in the trench, often six to eight feet or more. It runs by gravity, so the alignment follows the slope of the ground. Puncture a sewer main and you're dealing with a hazmat situation, plus the repair, plus the fine from the district.
Orange means telecom. Fiber optic, cable TV, communication lines, conduit. Telecom damage is expensive in a different way. A single fiber cut can knock out service for thousands of customers. The carriers will send you a bill that makes your eyes water. Fiber is fragile and often in shallow conduit, sometimes only 12 inches deep.
White means proposed excavation. This is your outline, your dig boundary. The white paint shows the locator where you plan to work so they know which utilities to mark. If you call 811 and they ask where you're digging, the white paint is the answer.
Pink means survey. Temporary survey markings, property lines, section corners. These are reference points, not utilities. But don't blast through a survey monument. Those are legal markers and replacing them requires a surveyor and a lot of paperwork.
Before every dig, you call 811. That's the law in every state. You call, you give them the address and the scope, and the utility companies send locators to mark their lines. It takes two to three business days in most areas. I've seen guys try to skip this step to save time. It never saves time. One unmarked gas line hit will cost you more than every 811 call you'll ever make combined.
What happens when you hit an unmarked line? First, you stop. Don't move the bucket, don't pull it out, don't try to patch it yourself. For gas, evacuate the area and call 911. For electric, stay on the machine and wait for the power company. For water and sewer, call the utility district. For telecom, call the carrier.
In every case, document everything. Photos, measurements, the 811 ticket number, the location of the markings relative to the strike. If the line wasn't marked or was marked in the wrong location, the locating company bears the liability, not you. But only if you followed the rules. No 811 ticket, no protection.
I've been running excavation in Truckee for years now, and I still walk every set of markings before the first cut. I've caught mismarks, missed lines, and markings that were three feet off. The five minutes it takes to walk the site and compare the marks to the plans has saved me from strikes that would have shut down the job. Read the paint. Every single time.
Share
4 min read
Choosing the Right Excavator Bucket for the Job
EK
Errol KerrOlympic Skier · Excavation Foreman
June 20, 2026ExcavationEquipment0 comments
Wrong bucket on the machine and you're fighting the dirt all day. Right bucket and the trench digs itself. Here's how I pick buckets for every phase of the job, from mass excavation down to final grade.
0 views
Read more
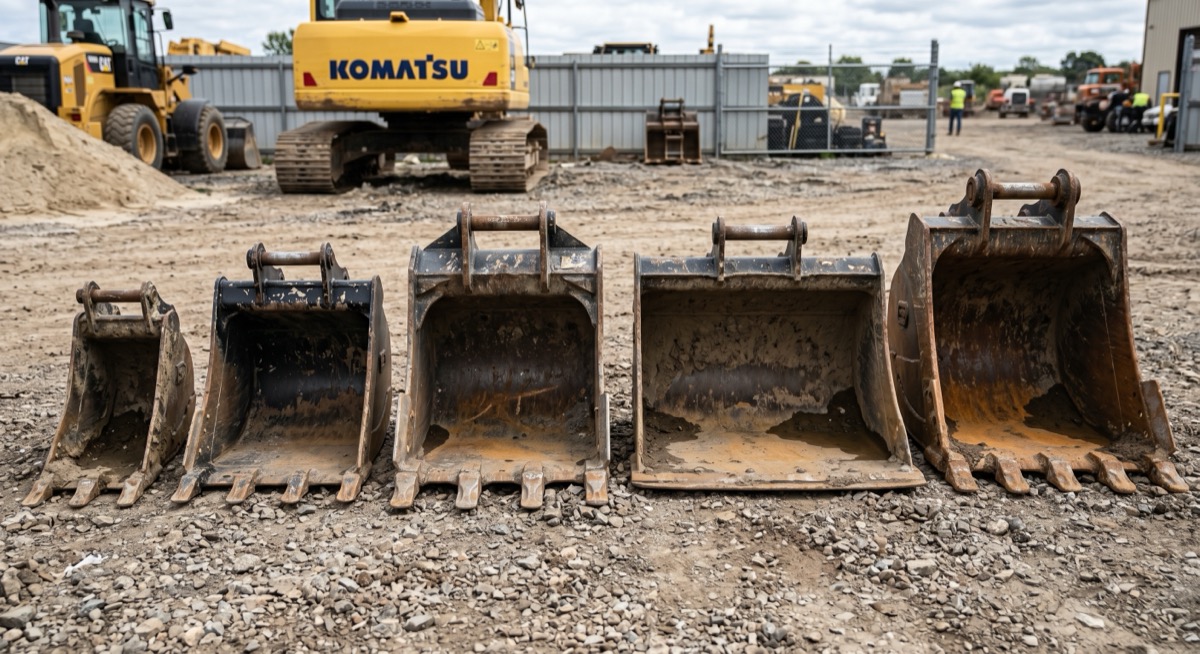
I've watched operators burn an entire shift fighting the wrong bucket. A 36-inch GP bucket on a trenching job where they needed an 18-inch. A smooth-edge cleanup bucket trying to rip through decomposed granite. The bucket is the business end of the machine. Pick wrong and the machine fights you on every cut.
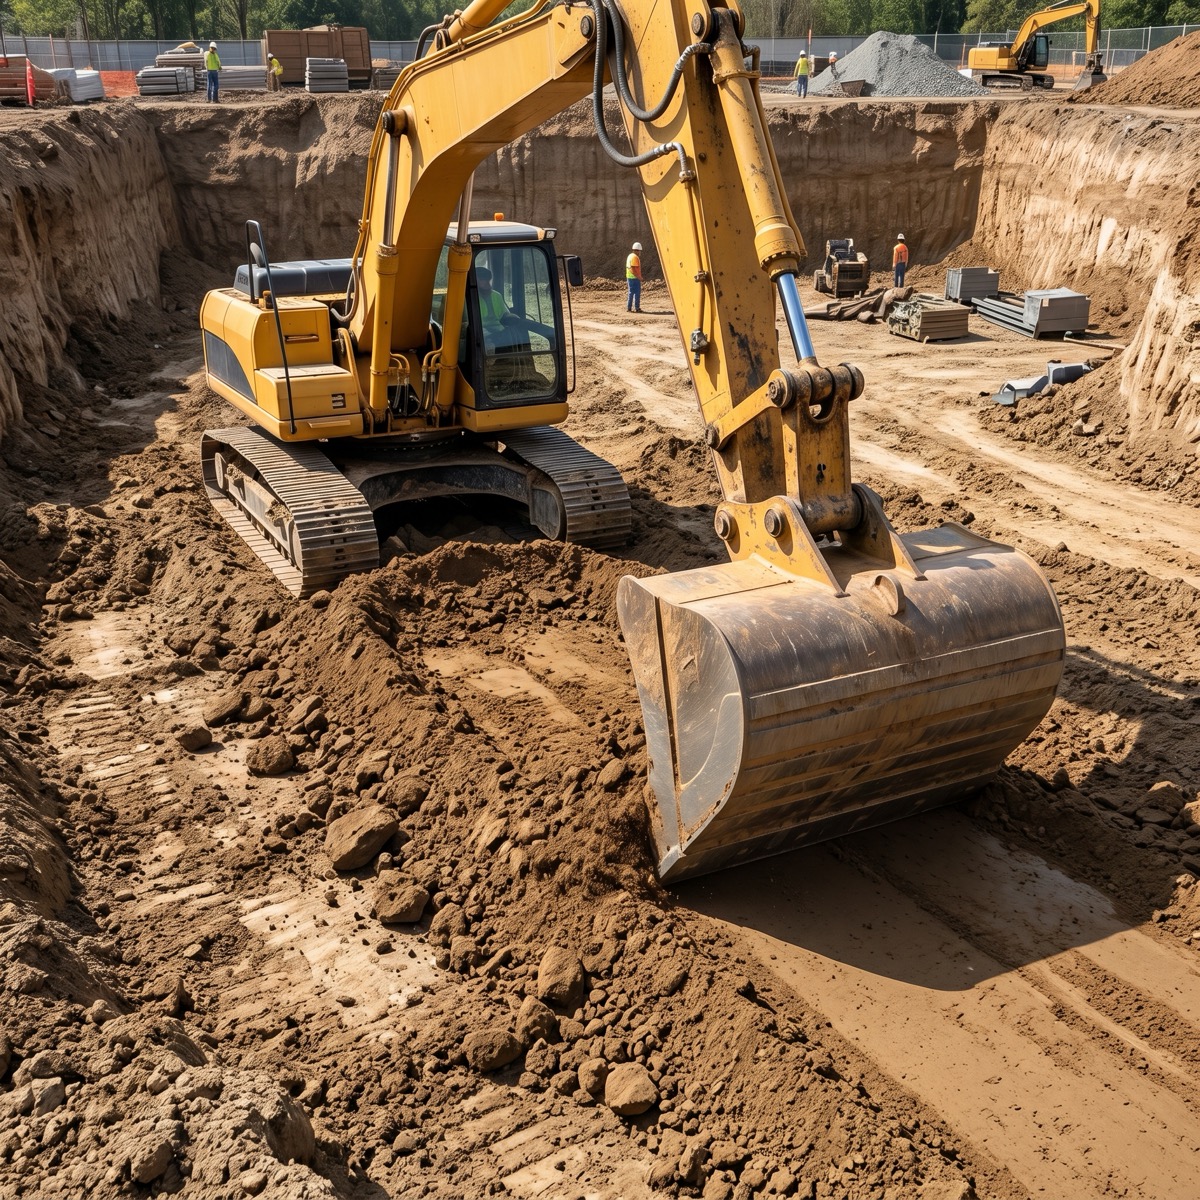
The GP bucket, general purpose, is what most machines wear as their daily driver. All-rounder. Medium width, usually 24 to 36 inches on a mid-size excavator, with teeth for penetration and a curved profile for good rollback. General site work, loading trucks, digging footings, moving mixed material, the GP handles it. Not the best at anything but good enough at everything. On my JD 35G, the 24-inch GP lives on the machine about 60 percent of the time.
The all-rounder at work — a general purpose digging bucket handling mass excavation on a big open cut
The trenching bucket is built for one thing: cutting a narrow, clean-walled trench. Usually 12 to 18 inches wide, deeper profile than a GP, with a flat bottom and straight sides. When I'm laying pipe, running conduit, or setting utilities, this is the bucket. The narrow width means less material to move, less spoil piled up on the side, and a tighter trench that's easier to backfill and compact. On utility work, a trenching bucket can double your production compared to digging the same trench with a GP.
A narrow trenching bucket cutting a clean utility trench — narrower than a GP, built for pipe and conduit work
The cleanup bucket, also called a ditch cleaning bucket or grading bucket, is the wide, flat, smooth-edge bucket you use for finish work. No teeth, just a bolt-on cutting edge. Widths run from 36 inches up to 60 inches or wider. This is what you use to grade the bottom of a trench to a precise elevation, clean out a ditch, or do final grading on a pad. The smooth edge gives you a flat, even cut. On GPS-controlled machines, a cleanup bucket paired with the design surface is how you hit grade to a tenth of a foot without a single grade stake.
The cleanup bucket — wide, flat, no teeth. Built for finish grading and smoothing the bottom of an excavation to design elevation
The rock bucket is the heavy hitter. Reinforced sidewalls, heavy-duty teeth, sometimes ripper shanks on the back edge. When I'm digging in the Sierra granite, the decomposed stuff that turns into solid rock about four feet down, this is what goes on the machine. The teeth are heavier and sharper so they bite into rock instead of bouncing off it. A rock bucket weighs significantly more than a GP bucket of the same width, so you give up some lift at full reach, but you gain the ability to rip through material that would fold a standard bucket.
The rock bucket — reinforced sidewalls and heavy-duty teeth, ripping through solid rock on a mountain job
The V-bucket, or trapezoidal bucket, is purpose-built for digging V-shaped drainage ditches and channels. The angled sides match the designed slope ratio of the ditch, usually 2:1 or 3:1. Instead of cutting the ditch in multiple passes with a standard bucket, one pass with a V-bucket gives you the full profile. We use them on road drainage work and anywhere the plans call for a shaped swale.
Ditch work in open ground — with a true V-bucket, the angled sides of the profile come out in a single pass
Bucket width drives production more than most operators realize. Go wider and you move more material per cycle, but you need more breakout force and the machine works harder. Go narrower and each cycle is smaller, but the machine cuts easier and you use less fuel. The sweet spot depends on the material. In soft clay, go wide. In rocky ground, go narrow. On a typical utility trench job, I match the bucket width to the pipe diameter plus clearance. Eight-inch pipe gets an 18-inch bucket. Twelve-inch pipe gets a 24-inch. No point digging a trench wider than you need to, because you just have to backfill and compact all that extra.
Quick-couplers changed the game. Before couplers, changing a bucket meant pulling pins with a hammer and a pry bar, 15 to 20 minutes of crawling around under a boom. Now I swap buckets in under a minute without leaving the cab. Hydraulic quick-couplers let you go from a trenching bucket to a cleanup bucket between cuts. That flexibility means I carry three or four buckets on the trailer and match the tool to each phase of the job. Mass excavation with the GP, trench with the trenching bucket, grade with the cleanup, all in the same shift.
One thing I see guys overlook is bucket maintenance. Teeth wear down and lose their self-sharpening profile. A dull tooth means the machine works harder for every cut, burns more fuel, and puts more stress on the linkage. I check teeth daily and replace them before they're worn to the adapter. Cutting edges on cleanup buckets take a beating too. A rolled or chipped edge means you can't hold grade. Replacing a cutting edge costs a couple hundred dollars. Re-grading a pad because your edge was shot costs a couple thousand.
Pick the right bucket, keep the teeth fresh, and the machine does the work. Fight the wrong one and you'll wonder why the job's behind schedule.
Share
4 min read
Mountain Construction: Working at Elevation in the Sierra Nevada
EK
Errol KerrOlympic Skier · Excavation Foreman
June 20, 2026ConstructionTruckee0 comments
Building at 6,000 feet is a different game. The air is thinner, the seasons are shorter, the weather turns on you without warning, and the ground has its own rules. Here's what the mountain teaches you about construction.
0 views
Read more
So, I've been building at altitude for years now. Running excavation jobs in Truckee at 5,800 to 6,200 feet, and the elevation touches everything. Equipment. Materials. People. Schedule. If you've only built at sea level, mountain construction will humble you fast. The rules are different up here, and the mountain doesn't care about your timeline.
Start with the iron. A diesel engine loses roughly three percent of its power for every thousand feet of elevation above sea level. At 6,000 feet, that's close to 18 percent. A 75-horsepower excavator at sea level is running about 62 horses up here. You feel it in the hydraulics. Breakout force drops. Cycle times slow down. The machine works harder for every bucket.
Newer Tier 4 engines with turbochargers compensate better than the older naturally aspirated stuff, but you still notice it. I plan for about 15 percent less production on any machine compared to its sea-level specs. If you're bidding a mountain job using flatland production rates, you're going to lose money.
Sierra ground fights back — boulders come out of trenches that would be clean digging in the valley
The thin air hits the crew too. Workers coming up from Reno or Sacramento, even just from 4,500 feet, can feel the difference at 6,000. The first few days are the hardest. Guys get winded faster, dehydrate quicker, and fatigue hits earlier in the shift. I keep extra water on the jobsite and watch for signs of altitude sickness in new crew members. Headaches, nausea, dizziness. It's rare at 6,000 feet but it happens, especially when guys are working hard in the sun. Acclimation takes three to five days. By the second week, most people have adjusted.
Concrete is its own challenge at elevation. The lower air pressure means water evaporates faster from the surface, so plastic shrinkage cracking is a real concern. You have to cure more aggressively up here. Wet curing, curing compound, or both.
Temperature is the other factor. Truckee can see 90 degrees in July and freezing temps by September. Concrete needs to stay above 50 degrees for at least 48 hours to develop adequate strength. Pour too late in the season and you're running ground heaters and insulated blankets to protect the slab. I've seen October pours in Truckee where the crew was heating the ground for a week before the trucks arrived and heating the slab for a week after. That's expensive, but a frozen slab is more expensive.
Weather windows are everything. The building season in Truckee runs roughly May through November, and even that's optimistic. Snow can fly in October, and the ground might not thaw until late April. That gives you maybe six solid months to get your dirt work done, foundations poured, and the building dried in. Compare that to the Central Valley, where you can work 11 months out of 12. Every day of production matters more up here because there are fewer of them.
Summer isn't a free pass either. Afternoon thunderstorms roll in almost daily from mid-June through August. By 1 PM, the cumulus clouds start building over the Sierra crest. By 3 PM, you can have lightning, hail, and an inch of rain in 20 minutes. I run my crews hard in the morning because I know the afternoon might get taken from me. When I see the CAPE values climbing above 500 on the morning forecast, I mentally cut the workday to six hours and plan accordingly.
Frost depth drives foundation design. In Truckee, the code-required frost depth is 36 inches. That means every footing, every pier, every foundation wall has to extend at least 36 inches below finished grade to get below the frost line. In Sacramento, it's 12 inches. That difference means deeper excavation, more concrete, more rebar, more time, and more cost for every single structure. A simple deck footing that takes 30 minutes to dig and pour at sea level is a full afternoon up here.
Access is the invisible cost. Mountain roads are narrow, steep, and sometimes unpaved. Getting a concrete truck up a 15 percent grade on a dirt road in spring mud is an adventure. Getting a 50-ton excavator delivered on a lowboy trailer around a switchback with six feet of clearance is a puzzle.
I've had jobs where the access road was the first thing we built, just to get the equipment to the pad. And then in November, the road closes for snow season and your jobsite is locked until May. If you left material or equipment up there, it's sitting under eight feet of snow until spring.
Chains on the loader — when the road up is ice or mud, traction is the whole game
Snow load is a design factor you don't think about at sea level. Truckee gets 200 to 400 inches of snow in a normal winter. Roofs up here are designed for 150 to 200 pounds per square foot of snow load. That means heavier framing, steeper pitches, and engineered trusses on everything. A roof design that works in Sacramento will collapse in Truckee. Period.
None of this means you can't build up here. Some of the most beautiful structures I've worked on are in the Sierra. But the mountain demands respect. Plan for less production, shorter seasons, deeper foundations, aggressive curing, and weather that changes faster than you can react. The crews that succeed are the ones that adapt to the mountain instead of fighting it.
Share
4 min read
How to Set Up GPS Machine Control on an Excavator
EK
Errol KerrOlympic Skier · Excavation Foreman
June 19, 2026GPSExcavationEquipment0 comments
A full walkthrough of GPS machine control setup on an excavator. Base station, RTK corrections, antennas and sensors on the machine, calibration, and what the operator actually sees on the in-cab display.
0 views
Read more
So, GPS machine control changed everything about how I run a grade. I still remember the first time I saw it work on a job. Watching the bucket track a design surface in real time on the in-cab screen, and thinking, this is going to make a lot of grade checkers nervous. It did.
But here's the thing nobody tells you: the system is only as good as the setup. Bad setup means you're chasing hundredths all day and blaming the satellites for your own mess. Here's how I set it up every morning before the bucket hits dirt.
It starts with the base station. The base is a GPS receiver that sits on a known survey point, a benchmark or a control point that's been shot in by a surveyor with a known coordinate and elevation. You set a tripod over that point, level it, plumb it, and power it on. The base locks onto satellites and starts broadcasting correction signals.
It knows exactly where it is, so it can calculate the error in the GPS signal and send that correction to the rover on the machine. Without the base, your GPS is only accurate to about three to ten feet. With it, you're down to about an inch. That correction is called RTK, real-time kinematic, and it's what makes machine control possible at construction-grade accuracy.
Where every setup starts — the GPS kit cased up in the shop. Antennas, receivers, cables, all of it checked before it rides out to the job.
The base broadcasts corrections over a radio link, usually UHF, to the rover on the machine. On a typical excavator setup, the GNSS antennas don't ride the boom — they mount up on the machine body, out of the way of the digging, and give the system position and heading. The boom, stick, and bucket each carry a sensor that reads its angle.
Those angles, plus the machine's measured-up geometry — boom length, stick length, bucket dimensions — let the system calculate exactly where the cutting edge is in three-dimensional space. Every time you move the stick or curl the bucket, the system recalculates. It's doing that math dozens of times per second.
Before you start digging, you run a calibration routine. This is where you check the system against a known point. You set the bucket tooth on a survey hub with a known elevation, tell the system to compare, and see what the offset is. If you're within a tenth, you're good. If not, you troubleshoot.
Common issues are a loose mount on the receiver, a bad satellite constellation that morning, multipath interference from nearby buildings or rock faces, or a base station that didn't initialize properly. I've seen guys skip calibration and end up half a foot off by lunch. Don't skip it.
The in-cab display is where it all comes together. On the Trimble system I run, the display shows a cross-section of the design surface and where your bucket is relative to it. There's a color-coded indicator: red means you're above grade and still have material to cut, blue means you've gone below grade and owe fill, and green means you're on grade within the tolerance you set.
Most finish grading work is set to a half-inch tolerance. Rough grading might be two inches. The display also shows your plan view, so you can see where you are on the site relative to the design, property lines, utilities, and any other layers the surveyor loaded into the model.
Trimble CB460 with live numbers on screen — 0.97 of cut on the left side, 0.93 on the right. The operator sees grade without leaving the seat.
If you saw my vlog on the Cat 335 running Trimble GPS on a guided dig near Lake Tahoe, that's exactly this system in action. That Cat 335 ran dual GNSS antennas, a Trimble TD520 in the cab, and a design surface loaded for a commercial pad. Watching the operator work that machine was like watching someone play a video game, except the stakes are real and the tolerances are tight. The bucket held grade inside a half inch on a pad a hundred feet wide. No grade checker needed. No stakes to chase. Just the machine, the satellites, and the design.
Typical accuracy specs on a well-set-up RTK system are plus or minus one-tenth of a foot horizontal and plus or minus two-tenths of a foot vertical. In practice, with good satellite geometry, a clear sky, and a solid base station setup, I consistently see better than that. But accuracy degrades in certain conditions. Heavy tree canopy blocks satellite signals. Working in a narrow trench between tall buildings creates multipath errors. Rain and heavy cloud cover can weaken the correction link. And if your base station is more than about six miles from the machine, the correction quality starts to drop.
For most jobsite work, none of that is an issue. But when you're pushing the limits of the system, you need to know where those limits are.
One thing people don't talk about enough is maintaining the mounts. Those antenna and sensor mounts take a beating. The machine vibrates, the boom slams, dirt and debris hit everything. A loose mount means a moving receiver, and a moving receiver means your position is bouncing around even when the bucket is still.
I check the mounts every morning as part of my walkaround. If a bolt is loose or a bracket is cracked, it gets fixed before the machine starts. Ten minutes of maintenance saves you a day of chasing bad readings.
GPS machine control isn't magic. It's a well-engineered system that requires disciplined setup and regular calibration. But when it's running right, there's nothing faster or more accurate for moving dirt to a design grade. It cut my staking time to nearly zero, reduced rework by at least half, and let me run grades that pass the first time the surveyor shoots them. If you're running excavation and you're not on GPS, you're working harder than you need to.
Soil Types in Sierra Nevada Excavation — What the Ground Tells You
EK
Errol KerrOlympic Skier · Excavation Foreman
June 19, 2026ExcavationTruckeeField Guide0 comments
What you actually encounter digging in the Sierra Nevada. Decomposed granite, volcanic rock, clay pockets, glacial till, and how soil type drives everything from bucket selection to production rates in Truckee excavation.
0 views
Read more
So, every time I put a bucket in the ground up here in the Sierra, the dirt tells me a story. It's never the same story twice. You can be digging clean decomposed granite one minute and hit a clay pocket or a boulder the size of a washing machine the next. What's down there decides your bucket, your pace, your compaction plan — and whether you make schedule or spend the day fighting the ground.
Decomposed granite — DG — is the most common material we dig in the Truckee area. It's exactly what the name says: granite that's broken down over millions of years into coarse, sandy, gritty material. Dry, it's dream dirt — cuts clean, doesn't stick to the bucket, and compacts beautifully with a plate compactor or a roller. The grains interlock and you get excellent density numbers without a lot of water or passes.
Wet is a different animal. DG turns into a heavy, soupy mess that sticks to everything and won't release from a smooth bucket. I run a toothed bucket in it almost exclusively — the teeth break it up and the material falls out cleaner than a smooth edge that just smears it.
Volcanic rock is the wildcard. The Sierra Nevada sits on volcanic and granitic geology, and depending on where you're digging you might hit basalt, andesite, or welded tuff. Some of it breaks up with a standard bucket if it's weathered enough. Some of it laughs at you.
I've hit ledges of andesite that stopped a 35,000-pound excavator cold. When you hit solid rock you're looking at a hydraulic breaker, a rock saw, or — if the project allows it — controlled blasting, none of them cheap or fast. The geotech report should tell you what's down there, but I've seen plenty that said "anticipated rippable rock" and then we hit solid ledge at four feet. The ground doesn't read geotech reports.
Clay pockets show up where you least expect them. The Truckee basin is mostly granitic, but clay hides in the low spots — near meadows and old lake beds — and the Martis Valley area is notorious for it. Clay is the opposite of DG in almost every way: it holds water, swells, shrinks, and has almost no bearing capacity when wet.
If you're putting a foundation on clay, you're overexcavating and replacing it with engineered fill. Period. In the trench, clay sticks to everything — the bucket, the teeth, the walls. You'll spend as much time cleaning your bucket as you do digging, so I switch to a clean-out bucket or a wider ditching bucket to move more volume and live with the sticking.
Glacial till is what the glaciers left behind when they carved these valleys — sand, gravel, cobbles, boulders, clay, and silt all jumbled together with no sorting. Digging it is unpredictable by definition. You might pull a bucket of clean gravel followed by a three-foot boulder wrapped in clay. I quote till work at about 60% of my normal DG production rate, and even that's optimistic if the boulders run dense.
A boulder coming out of the trench — the ground doesn't warn you first
Elevation changes the ground itself. At 6,000 feet in Truckee, winter frost can drive 36 inches deep or more, and that frozen layer digs like concrete until it thaws. Even in late spring you'll hit frost pockets on north-facing slopes that never see direct sun.
The thaw cycle is the sneaky part — it leaves a wet, unstable layer between the frozen ground and the surface that fails slopes and collapses trench walls. I won't dig a trench on a north-facing slope in April without probing the thaw with a bar first. Bar stops at 18 inches? You're still frozen. Wait or plan for it.
Water table depth is the other elevation factor. In the Truckee basin it can be surprisingly shallow, especially in spring when snowmelt is recharging the aquifer. I've hit groundwater at three feet on sites where the geotech said eight — because the report was done in September and I'm digging in May.
When you hit water, everything changes. You need a dewatering plan — pumps, maybe a sump or a wellpoint system. You can't compact saturated soil, you can't hold a trench wall in saturated sand, and you definitely can't pour a footing in standing water. Know your water table before you break ground.
Soil drives your grade control too. DG holds a grade once it's compacted — cut it to a tenth with GPS and it stays where you put it. Clay moves: it shrinks when it dries and swells when it gets wet, so a grade you cut today might be a half inch off next week.
Till with cobbles is the hardest to cut. The edge bounces off rocks and the grade jumps around on the display, so in rocky till I'll cut rough grade with the machine, then check with a laser and a rod and hand-trim the last couple inches. Slower, but it's accurate.
Reading the ground is a skill that takes years. The color, the texture, the smell, the way it sounds when the bucket hits — all of it tells you something. Dark soil means organics you're going to overexcavate. Red or orange streaks mean iron, which means water's been moving through.
Smooth, shiny trench walls mean clay. Gray, gritty material that crumbles in your hand — that's your DG. Learn to read it and the ground tells you everything before the lab results come back.
How to Read a Grading Plan — Field Guide for Excavation Crews
EK
Errol KerrOlympic Skier · Excavation Foreman
June 17, 2026ExcavationField Guide0 comments
Contour lines, cut and fill, slope ratios, bench marks, utility callouts. I read these every day in the dirt — this is how the sheet actually works.
0 views
Read more
So, every set of construction plans has a grading plan in it, and if you're running excavation you'd better know how to read one. Nobody teaches this well. Most guys learn it by osmosis, one stake at a time. Here's how I break it down with the plans rolled out on the hood of the truck.
First thing you look for is the bench mark. That's your reference point for every elevation on the sheet — a fixed, known point like a survey monument, a manhole rim, the top of a fire hydrant. Something that won't move. It'll have an elevation listed next to it, something like BM = 5,842.50, and every other number on the plan is relative to that point. Lose the bench mark or knock out the survey hub and you're flying blind. Protect your bench marks like they're made of gold.
Where every setup starts — the GPS kit cased in the shop, grade rods on the wall. Every elevation on the plan runs through this gear
Contour lines are the curved lines that show you the shape of the ground. Each line represents a specific elevation. When the lines are close together, the ground is steep. When they spread apart, the ground is flat. Existing contour lines are usually dashed. Proposed contour lines, the ones you're building to, are solid. The interval between lines is noted in the legend, usually one foot or two feet depending on the scale. Read that legend before you start interpreting anything.
Cut and fill is where the money is. Cut means you're removing material. Fill means you're adding it. The engineer will often show cut areas with one hatch pattern and fill with another. Some plans use color, red for cut and blue for fill, or they'll just call out spot elevations and let you do the math. Existing grade minus proposed grade: positive number means cut, negative means fill. When I walk a site before we start, I'm doing that math in my head at every stake, building a picture of where the dirt's going to move and how much of it there is.
Slope ratios show up as numbers like 2:1 or 3:1. That's horizontal to vertical. A 2:1 slope means for every two feet you go out horizontally, the ground drops one foot vertically. Steeper slopes like 1.5:1 or 2:1 need compaction and might need erosion control. Flatter slopes like 4:1 are usually for areas that get mowed or driven on. If the plan calls for a 2:1 and you cut it at 1.5:1, that slope's going to fail, and it's going to be your problem.
Utility callouts are the lines and symbols that show you where the underground infrastructure goes. Water, sewer, storm drain, gas, electric, communications. Each one has its own line type. Solid, dashed, dot-dash, each means something different. The plan should have a legend telling you which is which. Pay attention to the invert elevations — that's the elevation at the bottom of the pipe, not the top. When you're digging a trench for a sewer line, the invert is what matters because that's what sets your grade for flow. Miss it by two inches and the pipe doesn't drain. Get it right and the inspector signs off the first time.
GPS grade control has replaced a lot of the staking, but you still have to read the plan
Spot elevations are individual points on the plan with a specific elevation called out, like FF = 5,844.00 for a finished floor or TC = 5,843.25 for top of curb. These are your targets. When I'm running GPS on the machine, those spot elevations are loaded into the design surface and I can see them on my in-cab display in real time. But even without GPS, you need to know where those numbers are on the paper and how they relate to each other.
The last thing I check is the drainage pattern. Water flows downhill, and the grading plan should show you exactly where it's going. Look for the drainage arrows, the valley lines between high points, and the locations of catch basins, area drains, and outfalls. If the finish grade doesn't drain the way the plan shows, you're going to have standing water, erosion, and a callback. Grade for drainage first, everything else second.
Reading a grading plan isn't hard once you know what to look for. But you have to actually look. I've seen crews start cutting without reading the plan and end up three feet off because they assumed instead of checked. Don't assume. Find the bench mark, check the contours, run the cut/fill numbers, then start digging. The plan is the map. Treat it like one.
How we use an 8-model forecast ensemble to make daily GO/NO-GO calls on the jobsite. What triggers a weather hold, why mountain forecasts are different, and how we protect the crew and the grade.
0 views
Read more
So, every construction crew deals with weather. But running excavation in the mountains is a completely different game. Down at sea level you check the forecast, see rain, make a call. Up here at 6,000 feet the forecast might say 20% chance of showers and you end up under a full thunderstorm by 2 PM with zero warning from the morning sky. That is why we built a system for it. No more guessing.
We run an 8-model forecast ensemble that pulls data from the major weather models: GFS, ECMWF, NAM, HRRR, NBM, and a few others. Each model has strengths and blind spots. The GFS is good for broad patterns but misses mountain-scale detail. The HRRR updates every hour and handles convective storms better than anything else out there. The ECMWF is the best global model running but sometimes lags on fast-developing Sierra systems. By stacking them together and looking at where they agree and disagree, you get a much clearer picture than any single forecast gives you.
When the sky looks like this from the cab, you are already making the GO/NO-GO call
The GO/NO-GO call happens before the crew leaves the yard. I am looking at precipitation probability, wind speeds, lightning risk, and ground conditions from the previous 48 hours. Here is what triggers an automatic NO-GO: sustained winds over 35 mph, which is a crane and rigging safety issue and makes dust control impossible. Any lightning in the forecast within the work window. More than half an inch of rain expected during the shift, because at that point you are not grading, you are making mud. And if the ground is already saturated from recent storms, even a light shower can turn a jobsite into a skating rink for tracked equipment.
The tricky calls are the ones where the models disagree. Three models say dry, two say afternoon showers, three are somewhere in between. That is where experience matters more than data. I look at the upper-level pattern. Is there a trough moving through? What is the freezing level doing? Is there moisture streaming in from the Pacific or are we under a ridge? If the HRRR is firing up convective cells over the Sierra crest by 10 AM in the model run, I take that seriously even if the GFS says clear skies. The HRRR sees what the bigger models miss at mountain scale.
We also watch soil temperature and recent precipitation totals. After a wet period, even a sunny day might be a NO-GO if the subgrade has not had time to dry. You can compact wet soil all day and it will fail the density test every time. Better to wait a day and do it right than burn fuel and hours on work that will not pass inspection. The moisture content of the soil matters as much as what the sky is doing.
Checking the mirror and the sky — mountain storms move fast and hit hard
Mountain weather is different from valley weather for one simple reason: terrain forces air up. When moist air hits the Sierra, it rises, cools, and condenses. That is why Truckee can be sunny at 8 AM and under a full-blown thunderstorm by 1 PM on a day the Sacramento forecast called partly cloudy. The mountains create their own weather. If you are not accounting for that in your planning, you are going to get caught.
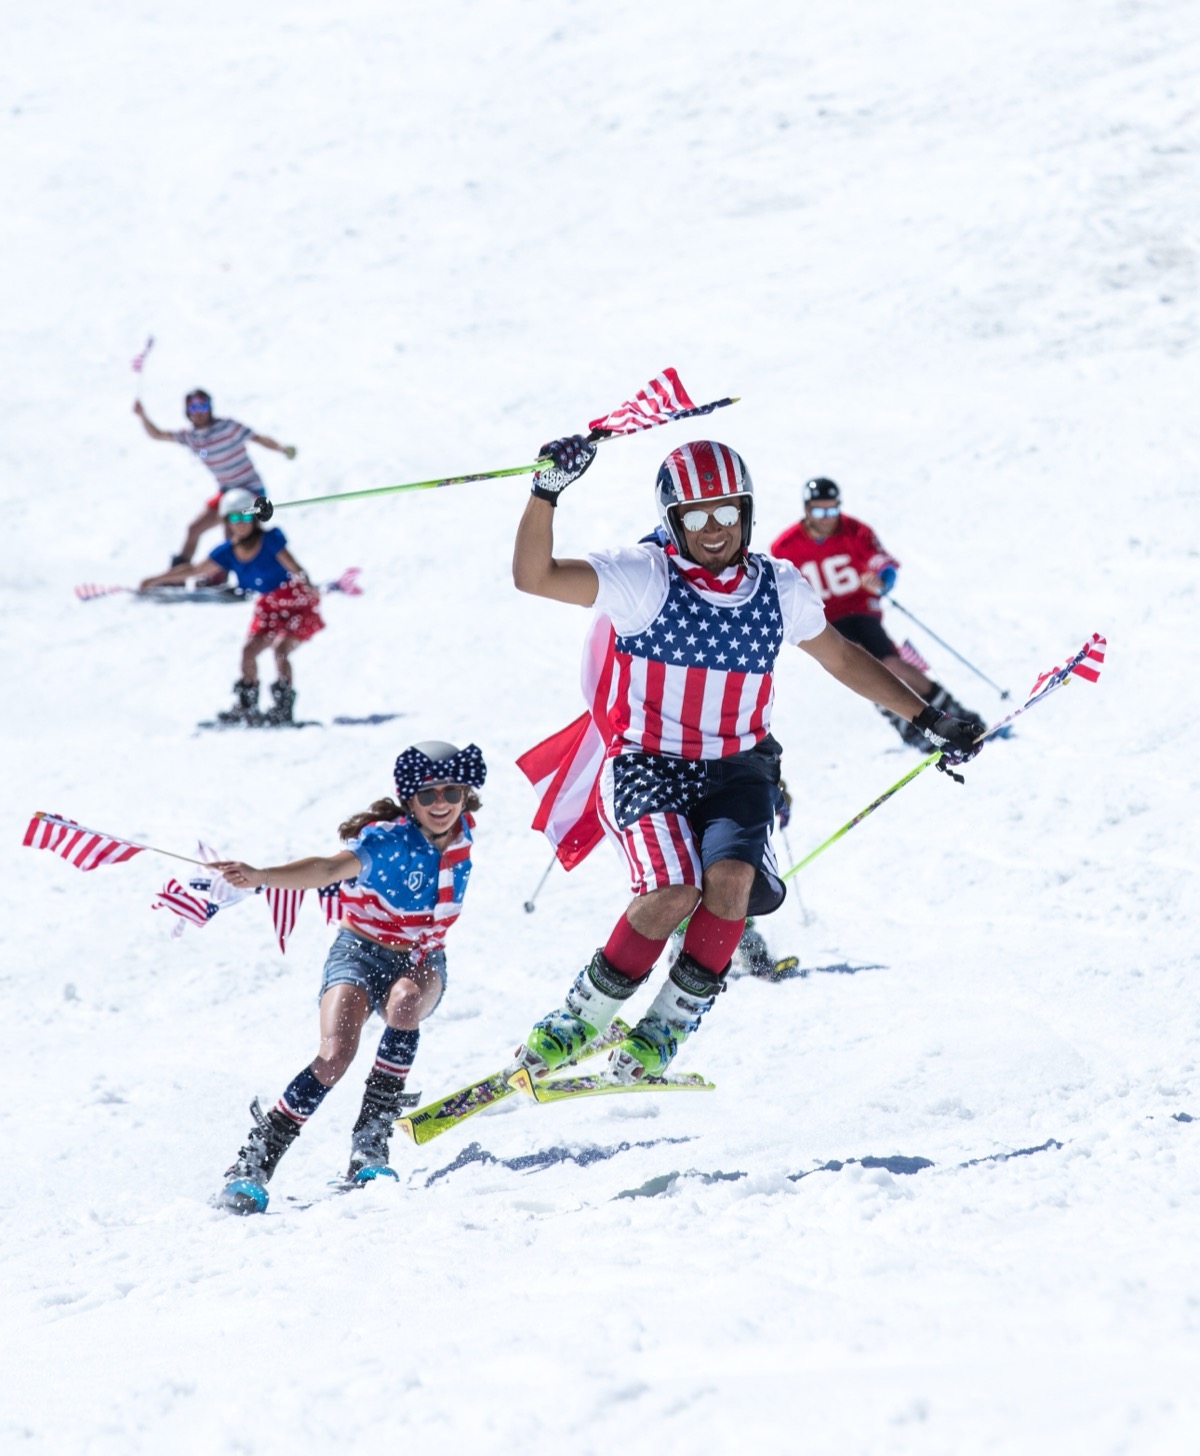
The system we use gives the crew a morning briefing with a confidence rating. High confidence GO means every model agrees, skies are clear, ground is dry, we are running all day. Marginal GO means conditions are workable but we might need to pull early. Weather hold means we are watching conditions and will reassess by a certain time. Full NO-GO means the machines stay parked. The crew knows the system, trusts it, and does not waste time arguing about weather at 6:15 in the morning. The data makes the call.
Ski racing taught me this. You do not send a racer down a course in conditions you have not assessed. You inspect, you measure, you check the snow, the wind, the visibility, and then you make a call. Same discipline applies to running a jobsite. The forecast is your course inspection. Treat it like one and you will keep your crew safe, your schedule on track, and your grade intact. Run your own GO/NO-GO check on the crew weather dashboard, or dig into the full 8-model Sierra weather platform for the raw data.
Truckee Summer Storm Season: What Construction Crews Need to Know
EK
Errol KerrOlympic Skier · Excavation Foreman
June 17, 2026WeatherTruckee0 comments
Sierra Nevada summer thunderstorms are fast, violent, and unpredictable. CAPE values, afternoon instability, lightning safety, and when to pull crews off the grade.
0 views
Read more
If you run a crew in Truckee between June and September, summer thunderstorms are part of the job. They are not like valley rain. They build fast, hit hard, drop lightning on ridgelines and open ground, and disappear in an hour leaving the jobsite soaked and the sky blue again like nothing happened. Understanding how they work is not optional up here. It is a safety issue.
The thing driving Sierra summer storms is something called CAPE. Convective Available Potential Energy. Sounds like a weather nerd term and it is, but it matters on the jobsite. CAPE measures how much energy is loaded in the atmosphere for air to rise fast and build thunderstorms. Under 500 J/kg, you are usually fine. Stable air. Once it climbs above 1,000, storms can fire. Above 2,000 and you are looking at severe cells, heavy rain, hail, dangerous lightning. I check CAPE every morning. It is one of the first numbers I look at before the crew leaves the yard.
Summer thunderstorms in the Sierra build fast and bring lightning, hail, and heavy rain
The pattern in Truckee is predictable in its general shape even if the specifics change daily. Morning starts clear and cool. The sun heats the ground, the ground heats the air above it, and that warm air starts rising. By late morning the cumulus clouds start building over the ridgelines. By early afternoon those clouds are towering, and if there is enough moisture and instability in the atmosphere, they go vertical and become cumulonimbus, full thunderstorm cells. The typical window for summer thunderstorms in the Truckee area is between noon and 5 PM, with the peak risk around 2 to 3 PM.
Lightning is the primary danger for construction crews. When you are standing on open ground next to a steel excavator, you are the tallest conductive path in the area. OSHA does not have a specific lightning standard, but the National Weather Service 30-30 rule is the baseline: if the time between a flash and the thunder is 30 seconds or less, the storm is within six miles and you get off the ground. Wait 30 minutes after the last flash before going back. That is the rule and we follow it. No exceptions. No waiting to see if it passes. When I hear thunder, the crew is already moving to vehicles.
The tricky part in the Sierra is that storms can develop directly overhead with very little advance warning. In flat terrain you can see a storm building 30 miles away and watch it approach. In the mountains, a cell can form on the backside of a ridge and be on top of you before you heard a single rumble. That is why the morning forecast matters so much. If the models show CAPE above 1,000 and the HRRR is firing convective cells in the afternoon run, I build that into the day's plan. We front-load the critical work. Grade checks, compaction tests, anything that needs people on the ground in open areas, that happens before noon. Afternoon work shifts to tasks that can be paused quickly or done near cover.
Reading the afternoon sky is a skill every mountain construction crew develops by necessity
Rain itself is a separate problem. A summer thunderstorm in Truckee can dump half an inch in 20 minutes. That is enough to turn a freshly graded pad into a rutted mess if equipment is still tracking across it. Trenches fill with water. Slopes that were just compacted start sheeting runoff. SWPPP controls get tested in a hurry. If you have silt fencing and waddles in place, great. If you do not, you are going to have a sediment problem and a conversation with the inspector that you do not want.
Flash flooding is real in the Sierra even in summer. The soil up here is decomposed granite over bedrock. It does not absorb water the way valley clay does. Water hits the surface and it moves, fast, downhill, into whatever low point exists. If your trench is the low point, you have a problem. We always check drainage paths before a storm window and make sure the site can handle a burst of heavy rain without trapping water where people are working.
The best thing you can do as a foreman is build storm awareness into the crew culture. Everyone should know the signs: towering cumulus that starts going dark on the bottom, a sudden wind shift, a drop in temperature, the smell of rain in the dry air. By the time you hear thunder it is already close. The guys who have been through a few Sierra summers know the drill. The new guys need to learn it fast. One close lightning strike on a jobsite is usually enough education for a lifetime, but I would rather they learn from the briefing than from the bolt.
Cat 335 Running Trimble GPS — Guided Dig in Lake Tahoe
A Caterpillar 335 running full Trimble GPS machine control on a guided dig in Lake Tahoe. Here is what a guided dig actually is, how the system works, and why it matters when you are cutting grade in the Sierra.
0 views
Read more
This is a Cat 335 running full Trimble GPS machine control on a guided dig out in Lake Tahoe, California. If you have never seen a guided dig before, this is what it looks like when an excavator knows exactly where it is in three-dimensional space, down to fractions of an inch, in real time while it digs.
A guided dig means the excavator is equipped with a GPS/GNSS machine control system that shows the operator exactly where the bucket teeth are relative to the design grade surface at all times. The in-cab display gives you a live cross-section of the ground, the design surface from the engineered plans, and your bucket position overlaid on top of it. You can see exactly how much material needs to come out, where you are cutting into grade, and where you still have fill to remove. No guessing. No eyeballing it. The machine tells you precisely where you are relative to where you need to be.
The Trimble display inside the Cat 335 cab — real-time grade data at the operator's fingertips
The way Trimble sets this up on an excavator like the 335 is with GNSS receivers mounted on the boom, the stick, and the bucket. Those receivers talk to a constellation of GPS and GLONASS satellites overhead, and then a base station set up on a known survey point nearby sends real-time kinematic corrections, what we call RTK, to tighten the accuracy down from a couple of feet to under a tenth of an inch. The system knows the exact geometry of the machine, the boom length, stick length, bucket dimensions, all of it, so when you combine the satellite position with the RTK correction and the machine geometry, the computer can calculate exactly where the tip of your bucket is in space at any given moment.
The in-cab display is a Trimble unit, usually a TD520 or similar, mounted right where you can see it without taking your eyes off the work for more than a second. It shows you a color-coded cut/fill map: blue means you are above grade and need to cut, red means you went too deep. When the screen goes green you are on grade. That color feedback is instant. You move the bucket a quarter inch and the display updates. It is like having a grade checker standing in the trench with a laser level at all times, except this one never takes a break and never misreads the rod.
The Cat 335 is a solid mid-size excavator for this kind of work. You are looking at roughly 80,000 pounds operating weight, a reach that handles most utility trench depths and foundation work without issue, and enough power to move material in the kind of ground we deal with around Tahoe. And up here, the ground is no joke. You hit decomposed granite, you hit rock, you hit volcanic material that does not want to move. The 335 has the muscle to work through that while the GPS keeps every cut precise.
GNSS receivers on the machine communicate with the base station for centimeter-level accuracy
What a guided dig changes on the job is significant. Without GPS, you are relying on grade stakes set by a survey crew, a laser level in the trench, and a grade checker calling out readings while the operator adjusts. That works, and it is how we did it for decades, but it is slow. Every time you need a grade check the work stops. The surveyor has to come back out to re-stake if anything gets disturbed. And the margin for human error, misreading a cut sheet, pulling a measurement off a wrong benchmark, is always there.
With the guided dig, the operator is self-sufficient on grade. I can see the design surface on my screen, I can see my bucket position, and I can cut to within a tenth of a foot on the first pass. That means fewer re-digs, less over-excavation, less wasted material that has to be hauled off or backfilled, and faster production overall. On a job where you are moving thousands of yards of material, the savings in time and backfill costs add up fast. It also means less fuel burned because you are not making unnecessary passes, and less wear on the machine.
Running GPS at elevation around Lake Tahoe adds its own variables. The terrain is steep, the ground conditions change every fifty feet, and you are working at 6,000-plus feet where satellite geometry can shift with the mountain terrain. But the RTK base station handles that. As long as you have a clean base setup on a known point with good sky visibility, the corrections stay tight and the system performs. I have run guided digs in conditions where you could not see the bottom of the trench from the cab and the GPS still had me within spec.
Full PPE on site as always. Hard hat, high-vis vest, steel toes, safety glasses. The GPS does not change the safety requirements, it just makes the finished product more precise. That is what a guided dig looks like in the field. The Cat 335, Trimble GPS, and a design surface that the machine follows in real time. This is how modern excavation gets done. See the full fleet and specs on the equipment page, and browse the field-tested tools that run alongside the iron.
Winter X-Games 2010: Ski Cross — Full Race Footage
Full ski cross race footage from the 2010 Winter X-Games in Aspen. Four riders, one course, no second chances. This is what competitive SX looked like before I carried the flag in Vancouver.
0 views
Read more
Dug this one out of the archive. Winter X-Games, Aspen, January 2010. Ski cross. Four of us in the gate, one course, and about ninety seconds to figure out who wants it more. This was a few weeks before Vancouver.
Ski cross is the only discipline where you race wheel to wheel. No time trials, no split screens. You are right there next to three other riders coming off the start, jockeying for position into the first turn, and making decisions at 60 mph that you cannot take back. Contact happens. Crashes happen. The course is built with rollers, jumps, banked turns, and flat sections designed to separate riders and punish anyone who is not precise. You can be the fastest skier on the hill and still lose if your line is off by a foot going into a compression.
Ski cross puts four racers on the course at once — contact, speed, and split-second decisions
What people do not see on TV is how physical it is. SX is a full-body sport. Your legs are burning from absorbing terrain at speed, your core is locked in because any time you get loose you lose time, and your arms are driving the poles and managing balance through features that are throwing you around. A 90-second race run feels like a three-minute sprint when your quads are on fire at 9,000 feet in Aspen.
I was representing Jamaica at this point. Had been on the FIS circuit, qualified through the rankings, and earned my spot. People always want the novelty angle on that, the Jamaican on snow. But there was nothing novelty about the training. I came up through the U.S. Ski Team development system, trained on the same mountains as the Americans, the Canadians, the Swiss. The flag was Jamaica but the preparation was world class. By the time I got to Aspen for X-Games I had hundreds of race starts behind me and I knew exactly where I stood in the field.
The X-Games course at Buttermilk was built for television — fast, tight, and unforgiving
This footage is raw. You can hear the crowd, you can see the course, and you can watch how a ski cross heat actually unfolds from start to finish. The start is everything. If you are a half second late out of the gate you are chasing for the rest of the run, and in SX there is no catching up once someone has the inside line into the first bank. I studied those gates like I study grade stakes now. Every detail matters when the margin is that small.
A month after this I was in Vancouver carrying the Jamaican flag in the opening ceremony. Finished ninth in the Olympic ski cross event. Not a medal, but top ten in the world in a discipline that was making its Olympic debut. I will take that every day of the week.
I keep this footage around because it reminds me that speed without control is just noise. Same lesson applies on a ski course at 60 mph and on a jobsite running a track loader at 6,000 feet. Read the terrain, hold your line, stay precise. The arena changed but the mentality did not.
The Longest Days: What 15 Hours of Daylight Does to a Dig Season
EK
Errol KerrOlympic Skier · Excavation Foreman
June 15, 2026SummerConstruction0 comments
Mid-June in the Sierra means the sun is up before you are and it does not quit until after nine. What the longest days of the year look like when your office is a trench in Truckee.
0 views
Read more
The solstice is this week, which means Truckee is running on about fifteen hours of daylight right now. Sun comes up around 5:30, doesn't fully quit until after 8:30 at night. For most people that means longer evenings on the patio. For a construction crew it means the clock just got a whole lot more generous, and we intend to use every minute of it.
There is a window in the Sierra that only opens once a year. The ground is finally dry from snowmelt, the frost is out of the soil, permits are moving, and now the sun is giving you the most working light you will get all season. Mid-June through mid-September is when everything real gets built up here. Miss it and you are scrambling against short days and early snow before you know what happened. So when the window is wide open like it is right now, you run.
Golden hour on the grade — when the sun does not set until after nine, the work day stretches with it
My alarm goes off at 5:30. In the truck by 6:15, coffee in hand, running through the day's plan in my head. On site by 7:00, walking the grade before the full crew gets rolling, checking what the overnight temps did to the ground, making sure nothing shifted. From there it is a full sprint. Normal day we are wrapping up by 3:30. On a push, maybe 5:30 if the job demands it and the crew has the legs for it. People ask me how long my workday is and I tell them it depends on the job, not the clock.
The office for the next three months. GPS display, joysticks, and a view of the grade through the glass.
The heat is real but different up here. We sit at almost 6,000 feet, so the air is thin and the UV is no joke even when the thermometer only reads 82. Sea-level guys visit a Truckee jobsite in July and cannot figure out why they are cooked by noon. It is the altitude. The sun hits harder and the thin air does not cool you the same way. Hydration is not optional, it is infrastructure. I go through a gallon of water before lunch most days, and if a guy on the crew is not drinking, I notice and I say something. Heatstroke at elevation sneaks up on you faster than people think.
But here is the thing about these long days that makes all of it worth it. You can actually see the progress. In winter, between the short light and the weather delays, a week of work might move the needle an inch on the schedule. In June, a single good day can change the shape of a jobsite. Trenches get cut, pipe goes in the ground, backfill gets compacted, and by the time that 8:30 sunset rolls around you are standing on a site that looks fundamentally different than it did at sunrise. That feeling never gets old. Sixteen years of running equipment and I still get a kick out of looking back at a day's work and thinking yeah, we moved some earth today.
Mid-June in Truckee — 15 hours of daylight means the schedule opens up and the crew runs longTrimble GPS machine control — cutting to grade within a tenth of a foot. Precision that turns a good operator into a dialed-in one.
The other thing the long days do is compress your personal life into these weird little pockets. Lindsay has figured out the rhythm by now. Dinner is late. Weeknight plans do not exist between June and October. Saturdays I try to protect but the job does not always cooperate. It is the trade-off for living in a place where the off-season actually means something. When November hits and the snow flies, the machines get parked and the pace changes completely. But right now, in the thick of it, the days are long, the work is good, and the Sierra is letting us build.
I remember racing ski cross in June. The season was over, the competitive circuit was done, but we would still be on snow somewhere in the southern hemisphere or up on a glacier doing camp turns and staying sharp. The mentality was the same: when conditions are right, you train. You do not waste good snow and you do not waste good weather. The mountain gives you a window, you use it. That lesson did not come from a textbook. It came from showing up every day the conditions allowed and not quitting until they didn't.
The CAT 299D XHP — 110 horsepower on tracks, ready to run until the Sierra says otherwise.
So if you are driving through Truckee this week and you see a crew still out at five in the afternoon, that is not overtime. That is a push day, getting it done while conditions allow. The longest days are the most valuable days, and we have got about three months of them left before the Sierra starts reminding us who is really in charge. I plan to make every one of them count.
Every ski family in Truckee has the same problem — a garage full of gear and no plan. How I built a wall-mounted ski rack system that actually works, and what I would do differently.
0 views
Read more
If you live in the Sierra and you ski, your garage is a disaster. I know because mine was. Skis leaning against the water heater, poles tangled behind the snowblower, boots in a pile by the door where they'd freeze solid overnight. Every morning before first chair was a ten-minute excavation project just to find matching gear. Finally got tired of it and built something.
The goal was simple. Wall-mounted racks that hold every pair of skis in the house, boots underneath, poles organized, and the floor completely clear so I can still park and still get to the workbench without climbing over a yard sale of Rossignols.
The before shot — every ski family in Truckee knows this pileThe before. Every ski family in Truckee knows this scene.
I framed the rack system with 2x4s lag-bolted into the studs. Not into drywall, not with toggle bolts, into the studs. A loaded ski rack with eight or ten pairs of skis is heavy, and anything that falls off a wall in a garage is going to land on something expensive. Found the studs, marked them, pre-drilled, and sank 3/8-inch lags. That rack is not going anywhere.
The horizontal rails are spaced to hold skis by the binding and tip, keeping them off the ground and separated so edges don't chew each other up. Poles hang from hooks below the rail. Boots sit on a slatted shelf that lets them drain and dry instead of sitting in a puddle of snowmelt on the concrete.
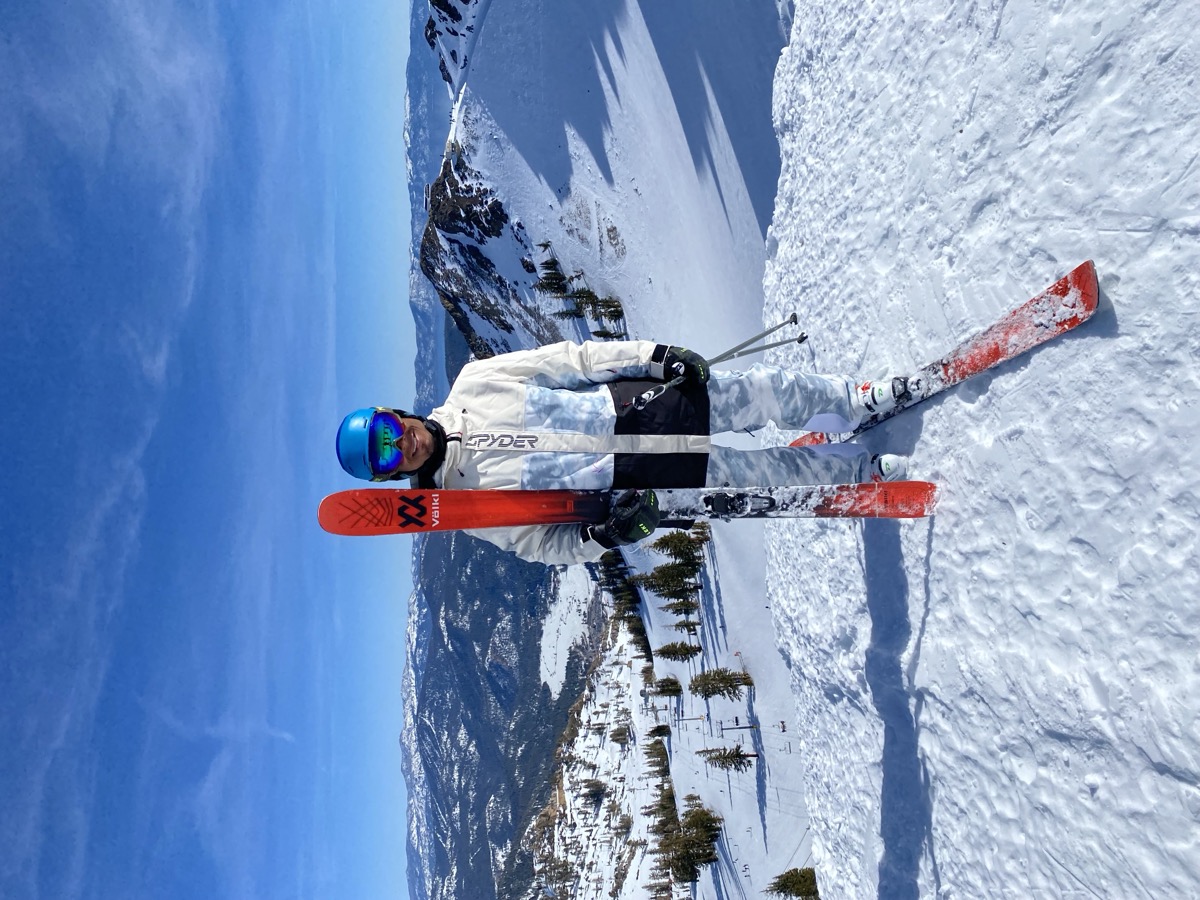
What I'd do differently next time: wider spacing between pairs. I packed them tight to maximize capacity and it works, but pulling a pair out of the middle is a two-hand operation. Another inch per slot would make the grab-and-go smoother. Also, I'd add a dedicated wax station. Right now I do edge work on the regular workbench, which means clearing tools every time. A fold-down table on the opposite wall would fix that.
Wall-mounted racks keep skis organized and the floor clear for the truckBoth doors up, snowblower clears, truck fits. That was the whole brief.
Total build time was about six hours across two weekends. Materials ran around $180 in lumber, lags, and hooks. The most expensive part of the whole thing was the beer afterward. If you have a drill, a stud finder, and a level, you can do this in a day. No welding required, though I did think about fabbing the whole thing in steel just because I could. Lindsay talked me out of it. She was right.
The real payoff is the morning routine. Walk in, grab skis, grab poles, grab boots, walk out. No digging, no untangling, no knocking over the snowblower. That alone was worth every lag bolt.
Workbench area stays usable when the gear is up and out of the way
Thin Air, Heavy Iron: Running Equipment at 6,000 Feet
EK
Errol KerrOlympic Skier · Excavation Foreman
June 14, 2026EquipmentField Notes0 comments
Altitude doesn't care how new your machine is. What the thin Sierra air actually does to a diesel, and the field habits that keep iron running clean all season.
0 views
Read more
People think a machine runs the same everywhere. It doesn't. Truckee sits at almost 6,000 feet, and every engine I've ever put to work up here gives back a little less than the spec sheet promised. Thin air is the tax you pay for the view, and the dirt doesn't grade itself any easier because the scenery is nice.
Start with power. Less oxygen up here means less burn, and a naturally aspirated diesel loses roughly three percent of its output for every thousand feet of elevation. Do that math on a small loader or a mini ex and you're already down close to a fifth of the muscle the sticker promised before you ever touch a lever. Turbos claw most of it back by force-feeding air, but they work harder to do it, and harder means hotter. Keep that in your head when you're sizing a job or wondering why the machine feels lazy pushing up a grade.
The CAT 299D XHP — 110 horses on paper, but the thin air at 6,000 feet takes its cut
Then there's the cold, even in June. Summer mornings in the Sierra still drop into the 30s. Cold diesel is thick, cold hydraulic fluid is thicker, and dropping a stiff machine straight into a hard cycle is how you cook seals and shorten a pump's life. Let it idle and come up to temp. Cycle the hydraulics with no load a few times until everything moves smooth and quiet. Five minutes of patience beats a five-figure pump every single time.

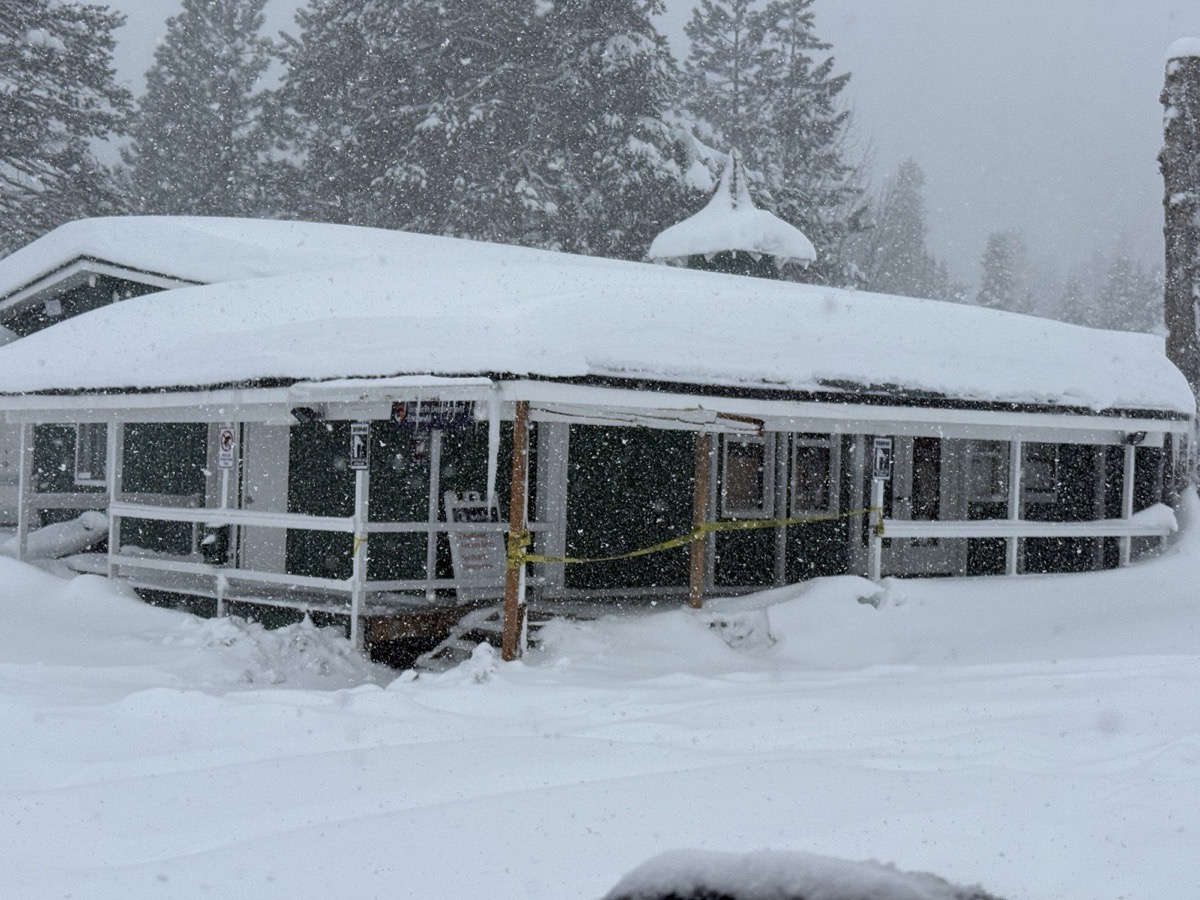
Cooling is the one that bites people. Thinner air carries less heat away, so your radiator is already at a disadvantage before Sierra dust and pollen pack the fins solid. Blow them out, then check them again that afternoon. A clogged cooler at altitude on a hot day is how you end up watching a machine steam in the middle of a dig instead of finishing it. Same story with air filters out here. This dry, dusty ground eats them faster than anywhere I've ever worked, so carry spares and check them more than you think you need to.
Fuel and batteries close it out. With our temperature swings, condensation is real, so top the tank at the end of the day, not the start. Less empty space means less room for water to collect overnight in the bottom of your tank. And a battery that limps through a cold morning is telling you it's done. Swap it before it strands you on the busy day, not after.
The JD 35G runs cleaner at altitude than the bigger machines, but you still watch the exhaust
None of this is fancy. It's grease guns, clean filters, and giving the machine a minute before you ask it for everything. The altitude is going to take its cut no matter what you do. Your only job is to make sure you don't hand it any extra. Treat the iron right up here and it'll put down clean work all season long. Treat it like sea level and the mountain will find the weak point for you, usually at the worst possible time.
Up here the weather is the boss. What ski racing taught me about patience, timing, and waiting for the ground to tell you it is ready.
0 views
Read more
Up here at 5,820 feet, you don't pick the day. The mountain picks it for you. June in Truckee is when the snow finally lets go and the ground turns workable, and every spring I get the same reminder. The calendar on the wall means nothing next to the one written in the dirt.
I learned this long before I ever ran a machine. Ski cross taught me that you can't force a start. You can be the strongest guy in the gate and still lose if you commit half a second before the course is ready for you. Timing beats power almost every time. The racers who lasted were the ones who knew how to wait for the right moment, then take it without hesitation.
When the mountain says wait, you wait — chains go on when the ground is still frozen
Excavation runs on the same rule. You can't grade saturated ground. You can't trust a slope that's still holding meltwater. Push a job before conditions are right and the Sierra makes you do it twice. So you read the sky, you check the soil, and you let the work tell you when it's ready instead of the other way around. That isn't slacking. That's the discipline nobody puts in a highlight reel.
People mistake patience for sitting still. It isn't. Patience is staying ready while you wait. All winter, with the snow on the ground, I was in the shop welding, fixing what broke last season, getting gear set so the day the ground opened up we could move without scrambling. The waiting is where the real work hides. By the time conditions line up, you've either prepared or you haven't, and the mountain can tell the difference.
The mountain does not care about your schedule. You learn patience or you learn the hard way
There's a bigger version of this lesson coming for me. Lindsay and I have a boy on the way later this year, and if anything is going to arrive on its own schedule instead of mine, it's a kid. I can't rush that either. All I can do is be ready, the same way I get ready for dig season. Sharpen what I can control. Make peace with what I can't.
That's the trade you make living in the Sierra. The weather is the boss. It doesn't care about your timeline, your invoices, or your plans for the weekend. But if you respect it, if you learn to read it and move when it gives you a window, it'll let you build things that last. The structures that survive up here get built by people who waited for the right day and then didn't waste it.
So I'm not in a hurry. The ground is finally ready, the machines are running, and the season is open. I spent the winter getting set for exactly this. Now it's time to put down clean work while the window's good, because up here you never know how long it'll stay open.
Still Climbing: What the Mountain Taught Me About the Long Game
EK
Errol KerrOlympic Skier · Excavation Foreman
June 2, 2026ReflectionsOlympics0 comments
Speed without control is just noise. What ski cross taught me about reading terrain, holding your line, and carrying discipline off the mountain.
0 views
Read more
Some people know me from the 2010 Vancouver Olympics — Jamaican flag bearer, ninth in ski cross, the best Caribbean finish at a Winter Games. Others found me on the cover of Ski Magazine, or in the Warren Miller films. All of that still matters. None of it is the finish line.
What ski cross taught me is that speed without control is just noise. You read the terrain, you commit, and you hold your line when the course gets rough. That lesson followed me off the mountain and into the work I do now, running heavy equipment and building things that have to stand up to real weather and real load.
The mountain teaches the same lesson whether you are on skis or in the cab — read the terrain, hold your lineSpeed without control is just noise. That applies to the gate and to the grade
The Olympics gave me a stage. The films gave me a story. The cover gave me a moment. The discipline behind all of it is what I actually carry forward. Every day I get to point that same focus at a different kind of slope.
I am still the kid who moved to Truckee and decided the impossible was worth chasing. The gear has changed. The drive has not. If you have followed any part of this ride, thank you. The best chapters are the ones still being written, and I plan to keep building them one clean line at a time.
New content drops weekly. Field stories, project videos, photo dumps, and hard-won lessons from Truckee. Follow along on Instagram so you never miss a post.